
Have you ever been perplexed about which HDMI to use when connecting your display to your computer? Should you use the HDMI port on your motherboard or the one on your GPU? It’s a question that many people find themselves asking, but the answer is not always clear. In this blog post, we will explore the differences between using the motherboard HDMI and GPU HDMI ports, and which one you should use depending on your needs. Think of it like having two different roads to take to reach your destination – both can get you there, but one might be faster and more efficient than the other.
So, let’s dive in and find out which road is best for you!
Understanding the Difference
If you’re building a PC or upgrading its components, you might find yourself trying to figure out how to use the motherboard HDMI and GPU HDMI ports. The difference is simple: the motherboard HDMI port is connected to the integrated graphics of your CPU, while the GPU HDMI port is connected to the graphics card. The GPU is designed for heavy graphics tasks, such as gaming or video editing, while the integrated graphics are more apt for regular computer use, like browsing the web or watching videos.
To use your GPU HDMI port, ensure that your graphics card is properly installed and that its drivers are up to date. You’ll likely need to connect your monitor to the GPU HDMI port to use its advanced capabilities. However, if you’re just doing basic computer tasks and don’t need the extra power provided by the GPU, the motherboard HDMI port should be sufficient.
Remember to always install the necessary drivers and check your connections to optimize your computer’s performance.
Motherboard HDMI vs GPU HDMI
When it comes to connecting your computer to a display, there are two types of HDMI ports that you can use: the ones on your motherboard and the ones on your graphics card (GPU). So what exactly is the difference? Well, the main thing to keep in mind is that the HDMI port on your motherboard is connected directly to your CPU, while the HDMI port on your GPU is connected to the graphics card. This means that if you use the HDMI port on your motherboard, the graphics processing will be done by your CPU, which can result in lower quality graphics and slower performance.
On the other hand, if you use the HDMI port on your GPU, the graphics processing will be done by the graphics card, resulting in better graphics quality and faster performance. So if you’re looking to get the best performance out of your computer when it comes to gaming and other graphically-intensive tasks, it’s always a good idea to use the HDMI port on your GPU instead of the one on your motherboard.
Connecting Your Monitor
So you’ve got a shiny new graphics card and are ready to start gaming, but when you try to connect your monitor you’re faced with the dilemma of whether to use the HDMI port on your motherboard or on your GPU. Well, the answer is simple – use the HDMI port on your GPU. This is because your graphics card creates the images you see on your screen, so it makes sense to use the HDMI port that is linked directly to it.
Using the HDMI port on your motherboard may work, but it could limit the performance of your graphics card and cause issues such as screen tearing and input lag. So, for the best performance and gaming experience, always connect your monitor to the HDMI port on your GPU. By doing this, you can enjoy smooth visuals, faster response times, and an overall more enjoyable gaming experience.
Step-by-Step Guide to Connecting Your Monitor
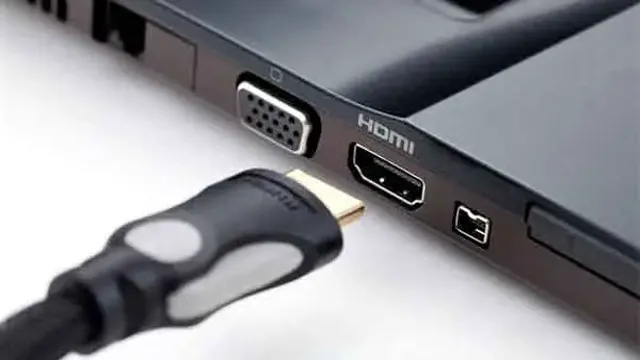
Connecting your monitor to your computer or laptop is an easy task if you know what to do. The first step is to identify the type of connection port on your device. If you have a newer computer, it most likely has an HDMI port.
Older computers may have a VGA or DVI port. Once you have identified the type of port, you can then connect the cable from your monitor to your device. HDMI cables are the most common and offer high-quality digital signals.
VGA and DVI cables are less common, but still offer decent image quality. Once the cable is plugged in, you may need to adjust the display settings on your computer to ensure that the images are properly displayed on your monitor. In summary, connecting your monitor is a simple process that can be done in just a few minutes, allowing you to enjoy high-quality visuals while using your device.
Configuring Your Settings
If you’re wondering how to use both your motherboard HDMI and GPU HDMI output, there are a few settings you’ll need to configure. Firstly, make sure your graphics card is installed correctly and that all the necessary drivers are up to date. Then, access your computer’s BIOS and navigate to the integrated peripherals section.
Look for an option that allows you to switch between your onboard graphics and dedicated graphics card. Select the dedicated graphics card option. Next, open your computer’s display settings and make sure both displays are detected.
From there, you can configure which monitor is the primary display and adjust the resolution and scaling as needed. By following these steps, you should be able to enjoy the best of both worlds with dual display output.
Choosing Your Display Device
When it comes to choosing your display device, configuring your settings is an important step to ensure optimal performance for your specific needs. One important setting to consider is the resolution, which determines the number of pixels displayed on the screen. Higher resolutions offer more detail but require more processing power.
Refresh rate is another setting to consider, as it determines how quickly the image updates on the screen. This is particularly important for gamers or those using software that requires quick image changes. Color accuracy is another consideration, with certain settings offering a wider range of colors or more accurate color reproduction.
Overall, taking the time to configure your settings can greatly improve your viewing experience, whether for work or entertainment purposes.
Setting Display Modes
When it comes to configuring your display settings, there are a few things to keep in mind to make sure you’re getting the most out of your device. The first thing you’ll want to check is your resolution, which is the number of pixels on your screen. Higher resolutions mean that your display will be sharper, but it may also put additional strain on your device.
Additionally, you’ll want to make sure that your refresh rate is set to a level that works for you. This is the number of times per second that your screen refreshes, so a higher refresh rate means that your display will be smoother and more responsive. However, keep in mind that setting your refresh rate too high can cause diminished battery life.
By tweaking your settings to suit your needs and preferences, you can get the most out of your display and ensure that your device runs smoothly and optimally.
Adjusting Resolution and Refresh Rate
When it comes to configuring your display settings, adjusting resolution and refresh rate can make a huge difference in your overall experience. Resolution refers to the number of pixels on your screen, while refresh rate refers to how many times your screen refreshes per second. Higher resolutions mean more detail on your screen, but they can also put more strain on your computer.
Similarly, higher refresh rates can make motion smoother, but they may cause screen tearing or other visual anomalies. It’s important to find a balance that works for your system and your preferences. By tweaking these settings, you can ensure that your display looks great and runs smoothly, whether you’re gaming, working, or just browsing the web.
Troubleshooting Common Problems
Are you having trouble using the HDMI ports on both your motherboard and GPU at the same time? It’s a common issue, but the solution is fairly simple. First, check your BIOS settings and ensure that the primary video output is set to your GPU. If it still doesn’t work, try disabling the onboard graphics in BIOS.
Another potential issue could be that your GPU drivers are outdated or not installed correctly. Try updating or reinstalling them to see if that solves the problem. If you’re still having trouble, it might be a hardware issue, and it’s best to consult with a professional.
With these troubleshooting steps, you can easily use both your motherboard and GPU HDMI ports simultaneously.
No Display on Monitor
“No display on the monitor” is a common problem that most computer users face. This can be frustrating, especially if you were in the middle of an urgent task. However, before you panic, there are several things you can do to troubleshoot the issue.
First, check the cables connecting your monitor to the computer. Ensure that they are properly plugged in and not damaged. If the cables are okay, restart your computer and see if the problem is resolved.
In some cases, the graphics card driver might need updating. Go to your device manager and check if there’s a yellow exclamation mark next to your graphics card. If there is, right-click on it and select “update driver.
” If none of these steps solves the issue, the monitor itself might be faulty. Bring it to a technician for repair. By following these simple steps, you can easily troubleshoot the problem and get back to your work in no time.
Black Screen or Flickering
If you’re experiencing a black screen or flickering while using your computer, don’t panic! There are a few common causes that may be easily resolved with some troubleshooting. First, check your display cables and connections to ensure everything is properly connected. If that doesn’t solve the issue, try updating your graphics card driver or adjusting your screen resolution.
In some cases, it may be a hardware issue, such as a failing graphics card or monitor. If none of these solutions work, it’s best to bring your computer to a professional for further diagnosis. Remember, a black screen or flickering can be frustrating but usually, it’s fixable.
Don’t stress and try some basic troubleshooting before considering more drastic measures like buying a new computer or monitor.
Conclusion
In conclusion, when it comes to utilizing the HDMI ports on your computer, it’s important to understand the difference between the motherboard HDMI and the GPU HDMI. While the motherboard HDMI may be convenient, it’s not ideal for heavy graphics work or gaming. For those situations, the GPU HDMI is the way to go.
So if you want to get your game on, hook up to the GPU HDMI and let the graphics flow. But if you’re just browsing the web or watching a movie, the motherboard HDMI will do just fine. Either way, know your HDMI options and use them wisely!”
FAQs
Can I use both the motherboard HDMI and GPU HDMI at the same time?
Yes, most modern motherboards and GPUs support using both HDMI ports simultaneously. However, make sure that both devices are recognized and configured correctly in your operating system’s display settings.
How do I switch between using the motherboard HDMI and GPU HDMI?
You can usually switch between the two by accessing your computer’s display settings and selecting the desired display output. Some computers also have dedicated hotkeys or buttons to quickly toggle between displays.
Why is my display not working when using the GPU HDMI?
There could be several reasons why the GPU HDMI isn’t working. First, make sure your computer is configured to use the GPU as the default display output. If that doesn’t work, try updating your GPU drivers or checking for any loose connections between your GPU and monitor.
Can I use multiple monitors with both the motherboard HDMI and GPU HDMI?
Yes, you can usually use multiple monitors with both ports. However, you may need to adjust your display settings to properly configure the multiple displays and ensure they are recognized correctly by your operating system.