Do you know how to connect the power button to your computer’s motherboard? It may seem like a simple task, but it’s crucial to ensure your computer turns on and off properly. Without a properly connected power button, your computer won’t respond when you try to switch it on or off. In this blog post, we’ll cover everything you need to know about connecting the power button to the motherboard, step-by-step.
We’ll guide you through the process and provide helpful tips to make sure you get it right the first time. Whether you’re a beginner or experienced computer enthusiast, this post will help you understand how to connect your power button to the motherboard like a pro. So, get your computer ready and let’s dive in!
Locating the Power Pins
When assembling a computer, one of the essential steps is connecting the power button to the motherboard. It may seem like a daunting task, but it’s a relatively simple process. First, locate the power pins on the motherboard.
These pins are usually near the edge of the board and are labeled as ‘PWR_SW’ or ‘POWER SWITCH.’ Once you’ve found them, identify the connectors that come from the power button. These connectors are usually two-pin wires that can be plugged into the power pins on the motherboard.
It’s crucial to get the polarity correct, which means the black wire should go to the negative pin, and the colored wire (usually red) should go to the positive pin. Connecting the power button correctly ensures that your computer will turn on correctly when you press the button. So take your time in locating and connecting the power pins to the motherboard, and you’ll have a fully functional computer in no time!
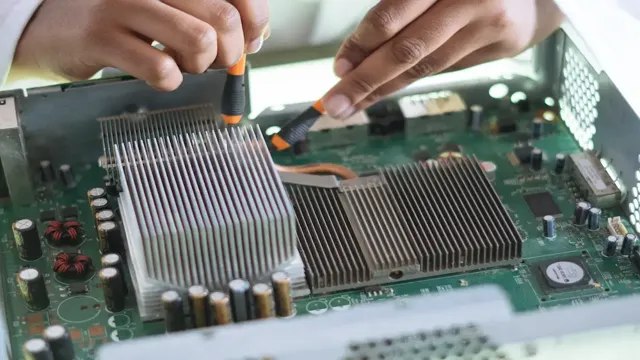
Inspect the Motherboard
When it comes to building or repairing a computer, inspecting the motherboard is an essential step. One of the most important parts of the motherboard to identify is the power pins. These pins are responsible for supplying electricity to the motherboard and all its components.
To locate the power pins, you will need to consult the motherboard’s manual or study the motherboard itself. Most motherboards have a 24-pin connector and an 8-pin connector for power, which are distinct as they are larger than other pins. Once you have identified the power pins, it is time to connect the power supply’s cables to them and secure them in place.
Make sure to handle the pins carefully, as they are fragile and can break easily. A little bit of caution can go a long way in ensuring a successful build or repair.
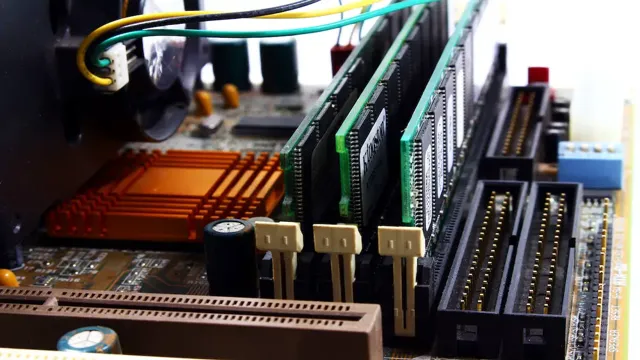
Reading the Motherboard Manual
When building a PC, it’s essential to read the motherboard manual carefully to avoid any mistakes that could damage your system. One crucial step is finding the power pins and connecting your power supply correctly. To locate these pins, you’ll need to look for a section on the motherboard labeled “Front Panel Connectors” or something similar.
This section will show you where to connect the power switch, reset switch, HDD LED, and power LED. Connecting these correctly will ensure that your PC starts up correctly and runs smoothly. It may seem complicated at first, but with a bit of patience and attention to detail, you’ll be able to get it done in no time.
Remember, it’s better to take the time to do it correctly than risk damaging your system by rushing through it.
Connecting the Power Button
Connecting the power button to the motherboard is a straightforward process. Firstly, locate the power button header on the motherboard and check the motherboard manual to ensure you connect the power button correctly. Most motherboards have a two-pin power button connector that needs to be connected to the two pins on the header.
It is essential to remember that the polarity of the connector is vital, and placing it in reverse polarity can damage the motherboard or prevent the computer from turning on. Most motherboards have color-coded connectors, which help with polarity. To check if the power button is connected correctly, plug in the power supply and turn it on, and then briefly touch the two pins on the power button header with a screwdriver.
The computer should power on. If not, check the polarity of the connector and ensure it is correctly placed on the pins. It is also beneficial to note that some motherboards can be sensitive to the amount of pressure applied when connecting the power button, so ensure a firm yet gentle connection.
Once the power button is properly connected, it should trigger the motherboard to power up the computer when pressed, which is a satisfying feeling for any PC builder.
Aligning the Power Connector
When assembling your computer, it’s essential to make sure that you align the power connector correctly. This connector brings power to your computer and allows it to start up. You will usually find the power connector on the motherboard near the CPU socket or near the power supply unit.
The connector is usually a rectangular shape with notches, making it easy to insert correctly. It’s crucial to make sure that the connector is securely in place. Sometimes it can be challenging to connect the power button; ensure that the cables are correctly connected to the motherboard.
Once you’ve plugged in the power connector, switch on the power supply and press the power button. The system should now power on. Remember to take your time when attaching this connector, and if you encounter any problems, seek help from a professional.
A correctly aligned power connector is essential to the proper functioning and longevity of your computer.
Connecting the Wires
Connecting the power button is an essential step in bringing your computer to life. This small yet important component is responsible for starting up your entire system, so it’s crucial to make sure it’s connected correctly. Typically, the power button is located on the front panel of the computer case, and its wires are connected to the motherboard using a small set of pins.
These pins are usually labeled with small printed text or etchings on the motherboard itself. It’s important to consult your motherboard’s manual or online resources to ensure that you connect the wires to the correct pins. Once the power button is connected, you can turn on your computer and see all your hard work come to life.
So go ahead, connect the wires, and power up your computer. Happy computing!
Securing the Connection
When it comes to securing the connection between your power button and the rest of your tech setup, there are a few things to keep in mind. First and foremost, you’ll want to ensure that all the parts and cables involved are in good working order, and are not damaged or frayed in any way. Once you’ve confirmed that everything looks good on the surface, it’s time to start plugging things in.
Make sure to follow the instructions carefully, and don’t force anything that doesn’t seem to fit quite right. It’s also a good idea to test the connection once everything is plugged in, just to make sure that everything is working correctly. By taking the time to connect your power button securely, you can ensure that your entire tech setup runs smoothly and efficiently.
Testing the Power Button
Connecting the power button to your motherboard is an essential step when building your own PC. It’s what allows you to turn your computer on and off with ease. To start, locate the four pins on your motherboard that are labeled “power switch.
” Then, take the two wires from your power button and connect them to these pins – it doesn’t matter which wire goes where, as the connection is not polarized. Once connected, push the power button and see if your computer turns on. If it doesn’t, make sure the wires are securely connected to the pins and try again.
A faulty power button can also be the issue, so double-check that it’s functioning properly. Overall, connecting the power button is simple and crucial for operating your PC.
Powering On and Off
When it comes to powering on and off your device, the power button is the key component that controls this function. Testing the power button is a crucial step in ensuring that your device is working properly and will respond accordingly when you use it. To do this, simply press the power button and see if the device turns on.
If it does, then you can assume that the power button is working correctly. However, if the device does not turn on or there is a delay in response time, then it may be time to take a closer look at your power button. Power buttons can wear out over time, so it’s important to keep an eye on this component and make sure that it is functioning properly.
Regularly testing the power button is a quick and easy task that can save you a lot of hassle in the long run. So, the next time you power on your device, take a moment to test your power button and make sure that it’s working as it should.
Troubleshooting Tips
When your computer fails to turn on, it can be frustrating and leave you feeling stranded. Before you make an appointment with a technician, it’s important to test the power button. This process is simple and can rule out the possibility of a faulty button being the cause of the problem.
First, unplug the computer and remove the battery, if possible. Then remove any external devices connected to the computer. Press the power button for 15-20 seconds and hold it down.
If you hear any sounds or see any lights, it indicates that the button is functioning properly. If not, it’s likely that the button needs replacement. This process can save you time and money in getting your computer back up and running.
Keyword: power button
Conclusion
Connecting the power button to the motherboard might seem intimidating, but fear not! It’s as easy as plugging in a phone charger, but with even more satisfaction once your computer boots up. Don’t let a simple button come between you and your computer dreams – take a deep breath, follow the manual, and before you know it, you’ll be powering on like a pro.”
FAQs
What is the purpose of the power button on a motherboard?
The power button on a motherboard is used to turn on or off the computer.
How do I connect the power button to my motherboard?
To connect the power button to your motherboard, locate the power header pins on the motherboard and attach the power button cable to the corresponding pins.
What happens if the power button on my motherboard does not work?
If the power button on your motherboard does not work, you can try resetting the BIOS or replacing the power button cable.
Can I use a different power button with my motherboard?
Yes, you can use a different power button with your motherboard as long as it is compatible and properly connected to the motherboard’s power header pins.
Why is it important to properly connect the power button to the motherboard?
Properly connecting the power button to the motherboard ensures that the computer can be turned on and off safely and reliably. It also helps prevent damage to the motherboard or other computer components.