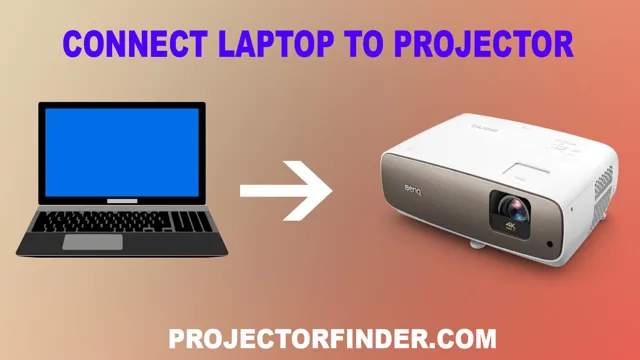
Have you ever found yourself in a situation where you need to give a presentation, but the only option is a projector and connecting cables? Worry no more because we’ve got you covered! In this blog, we will guide you on how to connect a projector to your laptop wirelessly. With the advancement of technology, wireless connections have become the norm, and we can now connect devices without having to deal with tangled wires. We will give you step-by-step instructions that are easy to follow, so you can have your presentation up and running in no time.
So, grab your laptop and projector, and let’s get started on how to connect them wirelessly.
Requirements for Wireless Connection
Connecting your projector to your laptop wirelessly can be a convenient way to give presentations or watch movies without having to deal with cables. However, there are a few requirements that need to be met in order to successfully connect your devices. Firstly, both your laptop and projector should support wireless connection.
Most modern projectors come with built-in Wi-Fi capabilities, while laptops may require an additional adapter. Secondly, both devices should be connected to the same Wi-Fi network. This can be accomplished by either connecting both devices to a shared Wi-Fi network or creating a wireless hotspot with your laptop and connecting your projector to it.
Lastly, you’ll need to ensure that both devices are set up to communicate with one another. This can typically be done through your projector’s settings or by installing additional software on your laptop. With these requirements met, you can easily connect your projector to your laptop wirelessly and enjoy a hassle-free presentation or movie experience.
Check Laptop and Projector Wi-Fi Compatibility
If you’re planning on using a projector with your laptop and want to wirelessly connect the two, it’s important to ensure that they are compatible with each other’s Wi-Fi technology. This means that both the laptop and the projector should support the same Wi-Fi standard and frequency band. Most projectors and laptops nowadays support either the 80
11n or 8011ac Wi-Fi standard, so be sure to check which one your devices have. Moreover, some projectors may support only the
4GHz frequency band, while others may support both 4GHz and 5GHz bands. Again, check your devices’ specifications to see which frequency bands they support.
It’s also a good idea to make sure that both your laptop and projector have the latest Wi-Fi drivers and firmware installed to ensure smooth and stable wireless connectivity. By taking the time to check these requirements, you can avoid frustrating issues and have a seamless wireless connection between your laptop and projector.
Ensure Both Devices Have Wi-Fi Adapters
One fundamental requirement for establishing a wireless connection between devices is that both devices must have Wi-Fi adapters. A Wi-Fi adapter is a piece of hardware built into your device that allows it to receive and transmit wireless signals. Usually, laptops, smartphones, and tablets come with built-in Wi-Fi adapters, but if you have a desktop computer or a device without one, you’ll need to acquire a separate adapter.
Without a Wi-Fi adapter on either device, it’s impossible to establish a wireless connection between them. It’s worth noting that the Wi-Fi adapter hardware must also be compatible with the specific wireless networking standard being used. For instance, if one device supports only the older 80
11g standard, while the other supports the newer 8011ac standard, a wireless connection may not be established between them. Therefore, it’s essential to ensure that both devices have compatible Wi-Fi adapters to achieve a wireless connection.
Connect Laptop and Projector to Wi-Fi Network
To connect your laptop and projector to a Wi-Fi network, there are a few requirements you need to have in place. First and foremost, your projector needs to be a Wi-Fi-enabled device. Additionally, your laptop needs to have Wi-Fi capabilities and be connected to the same network as the projector.
It’s also essential to ensure that both the laptop and the projector are running on the latest software updates to avoid any compatibility issues. Once all these requirements are met, you can now proceed to connect your laptop and projector wirelessly, which significantly improves your presentation experience. With a seamless wireless connection, you can easily present your ideas without worrying about tangled cords and other technical issues that can disrupt your presentation flow.
So, ensure you meet all the requirements to make your presentation a success.
Set up Wireless Projection
Connecting a projector to your laptop wirelessly can be incredibly convenient when you have a presentation or want to watch a movie. The process is straightforward and requires a Wi-Fi network and a compatible projector. First, make sure your laptop and projector are on the same Wi-Fi network.
Then, on your laptop, navigate to the display settings and choose the option to connect to a wireless display. Select your projector from the list of available devices, and make sure to enable the wireless display on the projector. Once connected, you can enjoy your content on the big screen without any cords or hassle.
Connecting your projector to your laptop wirelessly with ease and convenience has never been simpler, and you’re sure to impress your audience with your tech-savvy skills.
Install Wireless Projection Software on Laptop
If you’re looking to set up wireless projection, the first thing you’ll need to do is install the appropriate software on your laptop. This software will allow you to connect the two devices wirelessly and project your laptop’s screen onto a larger display. The process of installing this software varies depending on the brand and model of your laptop, but it typically involves downloading the software from the manufacturer’s website and following the installation instructions.
Once the software is installed, you should be able to easily connect your laptop to a wireless projector or display. By doing so, you’ll be able to enjoy a larger and more immersive viewing experience without the hassle of dealing with cables or wires. So why not give it a try? You may just be surprised at how easy it is to set up wireless projection on your laptop!
Configure Projection Settings on Laptop
Are you tired of tripping over cords and cables during presentations or having to sit uncomfortably close to your laptop screen? Good news! You can now set up wireless projection on your laptop and enjoy the freedom of displaying your content on a larger screen from a distance. To get started, you need to configure your laptop’s projection settings. First, make sure your laptop supports wireless projection by checking if it has built-in Miracast or Wi-Fi Direct technology.
Then, select “Connect to a Wireless Display” from the Projection settings menu and search for available Wi-Fi display devices. Once your laptop detects the display device, connect to it and adjust the projection settings to your desired preferences. Whether you’re giving a presentation or watching a movie, wireless projection makes it easy and stress-free.
So why not give it a try and enjoy the convenience of projecting wirelessly?
Connect Projector to Wireless Network
Setting up your projector to connect wirelessly to your network can provide countless advantages. You can easily project presentations, videos, or images wirelessly without any cables. But how can you set up your projector to connect to your wireless network? First, check if your projector has a built-in wireless connectivity feature, or if you can purchase a separate wireless adapter that can be plugged in.
Next, find your network’s SSID and password and input them into the projector’s settings. You can connect your laptop or mobile device to the projector by searching for the projector’s name in the list of available networks, and then entering the password. Once all devices are connected, you can start projecting wirelessly.
Additionally, some projectors offer apps that you can download to your mobile device to control the projector’s settings. With a wireless connection, you can enjoy flexibility in positioning the projector and maximize your viewing experience.
Start Wireless Projection
Wireless Projection Are you tired of using cables to connect your device to a projector or display screen? Consider using wireless projection instead. This technology allows you to project your screen onto a larger display without any messy cords. Setting up wireless projection is easy, too.
First, ensure that your device and the display you want to project to are both connected to the same Wi-Fi network. Then, turn on the wireless projection feature on your device, which can usually be found in the settings menu. Next, select the display you want to project to from the list of available options.
Finally, enjoy your wireless projection setup without any cable clutter. With this easy setup, you can say goodbye to tangled cables and hello to seamless projection.
Troubleshooting Tips
Connecting a projector to a laptop wirelessly can be a tricky process. But with the right troubleshooting tips, you can easily accomplish this task. First, ensure that both the projector and laptop are connected to the same wireless network.
If you’re still unable to connect, try restarting both devices, as this can often resolve connectivity issues. Also, check if the wireless adapter on your laptop is turned on. Sometimes, it may be turned off, rendering your laptop unable to connect to the projector wirelessly.
Lastly, make sure that the projector is set to “wireless display” mode. This allows your laptop to detect the projector and establish a connection. With these troubleshooting tips, you’ll be able to connect your projector to your laptop wirelessly with ease.
Restart Devices and Check Network Connection
If you’re experiencing network issues, the first step is to restart your device. This can help clear up any temporary glitches and might solve the problem. Before you do that, make sure to check that your device is connected to the correct Wi-Fi network and that the password is correct.
If this doesn’t work, try resetting your modem or router. Unplugging it for a few minutes and plugging it back in might help resolve connectivity issues. If this still doesn’t work, try connecting your device to another network to see if the issue persists.
Overall, restarting devices and checking network connections is an essential troubleshooting step in ensuring your connected devices are functioning correctly.
Update Projector Firmware and Software
If you are experiencing issues with your projector, one possible solution is to update its firmware and software. This can help resolve bugs, glitches, and other issues that may be impacting its performance. To update your projector, you will need to find the latest firmware and software updates on the manufacturer’s website and download them to your computer.
Then, connect your projector to your computer using a USB cable and follow the instructions provided to install the updates. This process may take some time, but it can be worth it if it improves your projector’s functionality. Remember to always check for updates periodically to ensure that you are running the most current version of the software.
By doing so, you can avoid potential issues and keep your projector running smoothly.
Reset Projector to Factory Settings if Necessary
Projector, Reset, Factory Settings, Troubleshooting, Tips If you’re experiencing issues with your projector such as odd sounds, blurry images or frequent disconnections, it might be time to reset the device to its factory settings. This action will erase all the custom settings you have saved, including picture mode, brightness, contrast and more. First, locate the ‘Reset’ button on the remote control or projector’s menu, and press and hold it for a few seconds.
Once complete, the device will likely initiate a reboot, and you should try reconnecting your sources to check if the problem has been resolved. Keep in mind that resetting the projector can also cause data loss, so be sure to backup any valuable information before performing this action. If the problem persists, the best course of action is to contact the manufacturer or a trusted technical expert for further guidance.
Conclusion
In conclusion, connecting a projector to your laptop wirelessly may seem daunting at first, but with the right technology and a little know-how, it can be a breeze. Just remember that a strong Wi-Fi signal and compatible software are key, and don’t be afraid to seek out help from tech-savvy friends or online tutorials. With these tips, your presentations, movies, and gaming experiences can be taken to a whole new level – without the hassle of cords and cables.
So, go forth and connect with confidence, and who knows – you may even impress some of your more traditionally-wired colleagues.”
FAQs
What are the requirements for connecting a projector to a laptop wirelessly?
To connect a projector to a laptop wirelessly, you’ll need a wireless projector, a laptop with Wi-Fi capability, and a wireless network.
How do I connect my laptop to a wireless projector?
To connect your laptop to a wireless projector, follow these steps:
1. Make sure your laptop and projector are connected to the same wireless network
2. Turn on your projector and select the correct source input
3. On your laptop, go to the Display settings and choose “Projector Only”
4. Select the wireless projector from the list of available devices.
Can I connect multiple laptops to a wireless projector?
Yes, you can connect multiple laptops to a wireless projector as long as they are all connected to the same wireless network and the projector is set up to accept multiple inputs.
What if my laptop does not have Wi-Fi capabilities, can I still connect it to a wireless projector?
If your laptop does not have Wi-Fi capabilities, you can still connect it to a wireless projector by using a wireless adapter. Simply plug the wireless adapter into your laptop’s USB port, connect to the wireless network, and then follow the steps to connect to the projector.