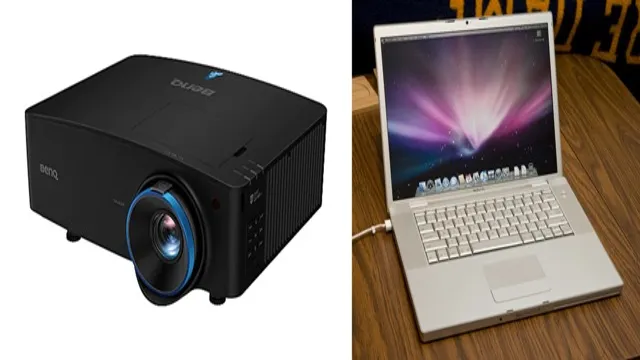
Do you need to give a presentation or watch a movie on a bigger screen than your MacBook’s? No worries, connecting your MacBook to a projector is easier than you might think. All you need is the right cable and a little bit of know-how. There are different types of projectors, so the cable you need may vary.
The most common connector is an HDMI cable, but older projectors might require a VGA or DVI cable. Check your projector’s manual or website to find out which cable you need. Once you have the right cable, connect the cable to your MacBook’s corresponding port.
If you have a newer MacBook, you might need an adapter to convert the HDMI or VGA port to a USB-C port. After connecting the cable, turn on your projector and switch it to the correct input. Voila! Your MacBook is now connected to the projector, and you can enjoy your content on a bigger screen.
Adjust the resolution settings if necessary, and you’re all set. Connecting your MacBook to a projector doesn’t have to be complicated or intimidating. With the right cable and a few simple steps, you’ll be presenting or watching your favorite movies on the big screen in no time.
Check Projector Compatibility
If you’re a MacBook user, you may encounter the need to connect your device to a projector. A crucial step before you begin the connection process is to check the compatibility of your MacBook and the projector. The easiest way to do this is to check the ports available on your MacBook and the ports provided by the projector.
Most projectors come equipped with VGA or HDMI ports, while MacBooks usually feature USB-C ports. If your MacBook and projector have different ports, you’ll need to purchase an adapter to bridge the connection. Additionally, it’s essential to consider the resolution and aspect ratio of your MacBook and the projector to ensure that the projected image looks crisp and clear.
Taking these steps will ensure that you can connect your MacBook to the projector smoothly and enjoy a seamless presentation experience.
Confirm MacBook Port
If you’re planning to use a projector with your MacBook, it’s important to check for compatibility before you start your presentation. One crucial factor to consider is the port on your MacBook. Most recent models use USB-C ports, which means you may need an adapter to connect to a projector.
It’s a good idea to have the right adapter on hand, or at least double-check what ports your projector has to avoid any last-minute technical difficulties. Additionally, check if your MacBook is compatible with the projector’s resolution and refresh rate to ensure optimal display quality. With these factors in mind, you’ll be able to seamlessly connect your MacBook to a projector and give a professional presentation without any interruptions.
Get the Right Cable
When selecting a cable to connect your projector, it’s essential to check for compatibility. You want to make sure your projector can support the cable you’re using, or else you may not be able to see anything on the screen. For example, if your projector has an HDMI input and you use a VGA cable, there won’t be any signal.
On the other hand, if your projector only has a VGA input, you’ll need to use a VGA cable instead of an HDMI. It’s also important to check the cable length, as too long or too short of a cable can cause signal loss. Always read the specifications for your projector and cable before making a purchase to ensure they’re compatible.
A simple cable incompatibility could ruin your entire presentation, so take the time to double-check everything.
Connect the Cable
Connecting your MacBook to a projector is easy, and all you need is the right cable. First, make sure you have the correct adapter for your MacBook’s port. If your MacBook has a Thunderbolt 3 (USB-C) port, you will need a USB-C to HDMI adapter.
For older models with a Mini DisplayPort or Thunderbolt 2 port, you will need a Mini DisplayPort to HDMI adapter. Once you have the proper adapter, simply plug one end of the HDMI cable into the adapter and the other end into the projector’s HDMI port. Make sure the projector is turned on and set to the correct input source.
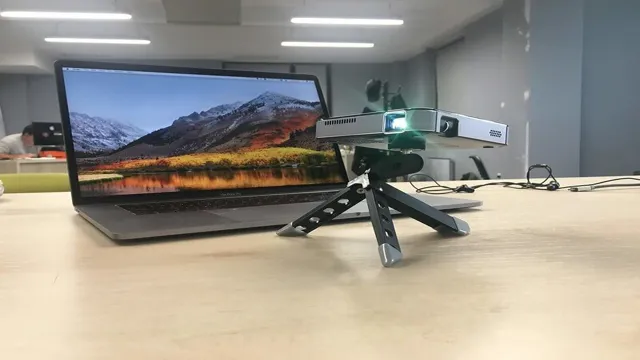
Finally, select the “mirror display” option from the System Preferences menu on your MacBook to ensure that your screen is displayed on the projector. And that’s it! You should now be ready to present your work or enjoy a movie on the big screen.
Power Up Devices
When it comes to powering up your devices, connecting the cable is the simplest and most straightforward approach. Whether you’re looking to charge your phone or connect your laptop to an external display, selecting the right cable is crucial. It’s essential to ensure that your cable meets the requirements of the device you’re attempting to power up and that it’s of high quality.
Avoid opting for cheaper cables, as they may be prone to damage and can cause electrical issues. Another crucial factor is the length of the cable. You don’t want to be stuck with a short cable that doesn’t allow for the flexibility you need to use your device comfortably.
In summary, whether you’re working, gaming, or just browsing, just remember to select the right cable for the job at hand, and you’ll be able to power up your devices with ease.
Change Projector Input
If you’re having trouble changing the input on your projector, don’t worry. Connecting the cable for the input you want is a straightforward process that anyone can do. Start by locating the input ports on your projector – they’re usually at the back or side of the unit.
Then, plug one end of the cable into the output port of your device (e.g. laptop, gaming console), and the other end into the corresponding input port on the projector.
Once the cable is securely connected, you can use the input source button on the projector or the remote to switch to the correct input. It’s that easy! By following these simple steps, you’ll be able to enjoy your favorite movies, TV shows, or games on the big screen in no time. Don’t let a stuck input frustrate you – just connect the cable and switch it up with ease.
Configure MacBook Display
If you’re looking to configure your MacBook display, one of the first things you’ll need to do is connect the cable. Depending on your specific MacBook model, you may need to use either a USB-C to HDMI cable or a Thunderbolt 3 cable to connect to an external display. Once you have the appropriate cable, simply plug one end into your MacBook and the other end into the external display.
Some displays may require you to select the correct input source to view your MacBook’s display. Additionally, you may need to adjust your MacBook’s display settings to determine how your external display will behave. For example, you may choose to mirror your MacBook’s display, extend your desktop, or use only the external display.
By following these simple steps, you can easily configure your MacBook display to meet your specific needs and preferences.
Troubleshooting Tips
Connecting your MacBook to a projector can be a bit tricky, especially if you’re not familiar with the process. If you’re having trouble getting the two to sync up, there are a few things you can check. First, make sure your cables are connected correctly.
You’ll need a VGA or HDMI cable depending on your specific model. If the connection seems fine, check the settings on your MacBook. Make sure the display settings are configured properly and that the projector is recognized as the external display.
If all else fails, try restarting your MacBook and the projector. This can sometimes do the trick and get things working smoothly. With a little troubleshooting and patience, you’ll have your MacBook projected in no time.
Try a Different Cable
One of the most common issues with technology is a malfunctioning cable. If you’re experiencing problems with a device, it’s always a good idea to try a different cable before resorting to other troubleshooting measures. Sometimes, a faulty cable can result in no connection or a poor connection, leading your device to not function at all or perform poorly.
A quick and easy way to see if your cable is the issue is to swap it out with a known working cable and see if that resolves the problem. It’s a simple solution that can save you time and frustration. So, next time you’re having trouble with a device, give a different cable a try before you panic and think the worst.
Check MacBook Settings
As a MacBook user, you might occasionally face some issues with your device, such as slow performance or connectivity problems. Before you take your MacBook to a technician, there are some quick and easy troubleshooting tips you can try on your own. One of the primary things to check is your MacBook settings.
Ensure that your Wi-Fi and Bluetooth are turned on, and your network preferences are set correctly. You can also check your Activity Monitor to see if any applications are causing high CPU usage, which can lead to slower performance. It’s also essential to make sure that your software is up-to-date, as outdated applications can cause compatibility issues and crashes.
By regularly keeping an eye on your MacBook settings and updating your software, you can prevent many common issues and keep your device running smoothly.
Conclusion
In conclusion, connecting your MacBook to a projector is a magical and transformative experience. It’s like turning on a portal to another world filled with stunning visuals, captivating presentations, and spine-tingling movie nights. With just a few clicks and cables, your MacBook can become the star of the show, dazzling audiences with its power and versatility.
So whether you’re giving a TED talk, teaching a class, or hosting a movie marathon, don’t be afraid to connect your MacBook to a projector and let the magic unfold!”
FAQs
What type of cable do I need to connect my MacBook to a projector?
You will need a Mini DisplayPort to VGA or HDMI cable, depending on the type of port your projector supports.
Can I connect multiple projectors to my MacBook?
Yes, you can connect multiple projectors to your MacBook by using a VGA or HDMI splitter.
Why isn’t my MacBook displaying on the projector?
First, check to make sure the projector is turned on and selected as the input source. Then, check that the cable is securely connected and the MacBook is set to display on the external monitor in the System Preferences.
How can I mirror my MacBook screen on the projector?
To mirror your MacBook screen on the projector, go to System Preferences > Displays > Arrangement and check the “Mirror Displays” box.