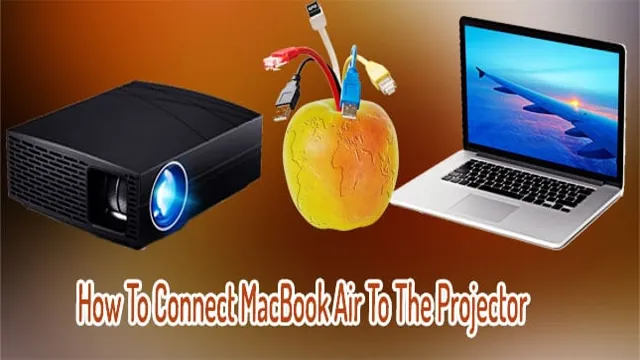
Connecting your MacBook Air to a projector might seem like a daunting task, especially if you have never done it before. But fear not! With just a few simple steps, you can easily connect your MacBook Air to a projector and enjoy your presentations, movies, and favorite shows on a larger screen. In this blog post, we will guide you through the process of connecting your MacBook Air to a projector, step by step.
By the end of this post, you will be ready to connect your MacBook Air to any projector with ease. So, grab your MacBook Air and let’s get started!
Check Projector Compatibility
If you’re looking to connect your MacBook Air to a projector, it’s important to check compatibility before making any purchases. While most projectors these days come equipped with HDMI ports, MacBook Airs use Thunderbolt 2 or USB-C ports. This means you’ll likely need an adapter or cable that can convert the signal from your MacBook to one that the projector can recognize.
It’s also important to check the resolution and refresh rate of both your MacBook and the projector to ensure they are compatible for a clear and smooth display. Some projectors may also have specific software requirements that may not be compatible with macOS. To avoid any headaches, be sure to research and compare different projectors and adapters before making any purchases.
With some careful planning and consideration, you’ll soon be able to enjoy sharing content from your MacBook Air on the big screen.
Confirm the Ports of Your Projector
When it comes to setting up a projector, compatibility is key. One important factor to consider is the ports of your projector. Before investing in a projector, it’s important to check its compatibility with your other devices by examining its input and output ports.
Check whether your projector has the necessary ports to connect to your laptop, gaming console, or other devices. If you’re unsure about what type of ports your devices have, do a quick search online or refer to their instruction manuals. For example, if your laptop has an HDMI port, make sure your projector also has an HDMI port.
Another thing to keep in mind is the number of ports available. Consider how many devices you plan to connect to the projector and make sure there are enough ports to accommodate them all. In summary, compatibility is crucial when it comes to projecting.
Confirm that your projector has the ports you need for your other devices and make sure there are enough ports available. This way, you can avoid the frustration of not being able to connect your devices and enjoy a seamless projection experience.
Make Sure Your Macbook Air Has a Compatible Port
If you plan on using your Macbook Air for presentations, make sure it has a compatible port that can connect to projectors. Some older projectors may only have VGA ports, while newer ones have HDMI or USB-C ports. Check the specs of both your Macbook Air and the projector to confirm compatibility before investing in any adapters or cables.
Additionally, make sure to bring extra charging cables and a backup battery pack in case of emergencies. After all, nothing is worse than running out of battery during an important presentation. By checking compatibility beforehand and having backup resources, you can ensure a smooth and stress-free presentation experience.
Connect Macbook Air to Projector
Connecting your Macbook Air to a projector can be a daunting task, but it’s actually relatively simple. Firstly, you will need a VGA or HDMI cable, depending on the ports of your projector and Macbook Air. Once you have the cable, plug one end into the projector and the other end into the appropriate port on your Macbook Air.
If you have a newer Macbook Air with only USB-C ports, you will need an adapter that converts USB-C to HDMI or VGA. Once you have connected the Macbook Air to the projector, you may need to adjust the display settings. Simply go to the Apple menu, select System Preferences, and click on Displays.
From here, you can adjust the resolution and other settings to best suit your needs. With these simple steps, you can easily connect your Macbook Air to any projector and share your screen with ease.
Get the Right Connector
If you want to connect your MacBook Air to a projector, the first thing to do is to get the right connector. The newest MacBook models come with Thunderbolt 3 (USB-C) ports, which can be a little tricky to connect to projectors since most projectors still use the standard VGA or HDMI ports. To get around this, you’ll need to get a compatible adapter that lets you connect your MacBook Air to your projector.
One option is to use a USB-C to VGA adapter, which will work with most standard projectors. Another option is to use a USB-C to HDMI adapter, which is ideal if you’re using a newer projector with an HDMI port. Whatever option you choose, make sure to get a high-quality adapter to ensure a reliable connection and a clear image.
With the right adapter, you can easily connect your MacBook Air to a projector and share your screen with others.
Connect the Macbook Air to the Projector
Connecting your Macbook Air to a projector can be a bit daunting if you’ve never done it before, but don’t worry, it’s easier than it looks. First of all, make sure that your Macbook and the projector both have the same input ports. Then, connect the two devices using a compatible cable, which is usually an HDMI cable or a VGA cable.
Once connected, turn on the projector and select the appropriate input source on the projector’s remote control or interface. On your Macbook, go to the System Preferences and select Displays. From there, choose the appropriate resolution for the projector and adjust the orientation if necessary.
And that’s it! You’re now ready to share your screen or present your content on a larger display. Whether it’s for a business presentation, a classroom lecture, or a movie night with friends, connecting your Macbook to a projector can enhance your overall experience.
Adjust Display Settings on the Macbook Air
If you want to connect your Macbook Air to a projector, it’s important to adjust your display settings to ensure a smooth and clear presentation. First, connect your Macbook Air to the projector using a VGA, HDMI, or DisplayPort cable. Then, go to the Apple menu and select System Preferences.
Click on Displays and you should see your Macbook’s screen and the projector listed as separate displays. Adjust the resolution, refresh rate, and scale options to your liking, making sure the projector is set as the primary display. You can also choose to mirror your displays so that what appears on your Macbook also appears on the projector.
With these simple adjustments, you’ll be able to seamlessly share your work with any audience, big or small.
Troubleshooting Tips
If you’re having trouble connecting your MacBook Air to a projector, don’t worry! There are a few troubleshooting tips you can try to get your presentation up and running smoothly. First, make sure that all cables are securely connected to both the MacBook Air and the projector. If you’re still having trouble, try adjusting the resolution on both your Mac and the projector to ensure compatibility.
Another potential issue could be the input source – make sure that the correct input source is selected on the projector. Finally, if none of these tips work, try restarting both the MacBook Air and the projector. With a little troubleshooting, you should be able to seamlessly connect your MacBook Air to a projector for your next presentation.
Check for Software Updates
It’s always a good idea to regularly check for software updates to ensure that your computer is running smoothly. Updates are usually released to fix bugs, improve security, and enhance performance. Keeping your software up to date can also prevent crashes, freezes, and other issues that can be frustrating to deal with.
Many programs have an automatic update feature, but it’s still a good idea to check manually to make sure that nothing has been missed. Updating your software is a simple process that usually involves just a few clicks. By taking the time to stay on top of software updates, you can save yourself a lot of headaches down the line.
Restart Both Devices if Necessary
When you face any technical difficulties in your devices, restarting them can be a helpful solution. It might sound like a no-brainer, but restarting can solve most of the problems. If you’ve experienced any slow performance or freezing issues with either your computer or phone, restarting both devices can be the best way to troubleshoot it.
A reboot can help release system glitches and memory cache problems that may interfere with your device’s performance. It is an excellent idea to close all the apps and software running on your computer or phone before restarting to improve your device’s overall performance. Additionally, restarting also allows your computer or phone to refresh and install any pending updates automatically.
Therefore, if you encounter any technical issues, restarting both devices is the easiest, simplest, and most effective troubleshooting technique for most problems.
Conclusion
In the end, connecting a MacBook Air to a projector is like merging two worlds – the sleek and portable design of Apple technology with the grand display of a projector. It’s a symphony of style and functionality, creating a truly immersive experience that brings your presentations and movies to life in a way that only Apple and projectors can accomplish. So, don’t be afraid to take the leap and connect your MacBook Air to a projector, because once you do, you’ll never want to go back to a plain old laptop screen again!”
FAQs
How do I connect my MacBook Air to a projector using HDMI?
You can connect your MacBook Air to a projector using an HDMI cable. First, plug one end of the HDMI cable into the MacBook Air’s HDMI port and the other end into the projector’s HDMI port. Then, turn on the projector and select the HDMI input. Your MacBook Air’s screen should now be displayed on the projector.
Can I connect my MacBook Air to a projector wirelessly?
Yes, you can connect your MacBook Air to a projector wirelessly using Apple’s AirPlay technology. First, make sure your MacBook Air and projector are connected to the same Wi-Fi network. Then, click on the AirPlay icon in the menu bar of your MacBook Air and select your projector from the list of available devices.
What do I do if my MacBook Air won’t connect to the projector?
If your MacBook Air won’t connect to the projector, try the following troubleshooting steps: 1) ensure the HDMI cable is properly plugged in, 2) try a different HDMI cable, 3) make sure the projector is on the correct input, 4) restart your MacBook Air, and 5) update your MacBook Air’s software.
Can I use a VGA cable to connect my MacBook Air to a projector?
Yes, you can use a VGA cable to connect your MacBook Air to a projector. However, since the MacBook Air does not have a VGA port, you will need to use a VGA adapter that connects to the MacBook Air’s Thunderbolt port. Once the adapter is connected, you can plug the VGA cable into the adapter and into the projector’s VGA port.