Looking for a fun project to do at home? Want to watch your favorite movies or TV shows on a bigger screen without shelling out hundreds of dollars? Well, look no further because creating a DIY shoebox projector can be a perfect solution for you! This budget-friendly hack can turn your regular smartphone into a movie projector that fits in the palm of your hand. The best part? You only need a few simple materials and a little bit of time to get started. So, put on your creative hat and let’s get started on this awesome project!
Materials needed
To make a shoebox projector, you will need a few simple materials that you can easily find in your home or purchase at a crafts store. The main item you will need is a shoebox. This will be the main body of your projector, so make sure it’s in good condition and not too small.
You will also need a magnifying glass or old lens, which will act as a projector lens. You can find a magnifying glass at a dollar store or use an old lens from an old camera. The next item you’ll need is a roll of electrical tape or black construction paper to cover the inside of the shoebox and ensure that no light escapes.
You’ll also need a knife or box cutter to cut a hole in one end of the box and a piece of plain white paper or a cheap projector screen to use as a projection surface. Finally, you’ll need your phone or tablet, which will be used as the light source for your projector. That’s it! With these simple materials, you’ll be well on your way to creating your very own shoebox projector.
Shoebox
If you’re in need of a storage solution for your small items, look no further than a trusty shoebox! To create your own shoebox organizer, you’ll need a few basic materials. First and foremost, you’ll need the shoebox itself. Any size or color will do, depending on your personal preference.
You’ll also need some decorative paper or wrapping to cover the outside of the box and give it a little extra flair. Glue or double-sided tape will be necessary to attach the paper to the box. Finally, consider adding dividers or small containers inside the box to keep everything organized and easy to find.
With these materials, you’ll have everything you need to create a functional and stylish storage solution out of a simple shoebox.
Magnifying glass
If you’re looking to make a homemade magnifying glass, the materials needed are relatively simple. First, you’ll need a clear glass or plastic sphere that is handheld in size, about 2-3 inches in diameter. You can often find these at a craft supply or hobby store.
Next, you’ll need a small lens or magnifying glass that fits snugly inside the sphere. Look for a lens that is at least 2 inches in diameter and has a magnification power of at least 3x. You can also find these at craft stores or online.
Finally, you’ll need a small piece of black cardboard or construction paper, scissors or a craft knife, and glue or tape. Cut the cardboard into a small circle that is slightly smaller than the diameter of the sphere, and glue or tape it to the bottom of the sphere to create a base for the lens. Once you’ve assembled your magnifying glass, it’s ready to use for observing and exploring the world around you.
Whether you’re examining the texture of a leaf or the details on a coin, your homemade magnifying glass will provide a new perspective on the world.
Electrical tape
When it comes to electrical work or repairs, one of the most commonly used materials is electrical tape. This versatile tape is a staple for any electrician or DIY enthusiast. To use electrical tape, you’ll need to have a few things on hand.
First and foremost, you’ll need the tape itself. There are several types of electrical tape available, so be sure to choose the right one for the job. You’ll also need a clean, dry surface to apply the tape to.
If the surface is dirty or damp, the tape may not stick properly. Additionally, you’ll want to have a pair of scissors handy to cut the tape to the desired length. Once you’ve gathered your materials, properly using electrical tape can make all the difference in ensuring a safe and secure electrical connection.
Whether you’re repairing a frayed wire or marking an important connection, electrical tape is an absolute must-have for any electrical project.
Smartphone
When it comes to creating a smartphone, there are many materials needed to make a functioning device. Some of the most important materials include microchips, batteries, and displays. Microchips are crucial components of any smartphone because they allow the device to process data and run applications.
Batteries are needed to power the phone and keep it running throughout the day. Displays are also important because they allow users to interact with the phone and view information. Other materials used in smartphones include plastics, metals, and glass.
These materials are used to create the phone’s casing, buttons, and other components. Overall, creating a smartphone requires a variety of materials that must work together seamlessly to create a powerful and functional device. So, the next time you use your smartphone, take a moment to appreciate all the materials that went into creating it!
Assembly
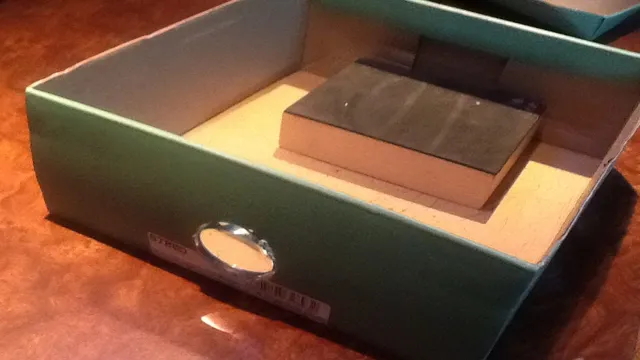
Assembling a shoebox projector can be both a fun and creative activity. To start with, gather all the required materials such as a shoebox, magnifying glass, cardboard, scissors, tape, and a phone or tablet. First, cut a rectangular-shaped hole at one end of the shoebox.
Then, place the magnifying glass in the hole and tape it securely in place. Next, cut another rectangular hole on the other end of the shoebox and place the phone or tablet inside, facing towards the magnifying glass. Make sure to adjust the distance between the phone or tablet and the magnifying glass until the image becomes clear.
Finally, cut strips of cardboard to act as a stand for the projector and tape them on the sides of the shoebox. Once everything is secured, turn off the lights and enjoy a movie or video on the big screen! With just a shoebox and a few added materials, you can create a mini movie theatre experience right in the comfort of your own home. So why not give it a try? It’s a great indoor activity during those rainy days or when you just want to enjoy a movie night in a unique way.
Plus, it’s an excellent opportunity to get creative and DIY your very own projector.
Step-by-step instructions
If you’re looking to assemble something, you’re in the right place! Here are some step-by-step instructions that will guide you through the process of putting together your project. First, gather all of the materials and tools you’ll need. It’s important to have everything ready before you begin, so you don’t have to stop in the middle of assembly to search for missing items.
Next, read through the instructions carefully, and make sure you understand each step before you start. If you’re unsure about anything, don’t hesitate to consult the manual or look up online resources. As you work through the assembly, double-check your work frequently to make sure you’re on track.
If at any point you run into trouble, take a break and try again later with a fresh perspective. With patience and persistence, you’ll soon have your project assembled and ready to use!
Link to YouTube tutorial
Are you struggling with understanding assembly language? Fear not! There are many resources available online to help you out. One great option is a YouTube tutorial by a professional programmer. In this tutorial, you’ll learn the basics of assembly language and how to write simple programs.
The tutorial breaks down each component of assembly language and provides clear explanations and examples. Whether you’re a beginner just starting out or you need to refresh your skills, this tutorial is a great resource. So don’t be intimidated by assembly language – give this tutorial a try and discover how easy and fun it can be to work with!
Adjusting the focus
A shoebox projector is a fun DIY project that lets you create a mini-movie theater in your own home! But sometimes getting the focus just right can be a little tricky. The first step is making sure your projector lens is clean and free of any smudges or dust. Next, adjust the distance between the lens and the wall until you get a clear, sharp image.
Don’t be afraid to experiment with different angles and distances until you find the sweet spot. Once you’ve got a clear image, you can fine-tune the focus using the lens adjustment on your projector. Keep in mind that the focus may shift slightly as the projector warms up, so you may need to make small adjustments over time.
With a little patience and experimentation, you can create a great shoebox projector that will provide hours of entertainment for you and your friends.
Tips for optimal image quality
When it comes to capturing optimal image quality, adjusting the focus is key. Whether you’re using a professional camera or a smartphone, ensuring the subject is in focus is crucial for sharp and clear images. One tip is to use the autofocus feature, which allows the camera to automatically adjust the focus based on the subject’s distance and movement.
If you prefer manual focus, make sure to zoom in and double-check the focus before taking the shot. Another helpful tip is to use the focus lock feature, which allows you to focus on a specific point and then lock it in place to capture other elements in the frame without losing focus. No matter which method you choose, taking the time to adjust the focus will make a significant difference in the final image quality.
Conclusion
In the end, a shoebox projector may seem like a simple DIY project, but it’s so much more than that. It represents creativity, ingenuity, and resourcefulness. It’s proof that with a little innovation, you can transform something as mundane as an old shoebox into a magical movie theatre.
So go ahead, dust off your old shoeboxes and see what kind of wonders you can create. Who knows, you might just discover that the best things in life really do come in small packages.”
FAQs
What is a shoebox projector and how does it work?
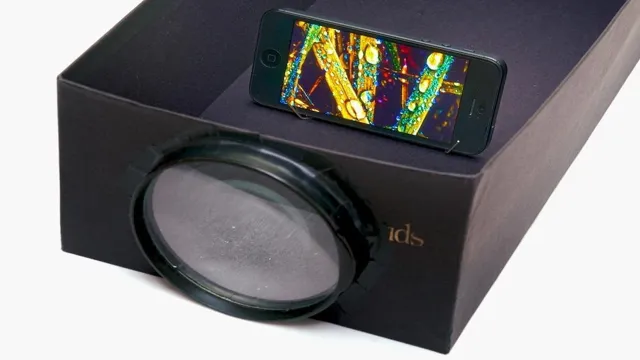
A shoebox projector is a simple DIY device that uses a shoebox, a magnifying glass, and a smartphone to project images onto a wall. The magnifying glass acts as the projector lens and the smartphone displays the image. The image is upside down but can be corrected by adjusting the distance between the phone and the lens.
What materials are needed to make a shoebox projector?
To make a shoebox projector, you will need a shoebox, a magnifying glass, tape, a pen or pencil, a ruler, scissors, and a smartphone.
Can any smartphone be used to make a shoebox projector?
Yes, any smartphone with a built-in flashlight feature can be used to make a shoebox projector.
What are the advantages of using a shoebox projector?
The advantages of using a shoebox projector are that it is a low-cost option for projecting images and videos onto a larger screen, it is portable and easy to carry, and it is a fun and creative DIY project that anyone can try.