
Have you ever tried connecting your laptop or computer to a projector only to find out that the display isn’t showing up as it should? You’re not alone! Dealing with projectors can be tricky, especially when you need to duplicate the screen. But don’t fret. In this blog post, we’ll teach you the basics of duplicating your screen on a projector, so you can share your presentations, movies, or any other content with ease.
With a little know-how, you’ll be able to share your screen like a pro, impressing your audience and avoiding any embarrassing technical difficulties. So let’s dive in and learn how to duplicate screen on projector, step-by-step.
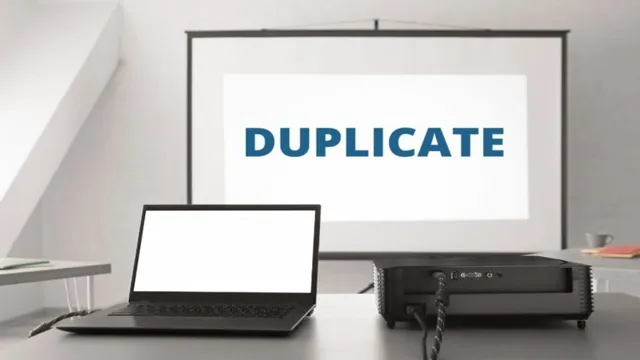
Connect Devices
Connecting your device to a projector can be an intimidating task, but it doesn’t have to be. If you want to duplicate your screen on a projector, the first step is to check if your device has an HDMI port. If it does, all you need is an HDMI cable to connect your device to the projector.
Once connected, your device should automatically detect the projector and duplicate the screen. If your device doesn’t have an HDMI port, you can use an adapter to connect to the projector. Many projectors also offer options for wireless connection, such as Bluetooth or Wi-Fi, which can be a convenient alternative.
Ultimately, duplicating your screen on a projector is a simple process that can make sharing your device’s content with a larger audience a breeze.
Check Cables & Ports
When it comes to setting up your devices, the first thing you need to check is your cables and ports. Having the right cables and ensuring they’re connected properly is crucial for your devices to function correctly. Make sure your cables are not frayed or damaged in any way, as this could lead to problems down the line.
Additionally, you need to ensure that your devices are connected to the right ports. Each cable is designed to fit into a specific port, so make sure you don’t force anything into the wrong one. If you’re unsure, consult your device’s manual or seek advice from a professional.
Taking the time to check your cables and ports may seem like a hassle, but it can save you a lot of time and frustration in the long run, especially if your devices fail to work because of minor issues like bad cables or incorrect ports. Remember, a little prevention goes a long way!
Adjust Display Settings
When it comes to connecting devices to your display, it’s important to adjust your settings correctly to ensure optimal display quality. One of the first things you’ll want to do is check your graphics card to see what resolution it supports. Once you’ve determined the highest resolution, you can adjust your display settings accordingly.
This may involve adjusting your screen scaling, changing your refresh rate, or even adjusting the color temperature. Don’t forget to test your settings to make sure they’re working properly and providing the best viewing experience. By taking the time to adjust your display settings, you can ensure that your devices are connected properly and that your content is being displayed in the best possible way.
Choose Mirroring Option
If you want to duplicate your screen on a projector, you need to choose the appropriate mirroring option. There are different ways to do this depending on the device you are using. If you’re using a Windows computer, you can use the built-in screen mirroring feature called Miracast.
You can also use a cable to connect your computer to the projector. Mac users can use AirPlay to mirror their screens wirelessly or use a cable to connect to the projector. For mobile phone users, most devices have a built-in screen mirroring or casting function that you can use.
Alternatively, you can get a third-party casting device such as Chromecast to mirror your phone’s screen on the projector. By choosing the right mirroring option, you can easily duplicate your screen on the projector and enjoy your content on a bigger screen.
Windows 10 Mirroring
When it comes to mirroring your Windows 10, there are a few different options you can choose from. One popular choice is to use the built-in mirroring feature, which allows you to duplicate your computer screen onto another display. This is useful if you want to share your screen with others in a presentation or if you simply want to have a bigger display to work on.
Another option is to use a third-party software, which can give you more advanced features such as remote control and collaboration tools. However, it’s important to choose a trusted and reliable software to ensure the security of your data. No matter which option you choose, mirroring can enhance your computing experience and make it easier to collaborate with others.
So, pick the one that suits your needs and start mirroring!
MacOS Mirroring
If you’re a MacOS user who wants to share their screen with others, you’re in luck. MacOS offers a variety of mirroring options to suit your preferences and needs. To get started, simply choose the mirroring option that works best for you.
One option is AirPlay, which allows you to wirelessly mirror your MacOS device’s screen to an Apple TV or another AirPlay-enabled device. Simply select the AirPlay icon from the menu bar, choose your device, and voila – your screen is now mirrored. Another option is to use a cable to connect your MacOS device to a display or projector.
This can be done using an HDMI, Thunderbolt, or USB-C cable, depending on your device’s ports. Whatever mirroring option you choose, be sure to check that your display or device is compatible and that you have the necessary cables or adapters. With some quick setup, you’ll be screen sharing in no time.
iOS and Android Mirroring
When it comes to mirroring your iOS or Android device, there are a few different options to choose from. One popular method is to use Apple’s AirPlay for iOS or Google Cast for Android, which allow you to mirror your device’s screen onto a larger display, such as a TV. Another option is to use a third-party app such as Reflector or AirServer, which can also provide mirroring capabilities for both iOS and Android devices.
While both options have their advantages and disadvantages, the main keyword to keep in mind when choosing the right mirroring option is compatibility. Make sure that the device and platform you want to mirror from and to are compatible with the mirroring method you choose, and that you have a stable and reliable Wi-Fi network to ensure a smooth mirroring experience.
Troubleshooting Tips
Have you been struggling with duplicating your screen on a projector? Don’t worry; we’ve got you covered. First, ensure that your projector and computer are correctly connected via an HDMI or VGA cable. Once connected, simultaneously press the “Windows” + “P” button on your keyboard to bring up the “Project” menu.
From there, select “Duplicate” to display the same content on both your computer and projector screen. If you’re still having trouble duplicating the screen, try checking your display settings to make sure both screens are set at the same resolution. Another option is to update your display driver or try a different cable.
With these troubleshooting tips, you should be able to successfully duplicate your screen on a projector hassle-free.
Make Sure Devices are Compatible
When it comes to troubleshooting devices, compatibility should always be at the top of the list. It is essential to ensure that the devices you are using are compatible with each other before starting any project or assigning any task. For example, if you are planning to connect a printer to your computer, you must check if your computer has the necessary drivers installed to support the printer model you have.
Similarly, if you are using multiple devices such as a controller and a game console, you must check whether the controller is compatible with the specific console you own. Compatibility issues can cause severe problems, including malfunctions, data loss, and device failures, and it can be a frustrating experience altogether. Therefore, always double-checking the compatibility of your devices is a must, which will save you time, money and keep your frustration in check.
So, it is always better to be safe than sorry, and make sure that you have compatible devices before working on anything.
Check for Software Updates
One of the most common causes of software issues is outdated programs. If you’re experiencing crashes, errors, or glitches, the first thing you should do is check for software updates. Developers frequently release updates to fix bugs and add new features, so it’s essential to stay up-to-date with the latest versions.
It’s easy to forget to update your software, especially if you have several programs installed on your device. However, failing to do so could lead to security vulnerabilities or even data loss. With some programs, you can set automatic updates to ensure you never miss a crucial update.
If you’re still experiencing issues after updating your software, don’t panic. There are several other troubleshooting tips you can try to solve the problem. Checking for outdated software is just the first step in the process.
By taking the time to keep your programs updated, you could save yourself from more significant headaches down the road.
Enjoy Your Dual Display
If you have a presentation or project that needs to be shown on both your computer and a projector, duplicating your screen is the perfect solution. By duplicating your screen, you can have the same display on both screens which can make your presentation more accessible and engaging for everyone. To duplicate your screen on a projector, you need to connect your computer to the projector using a cable.
Once you’ve connected the cable, you’ll need to go to the display settings on your computer and select the option to duplicate your screen. This will ensure that both screens show the same image simultaneously. By following these steps, you’ll be able to enjoy your dual display and make your presentations more accessible and engaging for your audience.
Conclusion
Now that you’ve learned how to duplicate your screen on a projector, you’ll never have to struggle with presentations or movie nights again! By following these simple steps, you’ll be able to effortlessly showcase your content in high definition on a big screen. Whether it’s work or play, duplicating your screen on a projector will certainly elevate your experience and leave a lasting impression on your audience. So go forth, and duplicate away!”
FAQs
What is screen duplication on a projector?
Screen duplication on a projector is when you display the content of your computer or other device on the projector screen, replicating exactly what is on your device screen.
How do I duplicate my screen on a projector?
To duplicate your screen on a projector, you can use the “Duplicate” or “Mirroring” function on your device or connect directly to the projector using an HDMI or VGA cable.
Can I duplicate my screen on a projector wirelessly?
Yes, you can use a wireless screen mirroring device such as Chromecast, Apple TV or Miracast to duplicate your screen on a projector.
What are the benefits of duplicating my screen on a projector?
Duplicating your screen on a projector allows you to share your computer screen or other content with a larger audience. It is useful in meetings, presentations, and classes where multiple people need to view something simultaneously.