
Is the white VGA light on your motherboard giving you a headache? You’re not alone. Many PC users have reported experiencing this issue, and it can be frustrating. If you’re not sure what’s causing it, or how to fix it, don’t worry.
We’re here to help. First of all, why is the white VGA light on your motherboard even there? This light is an indication that there is a problem with your graphics card. It could be a compatibility issue, a power supply problem, or a faulty GPU.
Whatever the cause, the white VGA light is a warning sign that something is not right. So, what can you do to fix it? There are a few things you can try, depending on the root cause of the problem. First, check your graphics card’s compatibility with your motherboard.
Make sure they work together seamlessly. Next, ensure that your power supply unit is supplying enough power to your GPU. Finally, try replacing your graphics card if none of the above solutions work.
Don’t worry if you’re not tech-savvy. We’ve got a step-by-step guide that will help you navigate through this problem. So, sit back, relax, and let’s get started on fixing that white VGA light on your motherboard.
Check VGA connection
If you’re experiencing the frustrating white VGA light on your motherboard, don’t be too alarmed! This issue is common and fixable. First, check your VGA connection. Make sure it’s properly plugged in and securely fastened.
It may seem basic, but sometimes the simplest solution is the best. If your connection is loose, try reseating the VGA cable. It’s also helpful to check the display on your monitor.
Make sure it’s turned on and operating correctly. If you’ve checked both the VGA connection and monitor display and are still experiencing the white VGA light, there may be an issue with your graphics card. At this point, it’s best to consult a professional or seek additional support from your motherboard or graphics card manufacturer.
By taking these steps, you’ll be well on your way to fixing the white VGA light and getting your computer back up and running smoothly.
Make sure VGA cables are properly connected to the motherboard and GPU.
When it comes to setting up a new computer or upgrading an old one, VGA cables are an essential component that must be properly connected to ensure optimal performance. One of the most common issues that can occur is a loose or improperly connected VGA cable to the motherboard and GPU. This can lead to a wide range of problems, including distorted or blurred images, no display, or even a completely unresponsive screen.
To avoid these frustrating problems, it’s important to double-check your VGA connection and ensure that it is tightly secured in the proper port on both the motherboard and GPU. By doing so, you can ensure that your display is crystal clear and everything runs as smoothly as possible. Remember, a well-connected VGA cable is key to getting the most out of your computer’s performance.
Remove and reinsert VGA cables to ensure proper connection.
If you’re experiencing issues with your computer’s display, it may be worth checking the VGA connection. Sometimes VGA cables can become loose, causing the signal to drop out and leaving you with a blank screen. To remedy this, try removing and reinserting the VGA cables to ensure a proper connection.
It’s also a good idea to check that the pins on the VGA connector are clean and straight. A dirty or bent pin could cause issues with the signal and lead to display problems. By checking and adjusting your VGA connection, you can avoid frustrating display issues and ensure that your computer’s display functions properly.
So, if you’re ever faced with a blank screen or poor picture quality, start by taking a look at your VGA connection and give it a little wiggle – it might just be the solution you need.
Check hardware compatibility
If you’re seeing a white VGA light on your motherboard, it could indicate that there’s an issue with your graphics card or its compatibility with your system. The first step is to check if your graphics card is seated properly in its slot. If it’s not seated correctly, you’ll need to reseat it and ensure that it’s secured firmly.
Another potential cause for this issue is hardware compatibility. Check to see if your graphics card is compatible with your motherboard and power supply. You can do this by checking the specifications for each component and ensuring that they match.
If they aren’t compatible, you’ll need to replace one or both. If you’re still experiencing the white VGA light issue, you may need to update your graphics card drivers or BIOS. Check the manufacturer’s website for the latest drivers and firmware updates, and install them as needed.
It’s important to note that the white VGA light could also indicate other issues, such as a faulty graphics card or a problem with the motherboard itself. If you’ve tried all of the above solutions and are still experiencing the issue, it’s best to consult a professional for further assistance.
Ensure VGA card and motherboard are compatible.
Compatibility, VGA card, motherboard. When building a computer, it is important to ensure that all the hardware components are compatible with each other. The VGA card and motherboard are two crucial components that must be checked for compatibility.
It is essential to research and match the specifications of the VGA card to the motherboard’s specifications before purchasing. One way to do this is by checking the motherboard’s manual or manufacturer’s website for a list of supported VGA cards. Another important factor to consider is the power supply requirements of the VGA card, as it must be supported by the motherboard’s power supply unit.
If the VGA card’s power requirements are not met, the system may not function properly, or it may not work at all.Taking the time to ensure compatibility can save time, money, and avoid frustration later on. So don’t forget to check the compatibility before making your hardware purchase decision.
Check if VGA card requires additional power or PCIe slot.
When upgrading your graphics card, it’s crucial to check for hardware compatibility. One essential factor to consider is whether your VGA card requires additional power or a PCIe slot. Some powerful graphics cards require more power than can be supplied by the PCIe slot alone, and therefore, an additional connection to your power supply is necessary.
To avoid any complications, make sure your power supply can handle the extra power requirements of your VGA card. Additionally, ensure that your motherboard has an available PCIe slot that’s compatible with your VGA card. Checking your VGA card’s compatibility can save you time and money and prevent any potentially expensive hardware malfunctions down the line.
Don’t forget, upgrading your graphics card can significantly improve your computer’s performance, but make sure to consult your computer’s manual and do your research to ensure a smooth installation process.
Consider updating BIOS or VGA drivers.
When it comes to upgrading or building a PC, it’s essential to check hardware compatibility before making any purchases. Incompatibility issues can cause numerous problems, from random crashes to complete system failure. One way to ensure compatibility is to check the motherboard and component manufacturers’ websites for compatibility lists.
Additionally, it’s a good idea to consider updating BIOS or VGA drivers. These updates can help resolve compatibility issues and improve system stability. BIOS updates can fix bugs and improve system performance, while VGA drivers updates can enhance graphics capabilities, making your PC run smoothly.
So, before you invest in new hardware components, take some time to research and ensure that they are compatible with your motherboard and system specs. It will save you time and money in the long run and ensure that your PC runs smoothly without any issues. Keyword: hardware compatibility, BIOS, VGA drivers
Inspect motherboard for issues
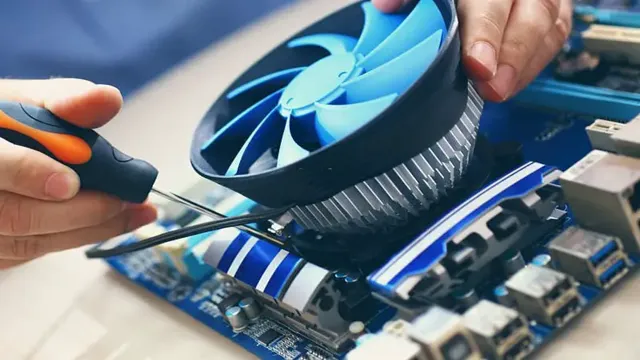
If you’re seeing a white VGA light on your motherboard, it’s a good sign that there’s a hardware issue. The first thing you should do is inspect the motherboard for any visible damage or loose connections. Carefully check all the components attached to your board, like the CPU, RAM, and graphics card.
Make sure everything is securely plugged in, and look for any signs of physical damage, like cracks or burn marks. If you don’t see any obvious issues, you can try resetting the CMOS on your motherboard. To do this, you’ll need to remove the battery from the board and leave it out for a few minutes before putting it back in.
If neither of these steps work, you may need to consult a professional or replace the motherboard altogether. Don’t ignore a white VGA light – it’s a sign that something isn’t working correctly, and addressing the issue quickly can save you from more extensive damage down the line.
Look for physical damage such as cracks or burns.
When it comes to fixing your computer, one of the first things you should check is the motherboard. This is the central hub of your computer that connects all the other components. Inspecting the motherboard for any issues is crucial to ensuring the smooth running of your system.
One common problem is physical damage, such as cracks or burns on the board. These can be caused by power surges or other external factors, and can cause your computer to malfunction or even stop working altogether. Therefore, it’s important to carefully examine the motherboard to check for any signs of damage.
If you do find any physical damage on the motherboard, you should take action immediately. This could involve replacing the motherboard entirely or repairing the damaged area, depending on the extent of the damage. However, it’s important to note that attempting to fix the motherboard on your own can be risky, as it involves delicate components that require specific knowledge and tools.
It might be best to take your computer to a professional repair service to get the problem fixed safely and effectively. In summary, inspecting your computer’s motherboard for physical damage such as cracks or burns is an important step in maintaining a healthy system. By identifying and addressing any issues early on, you can prevent your computer from malfunctioning or stopping working altogether.
With a little bit of care and attention, you can ensure that your computer is running smoothly and reliably for years to come.
Check for loose or damaged components.
Checking your motherboard for issues is an important step in ensuring the proper functioning of your computer. One common issue to check for is loose or damaged components. This can include loose RAM modules, improperly seated graphics cards, or damaged capacitors.
Before inspecting your motherboard, make sure to power off and unplug your computer to avoid electrical shock. Once your computer is unplugged, remove the side panel to access the motherboard. Take a close look at all the components and ensure that everything is properly connected and secured.
Check for any visible damage, such as cracks or burns on the motherboard or components. If you notice any loose or damaged components, it’s important to fix the issue before powering on your computer again. Loose components can cause your computer to malfunction or even fail to boot, while damaged components can cause electrical shorts or fires.
In some cases, you may need to replace a damaged component, such as a RAM module or capacitor. If you’re not comfortable doing this yourself, it’s best to take your computer to a professional for repair. By regularly checking your computer’s components, you can prevent issues from arising and ensure that your computer runs smoothly and reliably.
So, take the time to inspect your motherboard and keep your computer in top condition.
Get professional help if needed
If you’re facing a white VGA light on your motherboard, don’t panic. The first step is to check for any loose connections or damaged cables. If everything looks fine, then it might be a hardware issue that requires professional help.
It’s always better to get an expert opinion to avoid causing further damage to your system. Don’t try to fix it on your own unless you have the appropriate knowledge and experience. The white VGA light can indicate various problems, ranging from faulty GPUs, power supplies, or even the motherboard itself.
So, it’s crucial to get the problem diagnosed correctly to fix it. Avoid procrastination and contact a professional service to get your system checked today. Remember, it’s better to be safe than sorry!
Conclusion
In conclusion, if you’re stuck with a white VGA light on your motherboard, fear not! Just like a skilled mechanic can fix a broken engine, you too can fix this pesky light. Begin by reseating your GPU and checking for any loose connections. If that doesn’t work, dust off your troubleshooting skills and try testing with a different cable or even a different monitor.
And if all else fails, don’t panic – there’s always the option of seeking professional help. Remember, a little determination and some technical know-how can go a long way in solving tech problems!”
FAQs
What does a white VGA light on the motherboard indicate?
The white VGA light on the motherboard usually indicates a problem with the graphics card or its connection.
How do I diagnose the cause of the white VGA light on my motherboard?
First, make sure that your graphics card is seated properly in its slot. If that doesn’t work, try reseating it or using a different slot. You should also check that the power cable connected to the graphics card is securely attached. If none of these solutions work, the issue may be with the graphics card itself.
Can a faulty graphics card cause the white VGA light to appear on the motherboard?
Yes, a faulty graphics card can cause the white VGA light to appear. The card may be damaged, overheating, or simply incompatible with your system.
How can I fix the white VGA light on my motherboard?
Depending on the cause of the problem, you may need to replace the graphics card, update your BIOS, or adjust your system’s settings. If you’re unsure of what to do, it’s best to consult with a professional or the manufacturer’s support team for guidance.