Have you ever come across a white VGA light on your motherboard? It’s a common issue that can be frustrating and confusing, especially if you’re not sure what it means or how to fix it. Fortunately, there are a few steps you can take to troubleshoot and resolve this issue, and in this blog, we will dive into everything you need to know about fixing the white VGA light on your motherboard. The VGA light is an indicator that detects any issues between the graphics card and the motherboard.
If there is any problem in communicating between these two components, the VGA light usually turns on. This issue can arise due to several aspects such as overheating, cable connection problem, incompatible GPU, or outdated BIOS. In this blog, we will explain the possible reasons for the white VGA light, discuss the things you should check, and guide you through the practical solutions to resolve this problem.
We will also cover some additional tips to help you avoid this issue in the future. So, whether you are a gamer, a PC enthusiast, or just someone encountering this issue, this blog will help guide you through the troubleshooting process and get your computer up and running again. Let’s dive in!
Check Connections
Are you facing the frustration of the white VGA light on your motherboard? Don’t worry, as this issue can be resolved with a few simple troubleshooting steps. First, ensure that all cables are securely connected to your motherboard and graphics card. Any loose connection can cause the VGA light to turn on.
Next, check if your monitor is connected correctly and is functioning correctly. If your monitor is faulty, it can affect the display and cause the white VGA light to turn on. Lastly, ensure that your graphics card is installed correctly and is compatible with your motherboard.
Upgrading your graphics card can also fix this issue. By following these troubleshooting steps, you can quickly rid yourself of the annoyance of the white VGA light on your motherboard.
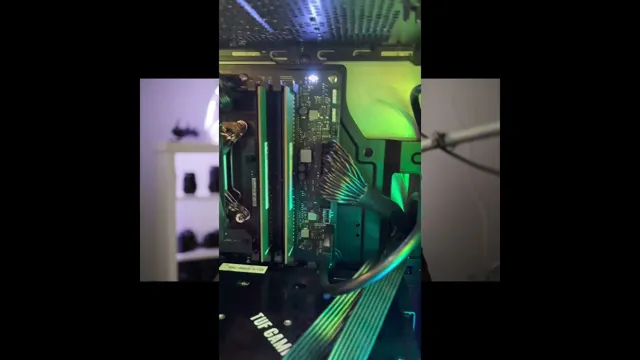
Reseat VGA Card
Reseating the VGA card can help fix issues related to low or no display, distorted display, or frequent crashing of the system. In order to reseat the VGA card, you need to first identify the slot where it is placed. Turn off the computer and unplug it from the power source.
Open the CPU cabinet and locate the VGA card. Gently remove the card from the slot, making sure not to touch the metal connectors. Check for any signs of damage or dust and clean if necessary.
Now, reinsert the card properly into the slot until you feel it click into place. Make sure the VGA card is tightly secured in the slot and then close the CPU cabinet. Connect the monitor to the VGA port and turn on the computer.
If the issue was related to improper or loose connections, it should be resolved now. It is important to remember to follow correct procedures while removing and inserting the VGA card and consult a professional if you are not comfortable doing it yourself.
Verify Cable Connections
If you’re experiencing connectivity issues with your devices, the first thing to verify is your cable connections. Loose or improperly connected cables are a common problem and can lead to slow speeds, network dropouts, or even complete connectivity failures. Start by checking the ends of your cables to ensure they’re fully seated in their respective ports.
If they appear loose, gently push them back in until you hear a clicking sound. If this doesn’t solve the problem, try using a different cable or connecting to a different port. This can help narrow down the source of the issue.
Remember, a chain is only as strong as its weakest link, and the same applies to your network. Every component needs to function seamlessly for optimal performance. So, check your cable connections regularly to avoid any possible issues and enjoy a smooth, uninterrupted connection.
Reset BIOS Settings
If you are getting a white VGA light on your motherboard, it’s an indication that something is not right with your BIOS settings. But don’t worry, it’s usually a problem that can be fixed with a simple reset. To begin, turn off your computer and unplug the power cord from the wall.
Next, locate the CMOS battery on your motherboard and remove it. Leave it out for about five minutes, then reinstall it. Turn your computer back on, and check to see if the white VGA light is still on.
If it is, you might need to update your BIOS firmware or look into other hardware issues. But most of the time, a simple reset will do the trick and get your motherboard back up and running smoothly again.
Enter BIOS Menu
If you’ve been experiencing issues with your computer’s performance, resetting the BIOS settings may help resolve the problem. But before you can reset the settings, you’ll need to enter the BIOS menu. To do this, restart your computer and look for the key that will take you to the BIOS setup screen.
This key varies depending on your computer’s make and model, but commonly used keys include F2, F10, and Delete. Press the necessary key repeatedly as soon as your computer begins to boot up. Once you’ve entered the BIOS menu, look for the option to reset the settings to their defaults.
This may also be labeled as “Load Setup Defaults” or “Reset to Optimal Defaults.” Select this option, save the changes, and exit the BIOS menu. Your computer will then restart with the default BIOS settings.
This can help resolve any performance issues you were experiencing and get your computer running smoothly again.
Load Default Settings
Resetting BIOS settings to default can be a helpful solution for many computer problems. This process involves clearing all custom settings on the motherboard, such as overclocking settings or boot configurations, and reverting them to the manufacturer’s default values. Some common reasons for resetting BIOS settings include stability issues, compatibility problems, or just wanting to start fresh.
Fortunately, this process is relatively straightforward and can usually be done through the BIOS menu or by physically resetting the CMOS jumper on the motherboard. Just be aware that resetting the BIOS will erase any custom settings you may have, so make sure to document them before attempting this process. With some patience and caution, resetting BIOS settings can be a quick and effective solution to getting your computer running smoothly again.
Check Power Supply
If you’re experiencing a white VGA light on your motherboard, it could be a sign of a power supply issue. The first step to fixing this problem is to check your power supply. Make sure that the power supply is properly plugged in and that all cords are connected securely.
If you’ve recently made any changes to your computer’s hardware, make sure that your power supply is capable of handling the new components. You can also try resetting your power supply by unplugging it from the wall and letting it sit for a few minutes before plugging it back in. If none of these solutions work, it may be time to consider replacing your power supply altogether.
Remember, a faulty power supply can cause serious damage to your computer, so it’s always important to make sure that it is working correctly.
PSU Voltage Check
One important thing to consider when it comes to your computer’s health is the power supply unit (PSU). A faulty PSU can cause serious damage to your entire system, so it’s essential to perform regular voltage checks. Checking the voltage of your PSU ensures that it’s delivering the right amount of power to your components, preventing any potential issues like overheating, crashes, or hard drive failures.
It’s a simple process that involves using a multimeter to measure the voltage output. You can begin by turning off your computer, disconnecting it from the power source, and then opening the case to locate the PSU. Then, connect the multimeter to the PSU and switch it back on, taking note of the voltage readings.
If the readings are within the acceptable range, then your PSU is likely functioning correctly. However, if the voltage is outside the normal range, your PSU may need to be replaced. Remember, keeping your PSU healthy ensures a stable and reliable computer system.
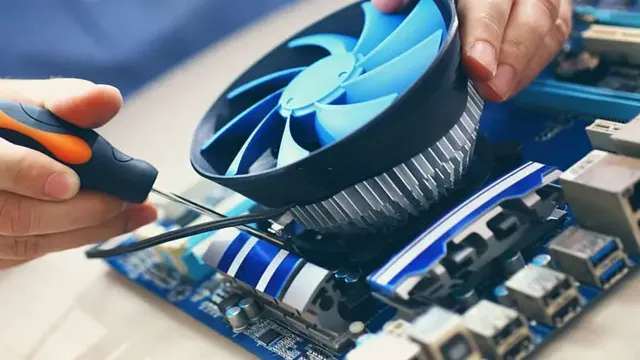
VGA Card Replacement
If you’re experiencing a white VGA light on your motherboard, it can be a symptom of a faulty or malfunctioning VGA card. Thankfully, replacing the VGA card is a relatively simple process that can fix the issue. First off, shut down your computer and disconnect all of the cables.
Open up your computer case and locate the VGA card, which is usually situated in an expansion slot on the motherboard. Remove the VGA card by gently pulling it out of the slot, being careful not to apply too much force. In the meantime, you can order a replacement VGA card online or purchase one at your local computer store.
Make sure the new card is compatible with your motherboard. Once you have the new card, insert it into the same slot where you removed the old one. Secure it in place with a screw or latch and reconnect all of the cables.
Restart your computer and verify if the white VGA light has disappeared. If so, you’ve fixed the issue and your computer should be running smoothly again.
Potential Issues
If you’re experiencing issues with your VGA card, it may be time for a replacement. One potential issue is a decrease in performance, which can be caused by overheating or simply outdated technology. Another issue to look out for is artifacting, which occurs when there are abnormalities in the images being displayed.
This is often a sign that your VGA card is failing and needs to be replaced. Be sure to check your system requirements before purchasing a new VGA card to ensure compatibility. Upgrading to a newer model can significantly improve your overall system performance and make for a smoother and more enjoyable gaming experience.
Consider choosing a card with a higher VRAM, as this can also help prevent future issues and ensure optimal performance for years to come.
Replacing the VGA Card
Replacing a VGA card is a task that can make your old computer feel brand new again. If you’re a gamer or work with graphic-intensive applications, switching to a new high-performance video card can make all the difference in your system’s speed and responsiveness. The VGA card, also known as a graphics processing unit (GPU), is the component responsible for generating and displaying images on your screen.
Over time, old VGA cards can become outdated, leading to slower system performance and even rendering some modern applications and games unusable. But with a new VGA card, you can upgrade your system’s graphics capability and unlock immense power for your personal and professional needs. Making the switch isn’t difficult, but it does require a bit of technical know-how, so be prepared to open up your computer case and work with some sensitive components.
Keyphrase: VGA Card Replacement
Get Professional Help
If you’re experiencing the frustrating issue of a white VGA light on your motherboard, it’s understandable that you might feel at a loss for how to fix it. The good news is that you don’t have to tackle the problem alone. Getting professional help from trained technicians can alleviate the stress and uncertainty of dealing with a technical issue like this.
Experts have the knowledge and experience to diagnose and troubleshoot the root of the problem, so you don’t have to spend hours researching and potentially causing more harm. Plus, many repair services offer guarantees on their work, giving you peace of mind in case the issue resurfaces down the line. So, don’t fret about that pesky white light any longer- reach out to professionals for effective and efficient solutions.
Conclusion
In conclusion, fixing the white VGA light on your motherboard is like solving a puzzle – it requires patience and attention to detail. Before you start, make sure all your connections are secure and check your graphics card for any damage or loose components. If everything is in good condition, try updating your drivers or adjusting your BIOS settings.
Remember, the white VGA light is not an insurmountable obstacle – with a little bit of troubleshooting know-how, you can get your system running smoothly again in no time.”
FAQs
What does a white VGA light on the motherboard indicate?
A white VGA light on the motherboard indicates that there is an issue with the graphics card or its connection to the motherboard.
How do I fix a white VGA light on the motherboard?
First, try reseating the graphics card in its slot and check if the cables are properly connected. If that doesn’t work, try updating the drivers or replacing the graphics card altogether.
Can a faulty power supply cause the white VGA light to appear on the motherboard?
Yes, a faulty power supply can cause the white VGA light to appear on the motherboard as it is unable to deliver enough power to the graphics card.
Is a white VGA light on the motherboard fixable?
Yes, a white VGA light on the motherboard is usually fixable by properly diagnosing the issue and taking appropriate corrective measures such as reseating the graphics card or updating the drivers. However, if the issue is with the graphics card itself, it may need to be replaced.