If you’re looking to connect your computer to your TV or monitor, you may be wondering how to enable HDMI on your motherboard. Luckily, the process is not as complicated as it may seem! HDMI (High-Definition Multimedia Interface) is a common method for transmitting high-quality audio and video signals from one device to another, and by enabling it on your motherboard, you can enjoy your favorite movies, TV shows, and games on a larger screen. In this beginner’s guide, we’ll walk you through the steps to enable HDMI on your motherboard and get you up and running in no time.
So sit back, grab a cup of coffee, and let’s get started!
Check Compatibility
If you’re looking to connect your computer to a monitor or TV, one option is to enable your motherboard HDMI port. However, before you start, it’s important to ensure that your motherboard is compatible with HDMI. You can check this by looking up the specifications of your motherboard model on the manufacturer’s website.
If your motherboard does support HDMI, the next step is to ensure that the video drivers for your motherboard are up to date. This can typically be done on the manufacturer’s website as well, or through your computer’s device manager. Once your drivers are up to date, you should be able to enable the HDMI port in your computer’s settings.
Keep in mind that if your motherboard does not support HDMI, you may need to look into alternative options for connecting to a monitor or TV, such as using a dedicated graphics card.
Determine Your Motherboard’s HDMI Capability
When it comes to determining your motherboard’s HDMI capability, it’s important to consider compatibility. Not all motherboards are created equal, and some may not support HDMI at all. The first step in checking compatibility is to consult your motherboard’s manual or the manufacturer’s website for specifications.
Look for HDMI support under the “Features” or “Expansion Slots” section. If your motherboard does support HDMI, it may come with a built-in HDMI port, or you may need to purchase a separate HDMI adapter. It’s also important to note that not all HDMI ports are created equal, with some supporting higher resolutions and refresh rates than others.
Be sure to double-check the specifications of both your motherboard and any potential HDMI adapters or cables to ensure optimal compatibility and performance. By doing so, you can enjoy high-quality visual output on your monitor or other HDMI-enabled devices.
Ensure Compatible CPU and GPU
When building a PC, it’s important to make sure that your CPU and GPU are compatible with each other. This means that they need to work well together in order to give you the best performance possible. The easiest way to check compatibility is to look at the socket type on your motherboard.
The socket type will tell you what type of CPU you need to get in order to fit onto your motherboard. Similarly, you need to make sure that your GPU is compatible with your motherboard’s PCIe slot. Checking compatibility may seem like a small step, but it can save you a lot of headaches down the road.
So before you make any purchases, make sure you check the compatibility of your CPU and GPU!
Update Drivers and BIOS
If you’re struggling to enable HDMI on your motherboard, the solution might be as simple as updating your drivers and BIOS. Many motherboard manufacturers release regular updates that address technical issues, including HDMI connectivity. These updates can be downloaded from the manufacturer’s website and installed easily on your computer.
It’s important to keep your drivers and BIOS updated regularly to ensure optimal performance and avoid compatibility issues with other hardware devices. Additionally, some motherboards have a specific BIOS setting that needs to be enabled to activate HDMI output. Check your motherboard manual or contact their customer support for guidance on how to access and enable this setting.
Don’t let a small issue like HDMI connectivity hold you back from fully enjoying your computer’s performance – try updating your drivers and BIOS today!
Download Latest Drivers
Keeping your computer’s drivers and BIOS up-to-date is essential for optimal performance and compatibility with the latest software and hardware. Outdated drivers can cause stuttering, lag, and even crashes, while updating your BIOS can improve stability and unlock new features. Thankfully, downloading the latest drivers and BIOS updates is easier than you might think.
Most manufacturers provide downloadable software that scans your system and downloads the necessary updates automatically. Alternatively, you can manually download the latest drivers and BIOS from the manufacturer’s website. It’s important to note that updating your BIOS is a delicate process that should be approached with caution.
Incorrectly flashing your BIOS can severely damage your system, so be sure to follow the manufacturer’s instructions carefully. By keeping your drivers and BIOS up-to-date, you can ensure a smoother computing experience with fewer bugs and fewer compatibility issues.
Update BIOS
Updating drivers and BIOS is a crucial part of maintaining your computer’s performance. BIOS (Basic Input/Output System) is responsible for booting up your system and managing hardware components, while drivers are software programs that communicate with the hardware. Over time, manufacturers release updates to the BIOS and drivers to improve functionality and fix bugs.
Updating the BIOS can also enhance the stability and security of your system. However, it’s crucial to follow the manufacturer’s instructions carefully and ensure that you download the correct BIOS version for your system. It’s also essential to update drivers regularly, as outdated drivers can cause issues like crashes, slow performance, or problems with connected hardware.
You can manually update your drivers by going to the manufacturer’s website or using driver update software. By keeping your drivers and BIOS up to date, you can keep your system running smoothly and mitigate any potential issues.
Configure BIOS Settings
When it comes to optimizing your computer’s performance, updating drivers and BIOS settings are essential steps that you should take. The BIOS, or Basic Input Output System, is firmware that is installed on your computer’s motherboard, which controls the communication between your computer’s hardware components. Updating the BIOS settings can help resolve issues that may arise due to old or outdated firmware.
It can also unlock new features or improve system stability. You can access BIOS settings by pressing a specific key, such as F2 or Delete, during system startup. However, be cautious when making changes to BIOS settings, as incorrect settings can cause serious issues.
It’s best to check online for specific instructions or reach out to the manufacturer for assistance. Similarly, outdated drivers can cause system errors, crashes, and can slow your computer down. Be sure to check regularly for updates for your device’s drivers, including graphics card, sound card, and network adapters.
Keeping your system updated can help ensure that you are getting the most out of your computer.
Connect HDMI Cable
Enabling your motherboard’s HDMI is a simple process that can offer a range of benefits, including improved screen resolution and enhanced multimedia capabilities. Firstly, you’ll need a suitable HDMI cable to connect your motherboard and your display device. Once you’ve located the HDMI port on your motherboard, make sure that it’s fully accessible and clear of any obstructions.
Then, connect one end of the HDMI cable to this port and the other end to your display device. After that, you’ll need to adjust your display settings to ensure that your screen recognizes the new input source. This can typically be done through your computer’s system preferences or display settings.
With just a few easy steps, you can easily enable your motherboard’s HDMI and enjoy a range of new features and capabilities.
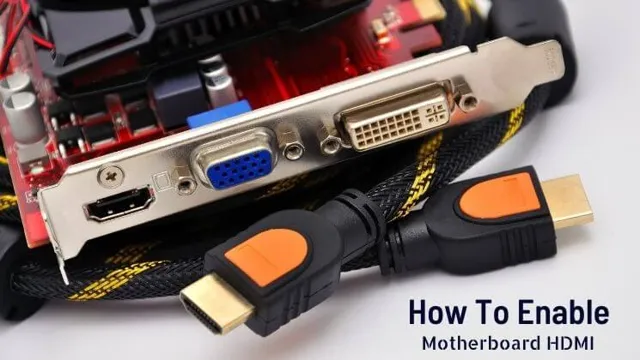
Locate HDMI Port on Your Motherboard
Connecting your motherboard to a monitor via HDMI is a simple process once you know where to look. To locate your HDMI port, you’ll need to check the back of your computer where your graphics card is mounted. On most motherboards, you’ll find the HDMI port near other video outputs like VGA or DVI.
If you’re having trouble locating it, be sure to consult your motherboard manual which will have all the information you need including where your HDMI port is located. Once you’ve found it, connecting your HDMI cable is easy. Simply plug one end of the HDMI cable into your motherboard port, and the other end into your monitor’s HDMI input.
And that’s it! Your computer should automatically detect the new connection and configure your display settings accordingly. So if you’re looking to enjoy high-quality visuals on the big screen, now you know how to connect your motherboard to your monitor via HDMI.
Connect HDMI Cable from Motherboard to Display
When it comes to setting up a computer, one of the most important steps is connecting the HDMI cable from the motherboard to the display. This cable is responsible for transmitting the video signal from your computer to your monitor or TV, and it’s essential for a high-quality picture. To do this, first, locate the HDMI port on your motherboard.
It’s usually found near the other ports, such as USB, Ethernet, and audio. Once you have located it, attach one end of your HDMI cable to the motherboard’s HDMI port and the other end to your display’s HDMI port. If your display has multiple HDMI ports, make sure you choose the correct one.
Finally, turn on your computer and display, and make sure your display is set to use the HDMI port as its input source. Voilà! You should now be able to enjoy a clear and crisp picture on your screen. So, if you want to get the best out of your computer, connecting the HDMI cable from your motherboard to your display is a crucial step to take.
Troubleshoot Common Issues
If you’re having trouble enabling your motherboard HDMI port, there are a few things you can check. First, make sure that your graphics card is properly installed and connected. If you’re using integrated graphics, check to see if there are any BIOS settings that need to be adjusted.
Additionally, you may need to update your graphics drivers or adjust your display settings. It’s also possible that your HDMI cable is faulty, so try using a different cable to see if that solves the problem. If you’ve tried all of these steps and you’re still having issues, you may need to consult with a professional or contact the manufacturer for assistance.
By troubleshooting these common issues, you can make sure that your motherboard HDMI port is functioning properly and enjoy your content without any interruptions.
No Display on Monitor
If you’re encountering a situation where there’s no display on your monitor, then there might be some underlying issues causing this problem. One of the most common and obvious reasons is a loose or damaged video cable that connects the monitor to the CPU. Make sure the cable is secured in the ports of both devices.
Another solution could be to check if your monitor is receiving power, and that it’s properly turned on. You can also try restarting your computer or pressing the Windows key + P, which allows you to toggle displays if you have more than one monitor connected. If everything fails, it might be a hardware issue that needs professional help.
The key here is to identify the source of the problem, and then troubleshoot accordingly to fix it.
Audio not Working
Audio not working can be a frustrating problem for anyone trying to enjoy their favorite tunes or watch a movie. But don’t worry; there are a few things you can do to troubleshoot common issues. First, check that your speakers or headphones are properly plugged in and turned on.
Also, ensure that the volume is turned up and not muted. If these simple solutions don’t work, try updating your audio drivers or checking for any hardware issues that may be causing the problem. It’s also worth checking your sound settings on your computer or device to ensure that it’s set up correctly.
By following these steps, you should be able to get your audio working again in no time.
Unsupported Resolution or Refresh Rate
If you’ve ever tried adjusting your computer’s display settings, but encountered an error message stating that your chosen resolution or refresh rate is unsupported, it can be a bit frustrating. However, this issue is not entirely uncommon, and there are some things you can do to troubleshoot the problem. A likely reason for this error is that your graphics card or monitor isn’t capable of displaying the resolution or refresh rate you’ve selected.
One solution would be to choose a lower resolution or refresh rate, as these settings are often the safest options. Alternatively, updating your graphics card driver or firmware may help resolve the issue and expand the resolution and refresh rate options available to you. Remember, a supported resolution and refresh rate will give you a better viewing experience, so it’s worth taking the time to investigate and find a resolution.
Conclusion
And there you have it, dear reader! By following these easy steps, you can unleash the full potential of your motherboard’s HDMI capabilities. No more fumbling with countless cables or settling for subpar display quality. You can now enjoy the glory of high definition video and pristine sound with ease.
So, what are you waiting for? Go forth and embrace the HDMI glory that awaits you!”
FAQs
What are the minimum system requirements for enabling HDMI on the motherboard?
To enable HDMI on the motherboard, your system should have a compatible motherboard with an HDMI port, a processor with integrated graphics, and supporting drivers installed.
How can I enable HDMI on my motherboard?
Firstly, check if your motherboard has an HDMI port. If it does, connect your HDMI cable to the port and your monitor. Then, reboot your computer and enter the BIOS settings to enable the onboard graphics.
How do I update the graphics driver on my motherboard for enabling HDMI?
You can update the graphics driver on your motherboard either manually or automatically. To update the driver manually, download the latest version of the driver from the manufacturer’s website and install it. For automatic updates, use software like Driver Booster to scan and update outdated drivers automatically.
What should I check if enabling HDMI on the motherboard is not working?
Firstly, check if the HDMI cable is working correctly. If it is, ensure that your motherboard and processor support HDMI. Then, check if the onboard graphics are enabled and if the appropriate drivers are installed. If all troubleshooting measures fail, seek professional help.