Dead motherboard? Fret not! Troubleshooting and repairing your motherboard can be a challenging task, but with the right tools and techniques, anyone can do it. One such tool is the multimeter. In this blog post, we will teach you how to diagnose a motherboard with a multimeter, step by step.
Picture this scenario: You turn on your computer, but it doesn’t start up. The motherboard may be the root of the problem. Unfortunately, it’s not always easy to detect the issue without the proper tools.
This is where a multimeter comes in. Instead of squinting at wires and chips trying to locate the troublesome component, using a multimeter gives you a faster and more precise way to find the problem. We know that not everyone is an expert in electronics.
So, in this blog post, we’ll explain the basic principles of how multimeters work. We’ll also guide you through the process of diagnosing your motherboard with a multimeter. We’ll provide useful tips and tricks to help you measure voltage, resistance, and other factors that will help you determine the source of your motherboard’s issues.
By the end of this blog post, you’ll be ready to diagnose your motherboard using a multimeter like a pro. So why wait? Let’s get started!
Introduction
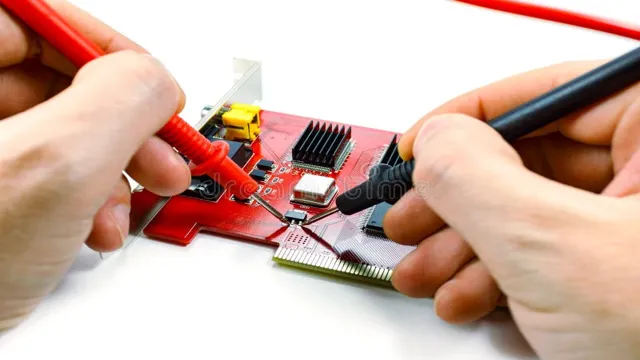
Diagnosing a faulty motherboard can be a daunting task, but it is necessary when your computer is not functioning properly. Multimeter, a tool used for measuring voltage, current, and resistance in electronic devices, can be very helpful in diagnosing a motherboard. First, you need to unplug the computer and remove the outer casing to access the motherboard.
Then, set your multimeter to DC voltage and touch the red probe to the positive end of the motherboard’s power connector and the black probe to the negative end. If the multimeter reads 12 volts, the power supply is working correctly. You can then test the voltage levels of other connectors and components on the motherboard, such as the CMOS battery and RAM slots.
If any of these readings are abnormal, it’s likely the specific component or connector is faulty and needs to be replaced. By using a multimeter, you can pinpoint the exact issue, saving you both time and money in the long run.
Why Diagnose with Multimeter?
As a newbie in electrical work, diagnosing any electrical issues can seem like an overwhelming task. This is where a multimeter becomes an essential tool for any electrical work. A multimeter is a versatile device that allows you to measure current, voltage, and resistance in electrical circuits.
Using a multimeter can help identify issues such as faulty wires, blown fuses, and other problems in your electrical system. Through its various functions, it can help you better understand the behavior and patterns of electrical circuits and components, assisting you in making more precise diagnoses. In this way, a multimeter can save you time and money by enabling you to pinpoint problems more quickly and accurately.
The importance of diagnosing with a multimeter cannot be overstated when it comes to dealing with electrical issues safely and effectively. By investing in a reliable multimeter and learning how to use it correctly, you’ll have more confidence in diagnosing electrical issues, allowing you to tackle electrical tasks with ease.

Tools and Equipment
Diagnosing a motherboard with a multimeter can be a useful way to identify issues with your computer hardware. To begin, you will need a multimeter and some basic knowledge of electronics. First, examine the motherboard for any physical damage, such as cracks or burn marks.
Next, test the power supply by measuring the voltage across the 12V, 5V, and 3V rails. If the readings are off, it may be a problem with the power supply or the motherboard’s power management circuitry.
You can also test the motherboard’s capacitors and resistors for proper values. In addition, troubleshoot the BIOS by measuring the voltage across certain pins to see if it is functioning correctly. Remember to exercise caution when using a multimeter and be mindful of static electricity to avoid damaging the motherboard.
By performing these tests, you can determine if your motherboard is the source of the problem and take appropriate steps to fix it.
Multimeter Basics
Multimeter Basics When it comes to electrical work, having the right tools and equipment is crucial to ensure safety and accuracy. One essential tool that every electrician should have in their arsenal is a multimeter. This handy device allows you to measure different electrical properties like voltage, current, and resistance, all in one compact package.
Operating a multimeter is relatively straightforward, but it’s important to read the instructions carefully and understand the basics before use. Some models include extra features like continuity testing, diode testing, and frequency measurement, so be sure to choose one that suits your needs. Remember to always keep your multimeter in good condition, and avoid using it on live circuits unless you’re properly trained and equipped.
With a little practice, a multimeter can be an invaluable tool for diagnosing electrical issues and ensuring that your circuits are functioning correctly.
Screwdriver
When it comes to home repair or DIY projects, having the right tools is crucial. One tool that should be in everyone’s toolbox is a screwdriver. A screwdriver comes in different shapes and sizes, and each one serves a specific purpose.
The most common types of screwdrivers are the flathead and Phillips. The flathead screwdriver is designed for slotted screws, whereas the Phillips screwdriver is designed for cross-head screws. It’s essential to use the correct screwdriver for the job to avoid damaging the screw or the surface it’s attached to.
Screwdrivers come with either a plastic or wooden handle. The handle provides a better grip and prevents slipping, making it easier to apply pressure while turning the screw. The metal shaft of the screwdriver has a tapered end with a flattened blade or a pointed tip that fits into the screw head.
A screwdriver’s length can also vary, with longer ones providing more torque and shorter ones being more maneuverable in tight spaces. Overall, having a screwdriver in your toolbox is essential, and it’s worth investing in a good quality set to ensure you have the right tool for the job. From fixing a loose doorknob to assembling furniture, a screwdriver is a versatile tool that can help you tackle any project around the home.
So the next time you need to tighten a screw, remember to use the right tool for the job and have a screwdriver handy.
Step-by-Step Process
If you suspect that your motherboard is not functioning properly, using a multimeter to diagnose any issues can be a useful tool. To start, ensure that your multimeter is set to measure continuity and resistance. First, remove the motherboard from the computer and lay it on a flat surface.
Locate the CPU power connector and insert one end of the multimeter’s positive probe into the corresponding pin while the negative probe touches a ground point on the motherboard. Next, test the RAM slots by inserting the positive probe into the center pin of each slot while also touching a ground point with the negative probe. If you get a reading of zero ohms, the slot is functioning correctly.
If there is no response, the slot may be damaged. Proceed to test the other connectors and components in a similar manner. By following these steps, you can effectively diagnose any issues with your motherboard and determine if it needs to be repaired or replaced.
Disconnect Components
The first step in disconnecting components from your electronic device is to turn off the power supply. Once you’ve done that, unplug the device from the outlet. This will ensure that you’re not working with any live wires.
Next, you’ll want to locate the component that you want to remove. This might involve removing the casing or cover of your device to get at the components. Take your time with this step and be gentle to avoid damaging any of the other components.
Once you’ve located the component, you’ll need to determine how it’s connected to the rest of the device. This might involve unplugging a cable, removing screws, or prying it loose from a socket. Take note of how it’s connected so that you can put it back together correctly later on.
With the component disconnected, you’re ready to replace it or continue with your repairs. By following these steps, you can safely and efficiently disconnect components from your electronic device without causing any damage.
Set Up Multimeter
Setting up your multimeter can seem daunting, especially if you don’t have much experience with electronics. But don’t worry – it’s actually a pretty straightforward process! The first thing you’ll need to do is gather your multimeter (it should come with probes), batteries, and whatever you want to measure. Make sure your multimeter is set up correctly for the type of measurement you’ll be taking – this could include choosing between AC and DC current, setting the scale, or adjusting the dial.
Then, connect your probes to the appropriate ports on the multimeter (usually labeled “positive” and “negative”). Depending on what you’re measuring, you may need to touch the probes directly to the item or wire you’re testing, or you may need to use a clip or other connector. Once everything is connected and your multimeter is properly set up, you should see a reading on the display screen.
If you’re still having trouble or want more guidance, don’t hesitate to consult the manual that came with your multimeter or look up further instructions online. With a little bit of practice, you’ll be a pro at using your multimeter in no time!
Measure Voltage
If you’re looking to measure voltage, it can be intimidating if you don’t know where to begin. There’s a lot of technical terminology and equipment involved, but with a little guidance, it’s actually a pretty straightforward process. First, you’ll need a voltmeter, which is a device used to measure voltage.
Make sure it’s set to the correct range for the voltage you’re measuring. Next, connect the voltmeter in parallel with the circuit you want to measure, ensuring it’s properly grounded. Finally, turn on the circuit and read the voltage measurement on the voltmeter display.
It’s important to remember that electrical equipment can be dangerous, so it’s recommended to have a basic understanding of electrical safety before attempting any measurements. With practice and careful attention, measuring voltage will become second nature. So don’t be afraid to give it a try!
Check Resistance
Checking resistance is an important step in many different types of electrical installations and repairs. It’s a measurement of how easily an electrical current can flow through a circuit, and it’s crucial to know this value in order to avoid overloading the circuit and causing damage. The process of checking resistance involves using a device called a multimeter, which can measure both voltage and resistance.
First, you need to turn off the power to the circuit you’ll be working on, since measuring resistance while power is flowing can be dangerous. Next, you’ll need to set the multimeter to the resistance measurement setting, and touch the two probes to different points in the circuit. If the resistance is too high or too low, you’ll need to troubleshoot the circuit to find out what’s causing the problem.
By taking the time to check resistance properly, you can ensure that your electrical work is done safely and effectively.
Test Capacitance
When it comes to testing capacitance, there are a few steps that you should follow to get accurate readings. Firstly, it’s important to disconnect the capacitor from any circuitry to avoid interference. Once isolated, you should discharge the capacitor to remove any residual charge.
This can be done by connecting a resistor to both the terminals and waiting for it to discharge completely. After discharging, connect the capacitor to an ohmmeter or a multimeter and set it to measure capacitance. Start with the highest range and work your way down until you find the most appropriate range to get an accurate reading.
Remember to keep the leads as short as possible to avoid any error due to cable capacitance. With these simple steps, you can test capacitor values accurately and safely.
Conclusion
In conclusion, diagnosing a motherboard with a multimeter may seem daunting at first, but with the right technique and a little bit of know-how, you too can become a motherboard whisperer. Just remember to exercise caution and always disconnect your computer from the power source before testing. And remember, if all else fails, sometimes it’s best to just turn it off and on again – even technology needs a reboot every now and then.
“
FAQs
What is a multimeter and how does it help diagnose motherboard issues?
A multimeter is a tool used to measure electrical currents, voltage, and resistance. It can help diagnose motherboard issues by identifying if there is a short circuit or if components are not receiving appropriate power.
What steps should be taken before using a multimeter on a motherboard?
Before using a multimeter on a motherboard, it should be removed from the computer case to prevent any interference from other components. Additionally, the power source should be disconnected and any capacitors should be discharged.
How do I test motherboard components with a multimeter?
To test motherboard components with a multimeter, select the appropriate setting for the component being tested (such as resistance for a resistor) and place the multimeter probes on the appropriate connections. Compare the reading to the expected value to determine if the component is functioning correctly.
What are common issues that can be diagnosed with a multimeter on a motherboard?
Common issues that can be diagnosed with a multimeter on a motherboard include short circuits, faulty capacitors, and damaged traces. It can also help identify if components such as resistors or transistors are not functioning correctly.