Is your computer acting sluggish and slow? Is it taking forever to load your favorite web pages and programs? One of the most common culprits is a dusty motherboard. If you’ve never cleaned your computer’s motherboard before, don’t worry! In this article, we’ll walk you through five simple steps that you can take to clean your motherboard and get your computer running like new again. Think of your motherboard like the central nervous system of your computer.
It connects all the different hardware components and allows them to communicate with each other. Over time, dust and debris can build up on your motherboard, which can cause it to overheat and malfunction. This can result in slower performance, crashes, and even permanent damage to your computer.
But don’t panic just yet – with a little bit of know-how, you can easily clean your motherboard and keep it running smoothly for years to come. In the next section, we’ll dive into the nitty-gritty of how to clean your motherboard. We’ll cover everything from what tools you’ll need to step-by-step instructions on how to safely remove and clean your motherboard.
By the end of this article, you’ll be a pro at keeping your computer’s innards clean and tidy, and your computer will thank you for it!
Gather the necessary materials
Before diving into how to clean the motherboard, it’s essential to have all the necessary materials on hand. First and foremost, you’ll need a microfiber cloth or any lint-free cloth. It’s also essential to have Isopropyl alcohol with at least 90% concentration.
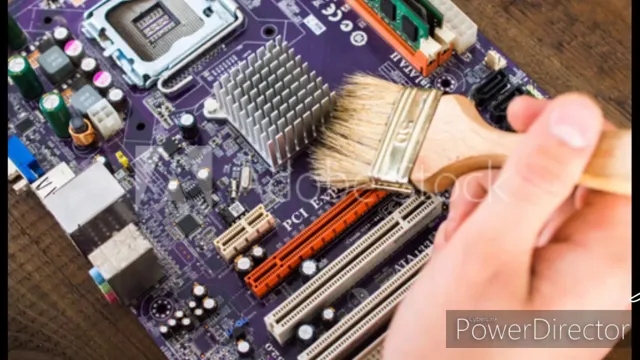
You may also need a small brush or soft-bristled toothbrush to remove any stubborn dirt or debris from the motherboard. Lastly, be sure to have compressed air or an air blower to remove any hair or dust build-up in hard-to-reach areas. By having all of these materials ready before beginning, you’ll ensure that you’re equipped to thoroughly and safely clean your motherboard, ensuring it functions optimally in the long run.
Cotton swabs, isopropyl alcohol, and a screwdriver
If you’re someone who enjoys tinkering with electronics, then you’ve probably encountered some stubborn screws that simply won’t budge. Fear not, as with the right tools, you can easily handle these situations. To tackle those stubborn screws, you’ll need a few essential materials.
Firstly, get yourself some cotton swabs, which are incredibly useful for cleaning up any residue that might be stuck in the screw’s threading. Furthermore, isopropyl alcohol can be used to get rid of any dirt or grime that might be present on the surface of the screw. Lastly, grab a screwdriver that is well-suited to the screw’s size, to apply the necessary torque to loosen it.
With these three essential materials, you’ll have everything you need to take on those stubborn screws and get those electronics up and running in no time!

Turn off and unplug the computer
If you’re planning on cleaning your motherboard, the first step is to turn off and unplug your computer. This may seem like common sense, but it’s important to emphasize the seriousness of handling electronic components. Once you’ve ensured that the computer is fully powered down, you can open up the case and begin removing any dust or debris that may have accumulated on the motherboard.
A can of compressed air is a handy tool to have for this step. Make sure to direct the air flow away from sensitive components, and use short bursts to avoid damaging anything. If you notice any dirt or stains on the motherboard, you can use a soft-bristled brush and a mixture of rubbing alcohol and water to gently clean the affected areas.
Be sure to let everything dry completely before reassembling your computer and powering it back on. By following these steps, you can help extend the lifespan of your motherboard and keep your computer running smoothly.
Safety first to prevent electrical damage
When it comes to preventing electrical damage to your computer, safety should always be your top priority. One simple yet effective measure to take is to make sure that your computer is turned off and unplugged when not in use. This not only protects your computer from power surges, but also helps to ensure that no one accidentally gets electrocuted while trying to handle it.
Make it a habit to turn off your computer and unplug it from the wall outlet before cleaning, upgrading, or performing any repairs. It may seem like a hassle, but taking this precautionary measure can save you from costly repairs or even having to replace your entire computer. Remember, it only takes a split second for an electrical surge to damage your computer, so always prioritize safety to avoid disastrous consequences.
Remove the motherboard from the computer
To properly clean the motherboard of your computer, you’ll need to remove it from the rest of the system first. This may sound daunting, but it’s actually quite simple. Start by unplugging all of the cables and peripherals from your computer tower.
Make sure the system is completely powered down and unplugged from the wall. Next, unscrew the screws that secure the motherboard to the case. Depending on the case, you may also need to remove any brackets or clips that are holding the motherboard in place.
Once everything is loosened, gently lift the motherboard out of the case. Be careful not to flex or bend the board. Now that the motherboard is free, you can clean it using compressed air or a soft-bristled brush.
Remember to be gentle and avoid using excessive force, as this can damage delicate components. After cleaning, carefully reattach the motherboard to the case, making sure everything is secured properly.
Use a screwdriver and be careful not to damage any components
When it comes to removing the motherboard from your computer, it’s important to take extra care and use a screwdriver to avoid damaging any of the components on the board. First, locate the screws that are holding the motherboard in place. These screws may be different sizes, so make sure to keep track of which ones go where.
Once the screws are removed, gently lift the motherboard out of the computer. It’s important to handle the board with care, as any rough movements could potentially cause damage to the sensitive components. When removing the motherboard, take note of any wires or cables that may be connected to it, as these will need to be disconnected before the board can be fully removed.
By taking the time to remove the motherboard properly, you can avoid any unnecessary damage and ensure that your computer is still functioning properly once the new motherboard is installed. So, take your time, use a screwdriver, and approach the task with care. Your computer will thank you!
Clean the motherboard with isopropyl alcohol
If your computer is running sluggishly or not at all, it might be time to clean the motherboard. But how do you go about doing that? The first step is to turn off and unplug your computer, of course. Then, remove the case and find the motherboard (it’s the large circuit board that most everything else connects to).
Next, use a soft-bristled brush to remove any dust or debris from the motherboard’s surface. Finally, use isopropyl alcohol and a microfiber cloth to clean the motherboard. This will help to remove any stubborn dirt, grease, or other contaminants that might be impeding the motherboard’s performance.
Just make sure to use a high-quality, 99% isopropyl alcohol solution that won’t cause damage to your computer’s delicate electronic components. By following these steps and using isopropyl alcohol to clean your motherboard, you can help keep your computer running smoothly and avoid costly repairs down the line.
Dip the cotton swab in alcohol and clean gently
If you need to clean your motherboard, you need to tread carefully. The best way to do it is with isopropyl alcohol – it’s a powerful cleaning agent that won’t damage the delicate components of your motherboard. Dip a cotton swab in the alcohol and use it to clean gently, taking care not to apply too much pressure.
Be sure to cover every inch of the motherboard – the alcohol will evaporate quickly, so don’t be shy with it. Remember: it’s better to clean too much than too little – dust and debris can cause all sorts of problems for your motherboard if left unchecked. Cleaning your motherboard can seem daunting, but with isopropyl alcohol and a little patience, it’s easier than you might think.
Let the motherboard dry and reassemble your computer
Cleaning the motherboard is an important task that can ensure the longevity and optimal performance of your computer. To clean the motherboard, you will need to remove it from the computer first. Then, you can use a soft-bristled brush or compressed air to gently remove any dirt or debris that has accumulated on it.
Be careful not to use too much force or liquid when cleaning the motherboard, as this could damage its delicate components. Once you have finished cleaning it, you should let the motherboard dry thoroughly before reassembling your computer. This will prevent any moisture from causing damage to the motherboard or other components.
By taking the time to clean your motherboard, you can help keep your computer running smoothly and avoid costly repairs in the future. Remember to always use caution when working with your computer’s motherboard, and if you are unsure about any steps in the cleaning process, consult a professional to help you.
Allow the alcohol to evaporate completely before reassembly
After cleaning your motherboard with isopropyl alcohol, it’s important to let it dry completely before reassembling your computer. This step shouldn’t be rushed, as allowing the alcohol to fully evaporate is crucial to prevent any residual moisture from damaging the sensitive electrical components. It’s recommended to let the motherboard sit for at least 30 minutes to an hour, and in some cases even overnight, to ensure it’s completely dry.
While waiting for the alcohol to evaporate and the motherboard to dry, take this opportunity to clean other components of your computer. You may want to dust off any fans or heatsinks, or even reapply thermal paste to the CPU if needed. After all, a clean computer is a happy computer.
Once the motherboard is dry, you can begin to reassemble your computer. Be sure to follow the manufacturer’s instructions carefully, and take your time to ensure everything is properly aligned and secured. It may also be a good idea to perform a test boot before fully closing up your computer, just to ensure everything is working properly.
In summary, taking the time to let your cleaned motherboard dry completely before reassembling your computer is a crucial step to prevent any damage from residual moisture. Use this opportunity to clean other components of your computer, and follow the manufacturer’s instructions carefully when reassembling. With a little patience and care, your computer will be up and running smoothly again in no time.
Conclusion
In short, cleaning your motherboard is like giving it a spa day – it deserves to be pampered and properly taken care of. By following these simple steps, you can banish dust, dirt, and grime, giving your motherboard the ultimate relaxation treatment. So grab your cleaning supplies, put on some soothing music, and get ready to give your motherboard the TLC it deserves.
Your computer (and inner neat freak) will thank you!”
FAQs
Why is it important to clean the motherboard?
It is important to clean the motherboard as dust and debris can accumulate over time, which can lead to overheating and damage to the components.
What tools should I use to clean the motherboard?
You can use a can of compressed air, a soft-bristled brush, or a microfiber cloth to clean the motherboard.
Can I clean the motherboard while it’s still connected to the power supply?
No, it is not recommended to clean the motherboard while it’s still connected to the power supply. Always turn off and unplug the computer before cleaning the motherboard.
How often should I clean the motherboard?
It is recommended to clean the motherboard at least once every six months to prevent dust buildup and maintain optimal performance.