
Is your computer running slower than usual? Are you hearing strange noises emanating from your system? These could be signs that your motherboard needs cleaning. The motherboard in your computer is the central hub that connects all the different hardware components. Over time, it accumulates dust, dirt, and debris that can affect its performance.
In this step-by-step guide, we’ll show you how to clean your motherboard to keep it in tip-top shape. Think of it like giving your computer a deep clean to make sure it’s running smoothly. So put on your cleaning gloves and let’s get started!
Gather Your Supplies
When it comes to cleaning your motherboard, the first step is to gather your supplies. Before you start cleaning, you’ll need some rubbing alcohol, a clean microfiber cloth, and a can of compressed air. It’s important to use rubbing alcohol that’s at least 90% strength to ensure that it evaporates quickly and doesn’t leave any residue on your motherboard.
A microfiber cloth is gentle enough to use on delicate electronic components and won’t scratch your motherboard’s surface. Compressed air is a great tool for blasting away dust and debris from hard-to-reach areas, like between the PCB layers. Once you have all your supplies together, you’re ready to begin cleaning and restoring your motherboard to its former glory.
Remember to take your time and be gentle when cleaning your motherboard to avoid damaging any of its delicate components.
What You’ll Need
When it comes to starting a new project, one of the first things you need to do is gather your supplies. The same goes for any DIY project, including crafting or home renovation. Before you dive in, it’s essential to make sure you have everything you need to complete the project successfully.
Depending on the project, there might be specific tools or materials you need to purchase or gather. For example, if you’re working on a painting project, you’ll need paints, brushes, and canvases. If you’re renovating a bathroom, you’ll need power tools, plumbing fixtures, and lighting.
Make a checklist before you start to ensure you don’t forget anything important and can work efficiently. By having all the necessary supplies, you’ll be able to complete your project with ease and without having to make multiple trips to the store.
Preparing Your Workspace
As you prepare to start working, it’s important to gather all the supplies you’ll need for a successful day. Start with the basics – pens, pencils, paper, and sticky notes are essential for any workspace. Depending on your work needs, you may also need a computer, a notebook, or a specific piece of equipment.
Make sure you have all the tools you need within arm’s reach, as having to leave your workspace repeatedly can be distracting and wasteful. It’s also important to prioritize comfort and ergonomics when arranging your workspace. Make sure your chair is at the right height, your computer screen is at a comfortable distance, and that your posture is supported.
Taking a few extra minutes to ensure you have everything you need before starting work can set a positive tone for the rest of the day and help you be more productive in the long run.
Unplug and Disassemble Your System
If you’re looking to cleanse your motherboard effectively, unplugging and disassembling your system is the best place to start. Begin by turning off and unplugging your computer to avoid any potential electrical risk. Next, you’ll need to carefully remove your motherboard from the case.
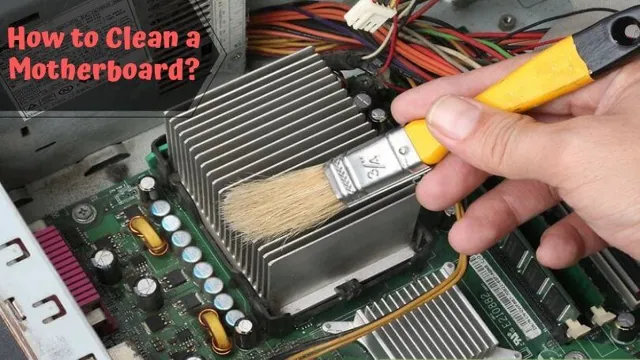
Be sure to take note of where each component is connected and where screws are located. Once you’ve safely removed your motherboard, take a can of compressed air and blow away any dust and debris built up on the circuitry and around the ports. You can also use a soft-bristled brush to gently remove any dirt or grime.
If you notice any stubborn stains, you can use a microfiber cloth dipped in isopropyl alcohol to clean them away. Once you’ve thoroughly cleaned every inch of your motherboard, let it dry completely before connecting the components back together and powering it on. Incorporating this simple routine clean up periodically, can help prolong the life of your motherboard and other computer components while maintaining optimal performance.
Power Down and Unplug Everything
One of the most important steps in disassembling your computer system is to power down and unplug everything. This might seem like an obvious step, but it can be easy to forget in the excitement of taking apart your hardware. Make sure to turn off your computer and any connected devices such as monitors, keyboards, and printers.
Then, unplug them all from the wall to ensure that there is no electrical current running through your system. Once everything is unplugged, you can begin the process of disassembling your computer piece by piece. Remember, taking apart a computer system can be complicated, so it’s important to take your time and follow instructions carefully.
By following these steps, you can safely take apart your computer system and upgrade or replace components as needed.
Disconnect, Remove and Label Components
When it’s time to disassemble your system, the first step is to unplug all cables and cords. It’s essential to disconnect everything properly to prevent any potential damage from power surges or electrical shock. After that, you should remove any components that you want to take out or replace.
Being careful while doing this is crucial as you don’t want to bend any pins or break any connectors. Once you’ve removed what you need to, it’s essential to label all the components accurately. This step will save you a lot of time and effort when you’re putting everything back together.
Using small sticky notes or even a label maker will help you identify each piece and where it belongs when you reassemble your system. Remember to take your time and stay organized as you disassemble your computer or other electronic devices. Keeping everything labeled and organized will make the process of reassembly much smoother and faster.
Remove Dust and Debris
When it comes to cleaning your motherboard, removing dust and debris is an important part of the process. Over time, dust can accumulate on your motherboard and cause overheating or even damage to your components. To start cleaning, make sure your computer is turned off and unplugged from the wall.
Then, use a can of compressed air to blow away any loose dust and debris from the surface of your motherboard. Be sure to pay special attention to any areas with visible dust buildup, such as around the CPU socket or the edges of your RAM slots. If there is still some stubborn dirt left, you can use a soft-bristled brush to gently sweep away the remaining debris.
It’s important to avoid using water or cleaning solutions, as these can damage your motherboard and components. By taking the time to remove dust and debris, you can help ensure that your computer runs smoothly and stays in good condition for years to come.
Methods for Cleaning Your Motherboard
When it comes to maintaining and cleaning your motherboard, it’s essential to keep dust and debris at bay. These particles can accumulate over time and create blockages that lead to overheating and system failure. To remove these obstructions, you need to shut down your computer, disconnect all cables and peripherals, open up the case, and use compressed air canisters or a vacuum cleaner to gently blow or suck out the dust and debris from the motherboard and its components.
Be sure to ground yourself by touching a metal object before touching the motherboard, as static electricity can damage it. Also, avoid using water or other liquid cleaners as they may damage the motherboard. With a little bit of care and effort, you can easily keep your motherboard clean and running smoothly, and extend its lifespan.
Gently Remove Dust with Compressed Air
If you want to keep your electronic devices effective and functional, it’s important to remove dust and debris that may accumulate over time. A great way to do this is through the use of compressed air. Compressed air is pressurized air that is forced out of a canister or can, which can be used to gently blow away any dust or debris that may be lodged in hard-to-reach places.
It’s important to note that when using compressed air, you should never shake or tilt the canister as it could cause potentially harmful chemicals to be released. Additionally, make sure to hold the canister a few inches away from the device to avoid accidental damage. By providing a quick and efficient way to remove any dust or debris, compressed air can help to extend the lifespan of your electronic devices and ensure they continue to function smoothly.
Remove Stubborn Grime with Rubbing Alcohol
Rubbing alcohol is an effective solution for removing stubborn grime and dirt from surfaces. It works by dissolving the dirt and helping to lift it away from the surface. However, before using rubbing alcohol, it’s important to remove any dust and debris from the surface with a soft cloth or brush.
This will ensure that the alcohol can reach the grime without interference. Once the surface is clean of dust and debris, dampen a cloth with rubbing alcohol and gently rub the affected area, being careful not to apply too much pressure or scrub too vigorously. The alcohol will help to break down the grime without damaging the surface.
Use this method to clean a variety of surfaces, including countertops, appliances, and car interiors. Remember to always spot test a small area before proceeding with larger cleaning jobs to ensure that the rubbing alcohol won’t damage the surface. At the end of the day, rubbing alcohol is a versatile and effective cleaning solution for stubborn grime.
Inspect Your Motherboard
Cleaning your motherboard is an important part of maintaining your computer’s health. Dust and debris can accumulate on the motherboard over time, causing the system to overheat or malfunction. To clean your motherboard, start by turning off and unplugging your computer.
Then, open the case and inspect the motherboard. Use compressed air or a soft-bristled brush to gently remove any dust or debris. Be careful not to touch any of the components on the motherboard, as they can be delicate and easily damaged.
Once the motherboard is clean, you can close the case and plug your computer back in. Remember to clean your motherboard regularly to ensure that your computer runs smoothly and efficiently. By taking the time to inspect and clean your motherboard, you can extend the life of your computer and save yourself from costly repairs in the future.
Check for Damage
When it comes to building or repairing a computer, checking for damage is crucial to ensuring that everything runs smoothly. One component that should always be inspected is the motherboard. This intricate piece of hardware connects all the other parts of the computer and allows them to communicate with each other.
Before installing the motherboard, it’s essential to carefully examine it for any visible damage such as physical cracks or broken connectors. Even the smallest imperfections can cause significant issues with the computer’s performance. It’s also a good idea to test the motherboard with a multimeter to ensure that there are no electrical issues.
By taking the time to inspect your motherboard thoroughly, you can prevent potential problems and ensure that your computer operates at its best when you power it on.
Repair or Replace Damaged Components
If your computer is experiencing issues, one component to inspect is the motherboard. The motherboard is the backbone of the computer, and any damage to it can disrupt the entire system’s functionality. Inspect the motherboard carefully for any signs of physical damage, such as cracks, burns, or bulges on the surface.
Also, check for any loose or missing components, as these can cause your computer to malfunction. If you find any damage, consider whether it’s worth repairing or if you should replace the motherboard entirely. Repairs can be costly, and if the motherboard is relatively old, it may be more practical to replace it altogether.
However, if you have a newer motherboard that’s still under warranty, you may want to consider repairing it to save money. Either way, it’s essential to address any issues with your motherboard promptly to prevent further damage to your computer.
Reassemble and Power Up Your System
After cleaning the motherboard, it’s time to reassemble your system and power it up. Begin by placing the motherboard carefully back into the case, ensuring that it fits perfectly into the designated space. Next, reattach all the components, starting with the power supply, CPU, and RAM.
Make sure that all the cables are securely attached and in the correct locations. If you had removed any expansion cards, such as a graphics card, now is the time to reinsert them. Finally, turn on your computer and check that everything is working normally.
If there are any issues, double-check that everything is connected correctly and consult the motherboard manual or online resources. Don’t forget to clean up any leftover dust or debris and keep your system in a clean and tidy environment to help prevent future issues. By following these steps, you’ll have a clean and functional system that’s ready to tackle any task you throw its way.
Putting Everything Back Together
Once you’ve completed your computer upgrades, it’s time to put everything back together and breathe life back into your system. Begin by reattaching all the cables and components you removed earlier, taking care not to use excessive force. Double-check to ensure all cables are plugged in correctly and that no stray screws or components are left behind.
Once everything is securely in place, turn on the power supply. If all goes well, you should see the fans starting to spin, indicating that everything is functioning as it should. From there, you can turn on your computer and check that all components are recognized by the BIOS.
With a bit of luck and some technical know-how, you’ll have successfully upgraded your computer and be able to enjoy all the benefits of the latest and greatest hardware.
Powering on Your System
After assembling your system, it’s finally time to power it up! Before doing so, make sure all of the components are connected correctly and securely. Double-check the power supply unit to ensure it is turned off and the power cable is disconnected. If all connections and components are secure, plug in the power, turn on the master switch on the power supply, and then press the power button to boot up.
If everything is working correctly, you should hear the fans spinning and see the computer’s LED lights turn on. If you encounter any issues, double-check your connections and troubleshoot any problems, such as a malfunctioning component. Once the system is up and running, it’s time to install the operating system and any necessary drivers.
Now sit back, relax, and enjoy your newly-assembled system!
Troubleshooting Tips
If you have disassembled your computer system for maintenance or upgrades, the process of reassembling it can be intimidating. However, with a little patience and attention to detail, you can do it yourself. First, make sure you have a clear workspace and all the necessary components to rebuild the system.
Begin by installing the power supply, motherboard, and processor. Once these are in place, connect the cables from the power supply to the motherboard and other components. Next, add the memory modules, graphics card, and storage drives, connecting them with the appropriate cables.
Before powering up the system, double-check all connections and components to ensure everything is secure. Finally, turn on the system and check that everything is functioning correctly. By following these steps, you can successfully reassemble your computer and enjoy using it once again.
Conclusion
In conclusion, cleaning your motherboard is more than just a chore – it’s a dance between science and technology. By using the right tools, taking gentle and methodical actions, and following the steps we’ve outlined, you’ll be able to do it with ease. So, don’t let a dusty motherboard bring your device down! Put on some music and get your cleaning groove on.
Your device will thank you and run smoother than ever.”
FAQs
What is the safest way to clean a motherboard?
The safest and recommended way to clean a motherboard is to use compressed air to blow off dust and debris. You can also use a soft-bristled brush to gently remove any stubborn dirt or grime.
Can I use water to clean my motherboard?
No, using water to clean your motherboard is not recommended as it can cause irreversible damage to the sensitive electronic components. Water can also lead to corrosion and short circuits.
Isopropyl alcohol safe to use for cleaning a motherboard?
Yes, isopropyl alcohol is a safe and effective cleaning agent for removing dirt and grime on the motherboard. Use a soft cloth or cotton swab dipped in isopropyl alcohol to clean the affected area.
Can a dirty motherboard cause system failures?
Yes, a dirty motherboard can cause system failures by disrupting the flow of electricity and heat, leading to overheating, short circuits, and other issues. Cleaning your motherboard regularly can prevent such problems and extend the lifespan of your system.