Are you tired of struggling with your Brother printer every time you need to change the ink toner? Don’t worry, you’re not alone. Many printer users find the process of replacing ink or toner cartridges daunting, even though it’s a simple maintenance task that should be done regularly. If you own a Brother printer, you might be wondering how to go about changing the ink toner without making a mess or damaging the printer.
Fortunately, it’s not as complicated as it seems. With a little bit of guidance and patience, you can replace the ink or toner cartridges in your Brother printer in no time. In this blog, we’ll guide you through the steps to change the ink toner in a Brother printer.
We’ll cover everything from identifying the right type of cartridge to installing it correctly and avoiding common mistakes. Whether you’re a seasoned printer user or a complete novice, you’ll find our tips and tricks helpful in making the process easier and smoother. So, let’s get started and learn how to change the ink toner in your Brother printer.
By the end of this blog, you’ll be a pro at cartridge replacement and enjoy a stress-free printing experience. Get ready to say goodbye to printer problems and hello to hassle-free printing!
Prepare Printer
Changing the ink toner in a Brother printer is a simple process that requires a little bit of preparation. First, make sure you have a replacement toner cartridge that’s compatible with your Brother printer. Then, turn off the printer and unplug it from the power source.
You should also allow the printer to cool down for a few minutes to avoid any accidents. Once you’ve done that, open the printer cover and remove the old toner cartridge by pulling it towards you. Be careful not to spill any toner from the cartridge.
Next, unpack the new toner cartridge and shake it gently to distribute the toner evenly. Then, remove the protective cover from the new cartridge and install it into the printer by aligning it with the guides inside the printer. Finally, close the printer cover, plug the printer back in, and turn it on.
Your printer should display a message indicating that a new toner has been installed. You’re all set and ready to print!
Turn off and unplug printer
If you’re about to start working with your printer, the first thing you need to do is to prepare it for the task. This means you need to turn off and unplug your printer so that you can safely handle it without any electricity flowing through it. Before you start tinkering with your printer, it’s always best to make sure that it’s in the optimal condition for the task you’re about to perform.
This will ensure that you don’t damage the printer or cause any problems with it while you’re working with it. So, grab the power cord and unplug it from the wall socket, and then turn off the printer using its switch or button. Once the printer is off and unplugged, you can safely move on to the next step of preparing your printer for the job.
Open printer cover
Opening the printer cover is an essential step you need to take to prepare your printer. When you open the printer cover, you gain access to the internal parts of your printer, such as the cartridges, ink heads, and paper feeder. Before opening the printer cover, make sure that the printer is turned off and unplugged to avoid any damage to the internal parts or any electrical shock.
Once you unplug your printer, locate the printer cover, which is usually located at the top or the front of the printer. Depending on the type of printer, you may need to press a button or latch to release the printer’s cover. After you have opened the cover, you can now clean and inspect the internal parts and prepare your printer for printing.
Remember to be careful when handling delicate printer parts, and avoid touching the ink heads or any other internal parts with your fingers as this may damage them. Taking the time to prepare your printer properly will help ensure that your printing job runs smoothly and produces high-quality results. In summary, opening the printer cover is a crucial step in preparing your printer.
It allows you to access the internal parts of your printer and clean, inspect, and prepare them for printing. So, if you want to print high-quality documents, take the time to prepare your printer and open its cover before printing.
Identify toner cartridges
When it comes to preparing your printer, one of the most important things to do is to identify the toner cartridges you need. Understanding which cartridges your specific printer model requires can save you time, money, and frustration in the long run. First, check your printer manual or manufacturer’s website for information on which cartridges are compatible with your printer.
It’s also helpful to know the cartridge’s model number, which can usually be found on the packaging or on the cartridge itself. Once you have this information, you can purchase the appropriate cartridges and easily install them into your printer. By being proactive and taking the time to properly identify your printer’s toner cartridge needs, you can ensure that your printer is always working at its best.
Remove Old Toner
Changing the ink toner in your Brother printer is a simple and straightforward task. One important step in the process is to remove the old toner before installing the new one. To do this, start by turning off the printer and unplugging it from the power source.
Next, locate the toner door or cover on the printer and open it. Gently pull out the toner cartridge and set it aside in a safe place. Be sure to dispose of the old toner cartridge according to your local regulations.
Once the old toner has been removed, you can begin installing the new toner cartridge. Remember to carefully read the manufacturer’s instructions for your specific printer model and follow each step closely. By properly removing the old toner and installing the new toner, you can ensure that your Brother printer continues to produce high-quality prints.
Press release button on cartridge
When it comes to replacing your toner cartridge, there are a few steps you can take to ensure that the process goes smoothly and quickly. First, press the release button on the cartridge to unlock it from your printer. Then, carefully remove the old toner cartridge by pulling it straight out from its slot.
Be sure to dispose of the used cartridge properly, as it may contain residual toner that can be harmful to the environment. Once you have removed the old cartridge, you can now prepare to install the new one. By following these simple steps, you can easily change your toner cartridge without any hassle and keep your printer running smoothly.
Remember to always use genuine toner cartridges that are compatible with your printer make and model to ensure optimal performance.
Carefully remove cartridge
When it comes to replacing your printer toner cartridge, it’s important to follow the right steps carefully. One of the first steps in the process is removing the old toner cartridge. This might sound simple enough, but it’s important to do it correctly to avoid any damage to your printer or injury to yourself.
Start by turning off the printer and opening the printer cover. Locate the toner cartridge and carefully remove it by pulling it straight out. Be sure to hold it by the handle and avoid touching the rollers or metal contacts.
Once the old cartridge is removed, you can dispose of it properly and prepare to install the new cartridge. By following these steps and taking your time, you can ensure a clean and safe toner cartridge replacement every time.
Insert New Toner
Changing the ink toner in your Brother printer might seem like a daunting task, but it’s actually quite simple once you get the hang of it. First of all, make sure you have the correct replacement toner cartridge for your printer model. Once you’ve got that sorted, turn your printer off and wait for it to cool down before you begin.
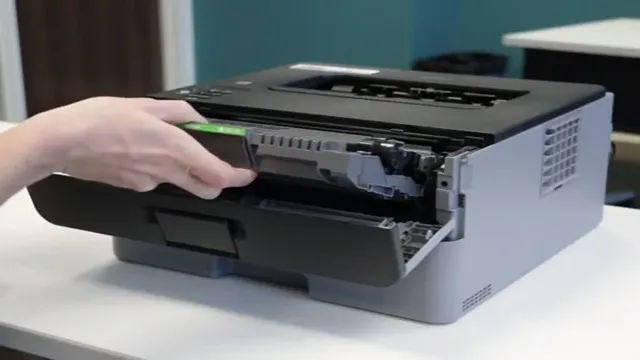
Next, open the front cover of your printer by pressing the release button on the side. You should be able to see the old toner cartridge in the printer. Carefully remove it by pulling it towards you.
Take the new toner cartridge out of its packaging and gently give it a shake to distribute the toner evenly. Then, insert the new cartridge into the printer and push it in until it clicks into place. Finally, close the front cover of your printer and turn it back on.
Your Brother printer should now be ready to use with your new ink toner cartridge. And there you have it—a simple, hassle-free way to change the ink toner in your Brother printer.
Take new toner cartridge out of packaging
Insert New Toner Hey there! Congratulations on purchasing a new toner cartridge for your printer! Now comes the fun part: inserting it into your printer. Before we get started, make sure you’ve removed the new toner cartridge from its packaging. Once you’ve done that, locate the area where your old cartridge was and remove it.
Now you’re ready to insert the new toner. It’s important to note that every printer is different, so please refer to your printer’s manual for specific instructions. In general, though, you’ll need to align the new toner cartridge with the printer and gently slide it into place until it clicks.
Make sure you don’t force it, and take care not to touch the drum inside the toner cartridge. This could cause streaks on your prints or even damage the drum. With your new toner cartridge securely in place, it’s time to test it out! Print a test page to make sure everything is working properly.
If you notice any streaks or lines on your printouts, try gently removing the toner cartridge and reinserting it. If that doesn’t help, you may need to replace the toner cartridge again. In conclusion, inserting a new toner cartridge into your printer is a relatively easy process, but it’s important to take your time and follow the instructions carefully.
With a little patience and care, you can enjoy high-quality prints from your printer for months to come!
Shake cartridge gently to distribute ink
When installing a new toner cartridge, it is important to ensure that the ink is distributed evenly throughout the cartridge. To achieve this, it is recommended to gently shake the cartridge before installation. This helps to ensure that the ink is evenly distributed and ready to use, making the printing process much smoother.
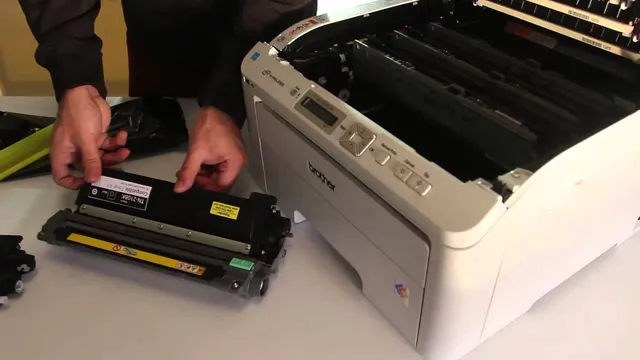
To begin the installation process, first, remove the old toner cartridge from the printer. Carefully unpack the new cartridge and remove any protective coverings. Before inserting the new cartridge, give it a gentle shake to distribute the ink evenly throughout the cartridge.
When inserting the cartridge, be sure to follow the manufacturer’s instructions carefully. Make sure that the cartridge is inserted correctly and that it clicks into place securely. This will help to ensure that the cartridge is installed correctly and that the ink will flow smoothly through the printer.
By shaking the cartridge before installation and following the manufacturer’s instructions, you can help ensure that your printer is working at its best. A well-functioning printer not only saves you time and money but also helps to reduce unnecessary waste and environmental impact. So, the next time you’re changing a toner cartridge, remember to shake it gently before installation.
This small step can make a big difference in keeping your printer running smoothly and efficiently.
Remove protective cover from new cartridge
When it comes to replacing toner cartridges in your printer, one of the essential steps is to remove the protective cover from the new cartridge before inserting it. This simple step may seem obvious, but it’s essential to ensure proper installation and avoid any potential damage to your printer or toner. To do this, carefully open the packaging and locate the protective cover that’s covering the toner.
Depending on the cartridge’s design, you may need to unlock or loosen a latch or release lever to access the toner. Once you’ve uncovered the toner, gently remove the protective covering and discard it. Make sure not to touch the toner drum or any other sensitive parts, as this can cause damage and result in poor print quality.
With the protective cover removed, you can now proceed to insert the new cartridge into your printer. Remember, taking care in removing the protective cover is a crucial step in the toner replacement process. By doing so, you can prevent any issues that may arise, such as toner leakage or damage to your printer.
So, whether you’re a seasoned pro or new to replacing toner cartridges, don’t forget this essential step. Keep your printer running smoothly and produce high-quality prints by following this simple but important procedure in replacing your toner cartridge.
Insert new cartridge into printer
Insert New Toner When it’s time to replace your printer toner, it can be intimidating. But don’t worry, it’s a straightforward process that you can easily accomplish! First, locate the toner cartridge that needs to be changed. The toner is typically located behind a panel, which can be opened by pulling or pressing a button.
Once the panel is open, you should see the old cartridge. Remove it by gently pulling it out from the printer. Next, take the new toner cartridge out of its packaging.
Remove any protective tape or clips that may be holding it together. Then, carefully shake the cartridge a few times to evenly distribute the ink inside. Now, insert the new toner into the printer in the same way that you removed the old one.
Ensure that the cartridge is correctly aligned with the printer, and then gently push it into place until you hear a click. Lastly, close the panel that you opened earlier. The printer may take a minute or two to recognize the new toner cartridge.
But once it does, you should be ready to go! Remember that it’s important to dispose of the old toner cartridge responsibly. Many office supply stores offer recycling programs for used cartridges. When it comes to inserting a new toner cartridge into your printer, it’s a simple process that anyone can do.
Follow these steps, and you’ll be back to printing in no time at all!
Finalize Installation
Are you struggling to figure out how to change ink toner in your Brother printer? Don’t worry, we’ve got you covered! The final step in installing your Brother printer is changing its ink toner. This is a crucial step that ensures the optimal functioning of your printer. To do this, locate the toner compartment, which is usually located on the front, back, or side of the printer.
Open the compartment cover, carefully remove the old ink toner cartridge, and discard it. Next, unwrap the new ink toner cartridge and insert it into the printer, making sure it clicks into place. Finally, close the compartment cover and power up your printer.
Congratulations, you’ve successfully installed a new ink toner cartridge in your Brother printer! Now you’re ready to start printing high-quality documents.
Close printer cover
Now that you have successfully installed your printer, it’s time to wrap it up by closing the printer cover. This may seem like a simple step, but it’s important to ensure that the cover is securely closed to prevent any dust or debris from entering the printer. Not only does this help to maintain the quality of your prints, but it also extends the lifespan of your printer and reduces the need for frequent cleaning or repairs.
As you close the cover, listen for a clicking sound to confirm that it’s properly latched. Congratulations! Your printer is now fully installed and ready to use. Remember to refer to the manufacturer’s instructions for any future maintenance or troubleshooting needs.
By completing this installation, you have taken your first step towards efficient and convenient printing.
Turn on printer and wait for initialization
After completing the installation process, it’s time to turn on your printer and wait for initialization. It’s important to allow the printer to go through its start-up routine and become ready to use before proceeding with any printing tasks. While waiting for it to initialize, you can adjust the paper and other settings based on your preferences.
Once your printer is ready, you can start printing and enjoy the benefits of a newly installed printer. With proper maintenance and care, your printer can last for years and provide high-quality prints every time you use it. Taking the time to complete the installation process correctly and ensuring proper initialization can help you avoid potential issues and ensure that your printer lasts a long time.
So, make sure to give your printer the time it needs to initialize before you start printing, and you’ll be ready to go in no time!
Print test page to confirm successful installation
Now that you’ve successfully installed your printer, it’s time to print a test page to make sure everything is working properly. This is a crucial step before you start printing important documents. Simply connect your printer to your computer and turn them both on.
Then, go to the printer settings and select “Print test page.” The printer will then go through the printing process and produce a page with various colors, text, and graphics. Take a minute to examine the page and make sure everything looks good, such as the text being sharp and clear, the colors being vibrant, and there are no smudges or lines on the page.
If everything looks good, congratulations! You’ve successfully installed and set up your printer, and you’re ready to start printing.
Conclusion
Changing the ink toner in your Brother printer may seem like a daunting task, but with a little patience and determination, it’s easier than you might think. From aligning the new cartridge to disposing of the old one, each step is crucial to ensuring your printer maintains optimal performance. Whether you’re a novice or a seasoned pro, following these steps will leave you feeling like a toner-changing expert.
And who knows, you might even be able to impress your printer with your newfound skills!”
FAQs
What is the process to change the ink toner in a Brother printer?
First, open the printer cover and locate the toner cartridge. Press the lock lever to release it and remove the old toner cartridge. Take out the new toner cartridge from its packaging and gently shake it from side to side. Remove the protective cover and insert the new toner cartridge into the printer. Finally, close the printer cover and wait for the printer to initialize.
Can I use third-party toner cartridges to replace Brother printer toner?
While it may seem cost-effective, it’s not recommended to use third-party toner cartridges as they may not be compatible with Brother printers. This could lead to poor print quality, printer damage, or even an invalidation of the printer warranty.
How do I know if the Brother printer toner needs to be changed?
The printer’s LCD screen will show a ‘Low Toner’ message indicating that the toner is running low and will soon need to be replaced. Alternatively, the printouts may appear light or faded, indicating that the toner is running low.
Can I recycle Brother printer toner cartridges?
Yes, you can recycle Brother printer toner cartridges. Brother has a free toner cartridge collection and recycling program where you can send back your used toner cartridges to be reused or recycled. Alternatively, you can locate a local electronics recycling center that accepts toner cartridges.