Is your Brother printer producing low-quality prints with streaks appearing all over the paper? It’s time to check and clean your printer drum! The printer drum is responsible for transferring toner onto the paper. Over time, the drum can become dirty, leading to smudged prints. Cleaning your printer drum is a simple process that can help restore your printer’s performance.
In this blog, we’ll guide you through the steps to clean your Brother printer drum, so you can enjoy high-quality prints once again. Let’s dive in!
Why Cleaning Your Printer Drum is Important
Brother printers are known for their high-quality printing and long-lasting performance, but like any other printing equipment, it is crucial to prioritize maintenance to ensure optimal results. Cleaning your Brother printer drum is one aspect of maintenance that is often overlooked. The drum is a critical component responsible for transferring toner onto the paper during printing.
With time, dust, ink residue, and other contaminants accumulate on the drum, leading to print quality issues such as streaks, lines, and fading. By regularly cleaning the Brother printer drum, you can prevent such problems, extend the life of your drum, and improve the overall printing experience. A good rule of thumb is to clean the drum every time you replace the toner cartridge or after printing around 10,000 pages.
To clean the drum, follow the manufacturer’s instructions carefully or seek the help of a professional technician for optimal results. In conclusion, cleaning your Brother printer drum is crucial if you want to achieve the best possible prints and prolong the life of your printer.
Extend the Life of Your Printer Drum
Printer drum If you want to extend the lifespan of your printer and ensure that it continues to produce high-quality prints for years to come, it’s important to take good care of its drum. The drum is responsible for transferring toner onto paper, so if it gets dirty or damaged, print quality can suffer. Regularly cleaning your printer drum can prevent debris buildup and ensure that it lasts longer.
To clean your drum, first, turn off the printer and remove the drum unit. Then, use a soft, lint-free cloth and a cleaning solution recommended by your printer’s manufacturer to gently wipe down the drum. It’s important to avoid touching the drum’s sensitive surface with your hands or any harsh materials, as this can cause damage.
By taking these steps, you can help ensure that your printer drum stays in optimal condition for years to come.
Improve Print Quality
When it comes to printing, we all want to produce high-quality documents that look great and make a professional impression. However, one thing that many people overlook is the importance of cleaning their printer drum. This essential component plays a crucial role in the printing process, as it transfers toner particles to the paper to create an image.
Over time, the printer drum can become coated with excess toner and other debris, which can result in poor print quality, streaks, and smudges. By taking the time to clean your printer drum regularly, you can ensure that your prints look crisp and clear every time. Plus, it can also help extend the life of your printer and reduce the need for expensive repairs or replacements.
So, if you want to improve your print quality and get the most out of your printer, be sure to make cleaning your printer drum a regular part of your maintenance routine.
When to Clean Your Printer Drum
Cleaning your Brother printer drum is essential for maintaining the quality of your printed documents. But how often should you clean it? It depends on how frequently you use your printer and how often you print. If you use your printer regularly, it’s recommended to clean the drum every 30,000-40,000 pages.
However, if you print infrequently, you can go longer without cleaning the drum. You may also need to clean the drum more often if you notice lines, spots, or streaks on your printed sheets. The cleaning process is straightforward and can be done easily at home.
Start by turning off the printer and removing the drum and toner cartridge. Gently wipe the drum with a lint-free cloth to remove any dust or debris. You can also use a specialized cleaning product to thoroughly clean the drum.
Once finished, reattach the drum and toner cartridge and turn on the printer. Regular cleaning will extend the life of your printer and ensure that your printed documents are of the highest quality. So, don’t wait until you notice signs of a dirty drum – make cleaning a regular part of your printer maintenance routine!
Signs of a Dirty Printer Drum
If you’re experiencing faded prints or streaks on your paper, it might be time to give your printer drum a good cleaning. Over time, printer drums can accumulate toner residue and other debris, which can negatively affect the print quality. A dirty drum can also cause jams and other technical issues.
Keep an eye out for warning signs like lines across the page or smudges. Depending on the printer model, cleaning the drum might be as simple as opening the printer and wiping it down with a soft cloth. However, for more complicated systems, it’s best to refer to the manufacturer’s guide or seek professional help.
Remember, a clean drum can increase the longevity and quality of your printer’s output.
Frequency of Cleaning
As a printer owner, it’s important to know when to clean your printer drum. The frequency of cleaning can vary depending on how often you use your printer. If you use your printer frequently, it’s recommended to clean your printer drum about once a month.
However, if you use your printer infrequently, you may be able to get away with cleaning it every three to six months. It’s important to note that dirt and dust can build up on the drum over time, which can cause your printer to produce low-quality prints. If you start to notice streaks or lines on your prints, it may be time to clean your printer drum.
Don’t wait too long to clean it, as this can cause permanent damage to your printer and require expensive repairs. By cleaning your printer drum regularly, you can ensure that your printer produces high-quality prints every time.
Steps to Take Before Cleaning
Printer drum cleaning is an essential part of printer maintenance. But, before cleaning the drum, there are some important things you need to consider. One of the most critical considerations is determining the appropriate time to clean your printer drum.
Generally, you should clean the drum when it starts producing spotty or faded prints. You may also need to clean the drum if you notice any visible dirt or dust on its surface or smears on your pages. However, make sure to check your printer’s user manual before you start cleaning.
Some printers have specific cleaning instructions, and using the wrong cleaning method can damage the drum. It’s also important to turn off and unplug your printer before you start cleaning to avoid any potential electrical hazards. By following these basic steps, you’ll ensure that your printer drum is cleaned correctly and safely, keeping your printing quality in top shape.
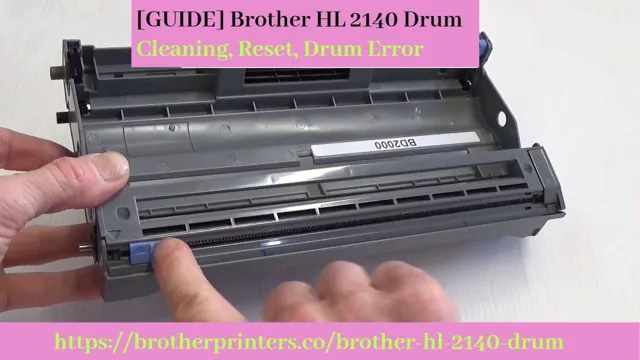
How to Clean Your Brother Printer Drum
If you own a Brother printer, you may eventually need to clean the printer drum. Cleaning the drum is important because it removes any excess toner or debris that can build up over time and cause print quality issues. To do this, open the printer’s front cover and remove the toner cartridge.
The drum unit should then slide out easily. Give the drum a good wipe with a soft lint-free cloth, being careful not to touch the surface with your fingers. Do not use anything abrasive or any chemicals, as this can damage the drum.
Once you are done cleaning, slide the drum unit back into the printer and reinsert the toner cartridge. This simple process can help prolong the life of your printer and ensure high-quality prints. If you find that your printer drum is regularly getting dirty, it may be time to replace it.
Step-by-Step Guide
Cleaning your Brother printer drum is a straightforward process that can help extend the life and improve the quality of your printer. To begin, turn off your printer and unplug it to prevent any accidental damage. Then, carefully open the printer and gently remove the drum.
Using a soft, lint-free cloth or cotton swab, wipe the drum’s surface to remove any toner or debris buildup. Be sure not to scratch or damage the surface of the drum as this can negatively impact print quality. Once you have finished cleaning the drum, carefully reinsert it back into the printer and close the printer cover.
Finally, plug in your printer and turn it back on, and you’re good to go! It’s important to note that cleaning your printer drum regularly can help prevent future issues and improve printing quality. So, why not give it a try and see the difference it can make?
Recommendations for Cleaning Solutions
Brother Printer Drum Cleaning To maintain your Brother printer’s longevity and enhance its performance, it’s essential to clean the drum regularly. Here are some recommendations on how to execute this task with ease. First, identify the correct cleaning solution – typically, a soft cloth dipped in isopropyl alcohol serves this purpose.
Second, ensure that the printer is turned off and unplugged, making it safe to clean without risk of electrocution. Third, gently remove the drum unit and place it on a flat surface, covered with a lint-free cloth to prevent any damage, that may occur during cleaning. Fourth, using the soft cloth submerged with the cleaning solution, carefully wipe the drum to remove any excess ink or debris.
Fifth, ensure that the drum is entirely dry before reinstalling it into the printer. Brother printer drum cleaning is vital to maintain the printer’s quality, ensuring that prints remain sharp and clear. So regularly clean your Brother printer drum and prolong its life span, saving you both time and money in the long run.
Preventing Future Build-Up
If you want to prevent future build-up on your Brother printer drum, there are a few things you can do. First, make sure to keep your printer clean and dust-free. This can be done by wiping down the exterior and interior of the printer regularly with a soft, dry cloth.
Additionally, try to use high-quality paper that is designed for laser printers, as low-quality paper can leave behind fibers that can clog the drum. Another tip is to replace your toner cartridge before it runs completely out. When a cartridge is low, it will start to produce less even coverage, which can lead to build-up on the drum.
By replacing the cartridge when it’s low, you can ensure that the drum is always getting properly coated with toner. Finally, consider scheduling regular maintenance checks with a professional to ensure that your printer is running smoothly and to catch any potential issues before they become bigger problems. With these tips, you can keep your Brother printer drum clean and running smoothly for years to come.
Best Practices for Maintaining Your Printer Drum
Maintaining your printer drum is crucial to ensuring your printer operates smoothly and produces high-quality prints. When it comes to preventing future build-up, there are a few best practices to keep in mind. Firstly, ensure that you use your printer regularly.
Leaving your printer idle for long periods can cause dry ink and toner to build up on the drum, which can ultimately affect the quality of your prints. Additionally, be mindful of the type of paper you use. Some paper types can leave behind residue, which can cause build-up on your printer’s drum.
Lastly, consider investing in a drum cleaning kit. Using a cleaning kit periodically can help remove any residue buildup and ensure that your printer operates at its best. By following these simple practices, you can help prevent future build-up and prolong the life of your printer drum.
Tools and Resources to Help You
Preventing future build-up is important to ensure your surroundings stay clean and sanitary. To help you in this endeavor, there are several tools and resources that can come in handy. One such tool is a drain hair catcher, which helps prevent hair from clogging your drains.
You can also use a drain snake to remove any build-up that has already occurred. Regularly cleaning your sinks, toilets, and showers with a disinfectant can also go a long way in preventing future build-up. Additionally, installing a water softener can help reduce the build-up of minerals in your pipes and fixtures.
Remember that prevention is key, as removing build-up can be a frustrating and time-consuming task. Incorporating these tools and resources into your cleaning routine will save you time and money in the long run.
Wrapping Up
In conclusion, cleaning your Brother printer drum is an essential maintenance task that can prolong the life of your printer and improve the quality of your prints. While it may seem daunting at first, following a few simple steps can make the task easy and stress-free. First, make sure to turn off your printer and unplug it before attempting to clean the drum.
Then, gently remove the drum unit and use a soft, lint-free cloth to wipe away any loose toner or debris. Finally, use a specialized cleaning solution to remove any stubborn stains or buildup. By regularly cleaning your Brother printer drum, you can ensure that your printer produces sharp, vibrant prints for years to come.
Conclusion
Cleaning your brother printer drum is like giving your printer a spa treatment. Just like our skin needs exfoliation to remove impurities and revive its natural glow, the drum of your printer needs to be scrubbed to maintain its efficiency and print quality. And, just like visiting the spa, cleaning your brother printer drum may seem like a chore, but the end result is worth it – a fresh and flawless finish.
So go ahead, treat your printer to a day at the spa and give it the TLC it deserves!”
FAQs
How often should I clean my brother printer drum?
It’s recommended to clean the brother printer drum every time you replace the toner cartridge or every 12,000 pages, whichever comes first.
What is the best way to clean my brother printer drum?
Use a soft microfiber cloth and gently wipe the drum surface. Avoid using any cleaning agents, as they can damage the drum.
What are the signs that my brother printer drum needs cleaning?
If you notice that your prints are coming out with streaks, smudges, or spots, it may be time to clean your drum.
Can I reuse my brother printer drum after cleaning it?
It depends on the age and condition of the drum. If it is relatively new and in good condition, cleaning it may extend its lifespan. However, if it is older or damaged, it may need to be replaced.