If you’re a proud owner of a Brother Printer, you know how important it is to keep your printer’s drum clean. The cleaning process can be overwhelming, especially if you’re not sure how to go about it. But fear not, we’ve got you covered.
In this article, we’ll explain the simple steps involved in cleaning the drum of your Brother Printer and keep your printer functioning at its best. From understanding the importance of cleaning a drum, to performing the cleaning process step-by-step, we’ll walk you through it all. So, let’s start cleaning!
Why Cleaning Your Drum is Important
If you’re experiencing poor print quality or streaks on your prints, it may be time to clean your brother printer’s drum. The drum is an essential component of your printer, responsible for transferring the toner to the paper during the printing process. Over time, the drum can become covered in toner residue, causing it to malfunction and produce inferior prints.
Regular cleaning of your printer’s drum not only prolongs its lifespan, but it also ensures consistently high-quality prints. To clean your Brother printer’s drum, begin by turning the printer off and allowing it to cool. Carefully remove the drum unit from the printer and use a soft, dry cloth to remove any toner residue or debris.
Avoid using water or detergents, as this can damage the drum. Once the drum is clean, reinsert it into the printer and resume printing. With a little routine maintenance, you can keep your Brother printer performing at its best and producing flawless prints every time.
Extend Printer Life
As a printer owner, you must be familiar with the importance of maintaining your device. A drum is an essential part of the printer that requires attention too. It helps in transferring images or texts from the toner to the paper.
Over time, dust, toner, and paper fibers can accumulate on the drum’s surface, leading to reduced print quality and eventual hardware failure. Therefore, cleaning your drum regularly is vital to ensuring its longevity. You can use a soft, lint-free cloth or a specialized cleaning product that is specifically designed for your printer model.
This simple task can go a long way in extending your printer’s life and ensuring that every print comes out clear and crisp. So, don’t forget to show your drum some love and attention to keep your printer up and running.
Avoid Faded or Blurry Prints
If you’re constantly noticing that your prints are coming out faded or blurry, it’s time to check your drum. Keeping your printer drum clean is crucial in producing sharp and clear prints. Over time, the drum can accumulate dust, toner residue, and even moisture, which can lead to these printing issues.
By regularly cleaning your drum, you can avoid these frustrating print quality problems and ensure that your documents and images come out looking crisp. So, take a few minutes to inspect your drum and clean it if necessary. Your printer (and your eyes) will thank you for it!
Steps to Clean Your Brother Printer Drum
If your Brother printer drum is not clean, it can cause poor-quality prints, streaks, and smudges. The good news is that cleaning your printer drum is a simple process that can take just a few minutes. First, turn off the printer and unplug it from the power source.
Open the printer cover and find the drum unit. Carefully remove the drum unit and toner cartridge from the printer. Set the toner cartridge aside and use a clean cloth to wipe down the drum unit.
Be sure to avoid touching the green drum roller, as this can damage it. Once you have wiped down the drum unit, return it to the printer and reinsert the toner cartridge. Finally, close the printer cover and plug in the printer.
Turn it on and run a test print to ensure the drum is clean and your prints are of high quality. By taking these simple steps to clean your Brother printer drum, you can significantly improve the print quality of your documents in just a matter of minutes.
Step 1: Turn Off Your Printer
Brother Printer Drum Cleaning Are you experiencing faded or blurry prints with your Brother printer? It might be time to clean your printer drum. Follow these simple steps to ensure that your printer produces high-quality prints. Firstly, turn off your Brother printer to avoid any accidents.
Next, remove the toner cartridge and place it in a safe place. Locate the drum unit and take it out of the printer. Inspect the drum for any dirt or debris, and wipe it gently with a lint-free cloth.
Avoid using sharp or abrasive materials as they can damage the drum. After cleaning, reinsert the drum unit and toner cartridge back into the printer. Finally, turn on the printer and test out your prints.
Regularly cleaning your Brother printer drum will extend the life of your printer and ensure that your prints always look sharp and vibrant. So, take some time to clean your Brother printer drum and enjoy clear and crisp prints every time.
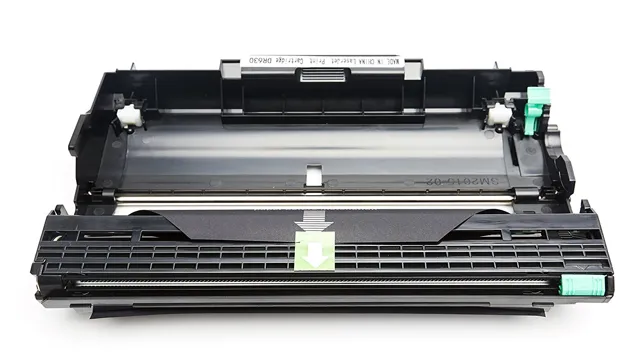
Step 2: Remove the Drum Unit
To properly clean your Brother printer drum, you must first remove the drum unit from the machine. This step is crucial, as attempting to clean the drum while it is still attached to the printer can cause serious damage to the machine. To remove the drum unit, start by opening the printer’s front cover.
Next, locate the green drum release lever and slide it to the right until it stops. Then, carefully pull the drum unit straight out of the printer and set it aside on a clean, flat surface. Take care not to touch the drum surface itself, as oils from your skin can cause print quality issues later on.
Once you have removed the drum unit, you are ready to move on to the next step of the cleaning process.
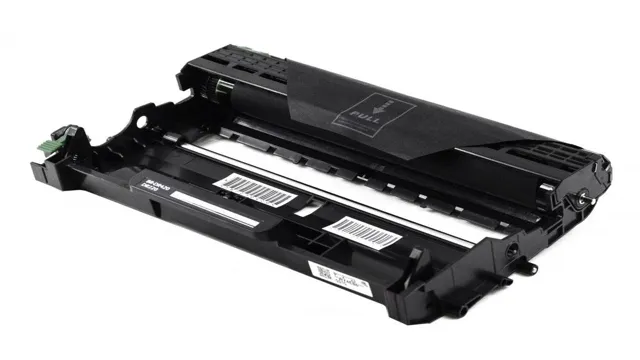
Step 3: Clean the Drum Unit
If you want to keep your Brother printer running smoothly, it’s essential that you take good care of the drum unit. Cleaning your printer’s drum unit on a regular basis can help ensure that your machine operates at peak performance and produces high-quality prints every time. So, how do you go about cleaning your Brother printer drum? The process is relatively simple.
First, turn off your printer and open the cover to access the drum unit. Remove the drum and toner cartridge assembly. Next, wipe down the drum unit using a lint-free cloth to remove any excess toner or debris.
Be sure to avoid using any sharp or abrasive materials, as this can damage the drum surface. Once you’ve cleaned the drum unit, reattach it to the printer and close the cover. Finally, turn your printer back on and run a test print to ensure everything is working as it should.
By following these steps, you can keep your Brother printer drum in top condition and enjoy clear, crisp prints every time you use your machine.
Step 4: Reinstall the Drum Unit
After you have completed cleaning the drum unit, it’s time to reinstall it back to your Brother printer. Begin by placing the drum unit into the printer and lining it up correctly with the indentations inside the printer unit. Make sure that all the clips and latches are fully secured in place before closing the front cover of the printer.
Once the cover is closed, turn on your printer to ensure everything operates correctly. Reinstalling your drum unit will help to ensure that the printed documents come out clean, clear, and professional in quality. It is an essential step to be performed after cleaning your Brother printer drum to prevent any potential issues or malfunctions.
So, make sure you do it with utter care and attention to detail.
Tips and Tricks for Maintaining Your Brother Printer
One of the most important components of a Brother printer is the drum unit, which is responsible for transferring toner onto the paper. To ensure optimal performance and longevity of your printer, it is crucial to regularly clean the drum unit. One tip for doing so is to use a lint-free cloth or cotton swab dipped in rubbing alcohol to gently clean the drum’s surface.
It is important to never touch the drum directly with your fingers, as the oils from your skin can damage it. Another helpful trick is to only use high-quality toner cartridges that are specifically designed for your printer model. Using inferior cartridges or refilling old ones can cause damage to the drum and ultimately lead to costly repairs.
By taking proper care of your Brother printer’s drum unit, you can ensure that it continues to produce high-quality prints for years to come.
Avoid Overusing Your Printer
One of the best ways to maintain your Brother printer is by avoiding overuse. Using your printer excessively can lead to wear and tear on important components, causing them to break down faster. To avoid this, it’s important to be mindful of how often you print and to only print when necessary.
You can also save ink and paper by setting your printer to print double-sided and by using the draft mode when printing documents that aren’t as important. Additionally, regularly cleaning your printer and replacing ink or toner cartridges when necessary can also help extend its life. By taking these simple steps, you can keep your Brother printer operating smoothly and efficiently for years to come.
Invest in Quality Toner Cartridges
When it comes to maintaining your Brother printer, investing in quality toner cartridges is essential for ensuring its longevity and high-quality prints. While it may be tempting to opt for cheaper cartridges, they often contain subpar toner that can damage your printer’s internal components and produce low-quality prints. Additionally, using low-quality cartridges can lead to higher overall printing costs in the long run due to increased maintenance and replacement costs.
To ensure that your Brother printer is running smoothly, it’s also important to regularly clean it, keep it free of dust and debris, and update its software and drivers. By following these tips and tricks, you can ensure that your Brother printer will last for years, producing high-quality prints every time you use it!
The Bottom Line
If you notice that your Brother printer isn’t producing high-quality prints or there are streaks and spots on the documents, it could be time to clean the drum. Cleaning the drum is highly recommended at regular intervals to maintain the printer’s performance and prolong its lifespan. Luckily, cleaning a Brother printer drum is a simple process that doesn’t require professional help.
Firstly, turn off the printer and unplug it. Locate the drum unit and open its cover. Take out the toner cartridge and keep it aside.
Use a soft, lint-free cloth to gently wipe the surface of the drum to avoid any damage. Avoid touching the drum with your bare hands as the oil from your skin can affect the drum’s future performance. Ensure that the drum’s surface is fully clean before replacing the toner cartridge.
Finally, close the drum unit and turn on the printer. With these few steps, your Brother printer drum will be sparkling clean, and you’ll be able to enjoy high-quality prints once again.
Conclusion
After cleaning the drum in your Brother printer, you’ll be amazed at the crystal-clear quality of your prints. It’s like giving your printer a refreshing spa day and rejuvenation treatment all in one. So go ahead and indulge your printer with a little TLC, and reward it with the gift of a clean drum.
You’ll thank yourself for it, and your printer will thank you with spotless pages for days!”
FAQs
How often should I clean the drum of my Brother printer?
It is recommended to clean the drum of your Brother printer every time you replace the toner cartridge.
What is the best way to clean the drum of my Brother printer?
To clean the drum of your Brother printer, you can use a lint-free cloth and a mild cleaning solution, such as isopropyl alcohol. Be sure to follow the instructions in your printer manual.
Can I reuse the toner that is left in the drum of my Brother printer?
It is not recommended to reuse the toner left in the drum of your Brother printer. It is best to replace the toner cartridge to ensure optimal print quality.
How can I tell if the drum of my Brother printer needs to be replaced?
Signs that the drum of your Brother printer may need to be replaced include faded or streaky prints, or a warning message on your printer display. Check your printer manual for more specific information.