
If you own a Brother Printer, you are probably aware that the drum unit plays a critical role in the printing process. Over time, the drum unit will wear out and require replacement, which can be an intimidating task for those who have never done it before. However, with a bit of knowledge and the right tools, replacing the Brother Printer drum unit can be a simple and cost-effective process.
In this blog post, we will provide you with a step-by-step guide on how to replace your Brother Printer drum unit, including tips and tricks to make the process as easy and stress-free as possible. So, let’s get started and ensure your printer continues to function smoothly!
Identify the Compatible Drum Unit
If you own a Brother printer, at some point, you may need to replace the drum unit to ensure that your printer continues to give you crisp, high-quality prints. However, it’s crucial to identify the compatible drum unit that works with your specific printer model. Brother printers have different drum units that vary in size, compatibility, and yield.
To determine the compatible drum unit, you need to check the printer manual or visit the Brother website to find the part number that corresponds with your printer model. Installing an incompatible drum unit can cause damage to your printer and negatively impact print quality. Therefore, it’s essential to verify the drum unit’s compatibility before making a purchase and installing it into your printer.
Choosing the right drum unit ensures that your Brother printer will function optimally and produce top-quality prints without any issues.
Check Your Printer Model
Before purchasing a new drum unit for your printer, it’s important to identify its compatibility with your printer model. Not all drum units are created equal, and using the wrong one can cause damage to your printer. To start, check your printer’s manual or manufacturer’s website for a list of compatible drum units.
Often, a specific model of printer will have a limited list of compatible drum units, so be sure to double-check before making a purchase. Using an incompatible drum unit can lead to lower print quality, premature failure, and can even void your printer’s warranty. Taking the time to ensure your drum unit is compatible with your printer can save you a lot of headaches in the long run.
Read the Printer Manual
When it comes to replacing the drum unit in your printer, the first step is to identify the compatible unit for your specific printer model. This information can usually be found in the printer manual that came with your device. It’s essential to ensure that you choose the right drum unit to avoid compatibility issues that could lead to poor print quality, errors, or even damage to your printer.
It’s also crucial to remember that each printer has a unique drum unit, so you can’t simply use the same cartridge for different printer models. Identifying the compatible drum unit will not only save you time and money but also provide you with the best performance from your printer. By taking the time to read your printer manual, you’ll be able to locate the right drum unit and keep your printer running smoothly.
Replace Drum Unit
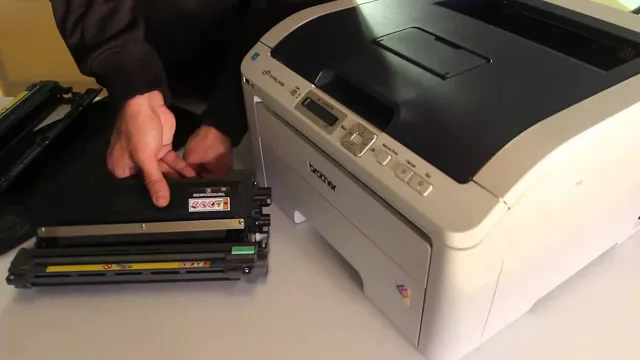
If you own a Brother Printer, you may eventually need to replace the drum unit. The drum unit is responsible for transferring the toner to the paper during the printing process. Over time, the drum unit can become worn out, which can lead to poor print quality.
Luckily, replacing the drum unit is a relatively simple process. First, make sure you have the correct replacement drum unit for your model of Brother Printer. Then, turn off your printer and open the front cover to access the drum unit.
Carefully remove the old drum unit by pulling it straight out, being careful not to touch the drum surface. Insert the new drum unit, ensuring it clicks securely into place. Finally, close the front cover and turn on your printer.
Your Brother Printer should now be ready to print with optimal quality. Don’t forget to recycle the old drum unit. By doing so, you will be helping the environment and supporting a sustainable future.
Turn Off the Printer
If you find yourself needing to replace the drum unit in your printer, the first thing you’ll want to do is turn off the printer. This prevents any accidental damage to the drum unit or other components during the replacement process. Once the printer is off, you can begin to remove the existing drum unit.
This process will vary depending on the make and model of your printer, so refer to your user manual for specific instructions. As you remove the drum unit, be sure to keep it level and avoid touching any of the internal components or rollers. Once the old drum unit is out, you can insert the new one following the same instructions in reverse.
This should be a relatively simple process and will help keep your printer in good working condition.
Remove the Old Drum Unit
When it comes to keeping your printer in top shape, replacing the drum unit is a crucial component. If you’re unsure how to do this, don’t worry—it’s easier than you might think! First, turn off your printer and let it cool down. Then, open the printer cover and locate the drum unit.
Most models have a release lever or button that you’ll need to press in order to remove the old drum unit. Simply slide it out of the printer and set it aside. It’s important to note that drum units should never be shaken or touched on the photosensitive drum surface, as this could damage it.
Once you’ve safely removed the old unit, you can move on to installing the new one and get back to printing high-quality documents and images in no time! Remember, regular maintenance and replacement of parts like the drum unit can greatly extend the life of your printer and ensure it continues to produce top-notch results.
Install the New Drum Unit
Installing a new drum unit in your printer can be a daunting task, but it’s crucial if you want to maintain the quality of your prints. When it’s time to replace your drum unit, start by finding the release lever or button that unlocks the cartridge assembly. Then, gently slide the assembly out of the printer and set it aside.
Extract the old drum unit by pulling it straight out of the assembly. Next, carefully unpack your new drum unit and remove any protective materials. Insert the new drum unit into the cartridge assembly, being sure to align it properly.
Finally, slide the assembly back into the printer until it clicks into place. Congratulations, you’ve successfully installed a new drum unit and can now enjoy crisp, clear prints once again.
Calibrate the Printer
If you’re experiencing printing issues such as streaks or smudging on your paper, it may be time to replace the drum unit in your Brother printer. However, before doing so, it’s important to calibrate your printer to ensure the new drum unit is functioning properly. To calibrate your printer, start by cleaning the corona wire inside the drum unit cover with the green tab.
Next, access your printer’s menu and select “Print Settings,” then navigate to “Maintenance” and “Calibration.” Follow the on-screen instructions to perform the calibration process. Once complete, you can safely replace the drum unit in your Brother printer.
Regularly calibrating your printer can help prevent printing issues and ensure your documents come out looking clean and professional. So don’t forget the importance of calibration in your printer maintenance routine!
Run the Printer Calibration
Calibrating your printer is an important step towards getting the perfect prints. Proper calibration ensures that the colors are accurate, the details are sharp, and the overall quality of your prints is top-notch. To begin, you’ll need to run the printer calibration test.
This test prints a series of color blocks, lines, and gradients which help to identify any inconsistencies in the printer’s performance. Once the test is complete, you can adjust the printer’s settings to ensure that everything is aligned and calibrated correctly. It’s important to note that printer calibration is not a one-time event.
Over time, the printer’s performance can change, and so it’s recommended that you run calibration tests periodically to ensure that your prints are always of the highest quality. With a well-calibrated printer, you can produce prints that accurately reflect the colors and details of your digital files, and your clients will be impressed with the quality of your work. So, take the time to calibrate your printer, and always keep it in top shape for the best results.
Check the Print Quality
Calibrating your printer is an important step to ensure the print quality is up to standard. Before you start printing, take the time to check if the printer is correctly calibrated. To do this, print a test page with a few lines of text and an image.
Check the colors, the sharpness of the text, and the contrast of the image. If you notice any issues, such as blurry text or faded colors, then it is time to calibrate your printer. Calibration is critical because it adjusts the printer’s settings to ensure that the colors, tones, and levels of brightness are correct, resulting in sharp and accurate prints.
An incorrectly calibrated printer can lead to misrepresentation of colors or mismatched tones, making the final print look unprofessional. Therefore, it is crucial to perform regular calibration to achieve the desired print consistency and quality, giving you an edge over the competition. Make sure you calibrate your printer regularly to keep your work looking its best.
Tips and Troubleshooting
If you have a Brother printer that needs its drum unit replaced, there are a few things to keep in mind. Firstly, make sure you have purchased the correct drum unit for your printer’s model number. Once you have the replacement drum, turn off the printer and open the front cover.
Remove the old drum unit by pulling it out gently, being careful not to touch the drum or any other parts inside the printer. Unbox the new drum and slide it into place, making sure it clicks securely into position. Close the front cover and turn the printer back on to ensure the new drum unit is recognized and working correctly.
If you continue to experience issues with print quality, consult the printer’s user manual for further troubleshooting tips. Overall, replacing the drum unit may seem daunting, but as long as you have the correct replacement part and follow the instructions carefully, it’s a straightforward process.
Use Genuine Brother Drum Units
If you are an owner of a Brother printer, it is essential to use genuine Brother drum units. These drum units are a vital part of the printing process and are responsible for transferring toner onto the paper. Using non-genuine drum units may save you a few bucks, but it can cause issues such as poor print quality, streaks, and uneven coverage.
Not to mention, using non-genuine products can also damage your printer in the long run, leading to costly repairs. To avoid any hiccups in your printing process, always opt for the genuine Brother drum units. They are specifically designed to work seamlessly with Brother printers, ensuring top-notch print quality and durability.
Don’t take a risk and stick with the quality and reliability of genuine Brother drum units. Your printer will thank you for it!
Clean the Printer Regularly
When it comes to keeping your printer functioning at its best, regular maintenance is key. One of the most important steps you can take is to clean your printer regularly. Over time, dust, debris, and stray bits of paper can build up inside your machine, making it less efficient and causing jams or other problems.
By taking a few minutes each week or month to wipe down the exterior of your printer and remove any loose debris from inside, you can help ensure optimal performance and extend the life of your machine. Plus, regular cleaning can also help you avoid more serious issues that may require professional repair. So make sure to add printer maintenance to your regular to-do list and enjoy a smoothly running machine that produces high-quality prints every time.
Contact Brother Support if Problems Persist
If you encounter issues with your Brother printer, there are a few tips and troubleshooting methods you can try before contacting support. Firstly, ensure that your printer is connected to your computer or device correctly and that all cables are securely attached. Additionally, check that there is paper in the tray and that the ink or toner levels are sufficient.
If your printer is producing low-quality prints or has alignment issues, try cleaning the print heads or performing a calibration. If problems persist, it may be necessary to update your printer’s drivers or firmware, which can often be found on the Brother website. However, if all of these solutions fail to resolve your issue, it’s time to contact Brother Support for further assistance.
They have a team of experts who can provide additional troubleshooting advice and, if necessary, arrange for repairs or replacement parts. Don’t hesitate to reach out to them if you need help – it’s better to get your printer back up and running as quickly as possible!
Conclusion
Replacing the drum unit in your Brother printer is like swapping out your tired sneakers for a fresh new pair. Just as your old shoes lose their tread and support, the drum unit wears down over time and can start producing poor quality prints. So don’t let your printer hobble along – give it a boost with a replacement drum unit and enjoy sharp, crisp documents once again!”
FAQs
How often should I replace the drum unit in my Brother printer?
It is recommended to replace the drum unit after printing approximately 12,000 pages or every 3 to 4 years, whichever comes first.
Can I replace the drum unit myself or should I hire a professional for my Brother printer?
Yes, you can replace the drum unit yourself by following the installation instructions provided by Brother. However, if you are not comfortable with replacing it on your own, you can hire a professional to do it for you.
What are the signs that indicate that the drum unit needs to be replaced in my Brother printer?
If you notice faded or blurry prints, black spots or streaks on your prints, or a warning message on your printer screen, it is likely time to replace the drum unit.
Can I use third-party or remanufactured drum units with my Brother printer?
While third-party or remanufactured drum units may be cheaper, it is recommended to only use genuine Brother drum units for optimal print quality and to avoid any potential damage to your printer.