If you’re looking to set up the HP 4100e printer for the first time, you may be feeling a bit overwhelmed. With so many different cables and buttons, it can be difficult to know where to start. But fear not! In this blog post, we’ll walk you through every step of the setup process so that you can start printing in no time.
Whether you’re using a Mac or PC, we’ve got you covered. So grab a cup of coffee and let’s get started!
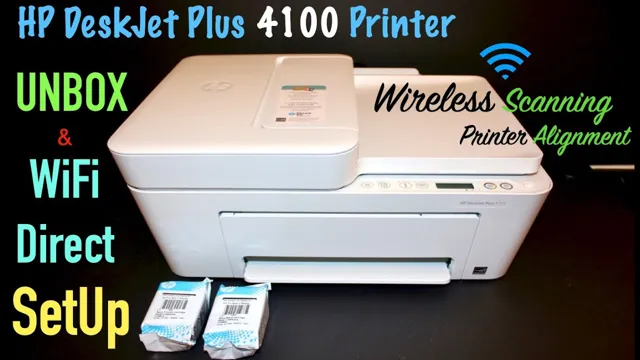
Unboxing and Initial Setup
Unboxing and setting up the HP 4100e printer is a straightforward process that anyone can accomplish. The printer comes in a sturdy box alongside all the necessary cables and software. Begin by removing the printer from its packaging and removing all the protective tapes and materials.
Next, plug in the power cable, and connect the printer to a computer via USB or ethernet cable. Once connected, turn on the printer and follow the instructions on the screen to select your language, set up the ink cartridges, and connect to a wireless network if needed. The HP Smart app can make this process even more comfortable, especially when attempting to connect wirelessly.
Ultimately, you will be required to download and install the printer driver and software, which should only take a few minutes. Overall, the HP 4100e printer setup isn’t complex, and anyone can do it. However, if you have trouble setting it up, help is always available online, in manuals, or via customer support.
Connecting the Printer to Power Source
When unboxing your new printer, one of the first things you will need to do is connect it to a power source. This is a straightforward process that usually involves plugging the printer into a wall outlet using the provided power cable. However, it’s important to ensure that you have the right voltage for your printer to avoid damaging it or causing a fire hazard.
Make sure to check the user manual or the back of the printer for instructions on the voltage and plug type required. Once you have confirmed that you have the correct voltage, simply plug in the printer, and you’re ready for the next step in the setup process. Remember that your printer’s power cord can be your faithful companion throughout the life of the printer, so make sure to keep it safe and store it properly when not in use.
Installing the Toner Cartridge
If you’re the proud owner of a new printer, then the first step in setting up your device is to install the toner cartridge. To do this, first, unbox the printer and all its accompanying parts, including the toner cartridge. Before handling the toner cartridge, make sure to wash and dry your hands thoroughly to avoid damaging it.
Find the cartridge opening located on the front or side of your printer and open it by pulling the latch. Once the opening is visible, remove the toner cartridge from its packaging and gently shake it to distribute the toner powder evenly. Now, insert the cartridge carefully into the opening, making sure it clicks into place.
Close the latch, and your printer is ready to use! Remember to dispose of the packaging and used toner cartridges responsibly to minimize environmental impact. With this simple guide, you can enjoy hassle-free printing with your new device in no time.
Loading Paper in the Tray
Loading paper in the tray is an essential part of setting up a new printer. When you unbox your printer, make sure to locate the tray where the paper will be loaded. Depending on the model of your printer, the tray may be found in different locations.
Once you find the tray, inspect it for any damage or dirt. If everything looks good, you can start preparing the tray for paper loading. First, adjust the paper guides to match the size of the paper you will be using.
Next, fan out the stack of paper to prevent any sheets from sticking together. Then, tap the stack gently on a flat surface to align the edges. Finally, load the paper into the tray, making sure that the stack is not too thick and that the guides are adjusted correctly.
With these simple steps, you will be ready to print in no time!
Connecting the Printer to Your Device
Setting up a new printer can be an exciting yet daunting task, especially if it’s your first time doing so. Fortunately, the hp 4100e printer setup process is relatively straightforward. The first step in connecting the printer to your device is making sure that your printer is turned on and connected to your wireless network.
Once this is done, download and install the printer software onto your device from HP’s website. Follow the on-screen prompts to complete the installation process, making sure to select your printer model and connect it to the same wireless network as your device. You may also need to enter your network password during the setup process.
Once the installation is complete, you should be able to print a test page to ensure that your printer is properly connected and ready to use. If you encounter any issues during setup, check that your printer and device are both connected to the same wireless network, and that you have downloaded the correct software for your device and printer model. With these steps complete, you’re ready to start printing!
Wired Connection
Connecting your printer to your device through a wired connection is a simple process that can save you a lot of hassle down the line. This is especially true if you plan on using your printer frequently. All you need to do is connect the printer to your computer or laptop using a USB cable.
However, it is important to note that not all printers come with a USB cable, so you may need to purchase one separately. Once you have connected the printer to your device, you can start using it right away without the need for any additional setup. Additionally, a wired connection will ensure that your printer always stays connected and you won’t have to worry about any connectivity issues.
Overall, a wired connection is a reliable and convenient way to use your printer and get the job done quickly and efficiently.
Wireless Connection
Connecting your printer wirelessly to your device can seem daunting, but it is actually quite simple. First, ensure that both the printer and the device are connected to the same Wi-Fi network. Then, on the device, navigate to the settings menu and select “Printers & scanners.
” From there, click “Add a printer or scanner.” Your device will automatically search for available printers on the network. Once your printer is identified, click on it and follow the prompts to complete the setup.
It’s really that easy! No more tangled cords or limited mobility; you can now print from anywhere in the room. Plus, this wireless connection allows multiple devices to connect to the printer, making it even more versatile. So enjoy the freedom and convenience of wirelessly connecting your printer and devices.
Installing Printer Drivers and Software
Setting up the HP 4100e printer requires the installation of its drivers and software, which can be easily done by following a few quick steps. Firstly, ensure that the printer is connected to your computer and is turned on. Next, visit the official HP website and navigate to the ‘Support’ section, where you can enter the printer model and download the appropriate driver software.
Once downloaded, run the installation wizard and follow the on-screen prompts to complete the process. It is important to note that for older operating systems, custom drivers may need to be installed manually. After the installation finishes, restart your computer and the printer should be recognizable by the system.
Ensure that the printer setting is properly configured before printing a test page. By following these simple steps, you can easily set up and install the HP 4100e printer drivers and software, and start printing in no time.
Downloading Drivers and Software from HP Website
If you’ve recently purchased an HP printer, you’re probably eager to get it set up and ready to use. Luckily, installing the necessary drivers and software from the HP website is usually a straightforward process. To get started, visit the HP support page and enter your printer model number.
From there, you can browse the available drivers and software that are compatible with your printer. Once you’ve found the files you need, simply click “Download” and follow the on-screen instructions to install them on your computer. Keep in mind that some printers may require additional software or updates, so be sure to read all instructions carefully and follow any prompts that pop up during the installation process.
By taking the time to download and install the necessary drivers and software, you can ensure that your HP printer runs smoothly and efficiently for years to come.
Driver Installation Process
When it comes to setting up your new printer, one of the first steps will be to install the necessary drivers and software on your computer. Depending on the make and model of your printer, these may be available for download online or may be included on a CD or USB drive that came with your printer. Installing the drivers and software typically involves following a step-by-step process, which will vary depending on your operating system and the specific printer you are using.
The goal is to ensure that your computer and printer are properly connected and communicating with one another, which will allow you to print documents and photos seamlessly. It’s important to carefully follow the installation instructions and restart your computer if prompted, to ensure that everything is working properly. With the right drivers and software in place, you’ll be well on your way to enjoying all the features and capabilities of your new printer.
Printing a Test Page
If you’re setting up an HP 4100e printer for the first time, it’s important to print a test page to ensure everything is working properly. To do this, simply hold down the “Go” button on the front of the printer for about 5 seconds until the printer starts printing. The test page should include information about your printer, such as the model number and firmware version, as well as a test of its printing capabilities.
This is a crucial step in the setup process because it can help identify any issues that may need to be addressed before you start using your printer for important tasks, such as printing documents and photos. So, if you’ve just purchased an HP 4100e printer, don’t forget to print a test page during setup to make sure everything is in working order.
Conclusion
In conclusion, setting up the HP 4100e printer is like mastering a complex puzzle. But once you have the pieces in place, you’ll have a reliable and efficient printer that will make your life a whole lot easier. It’s like having a trusty sidekick that never lets you down, always delivering outstanding print quality, without fail.
So, if you want to stay on top of your printing game, get ready to buckle up, follow the instructions carefully, and enjoy the smooth ride of the HP 4100e printer!”
FAQs
How do I set up my HP 4100e printer?
To set up the HP 4100e printer, connect it to your computer using a USB cable or through a wireless network. Then, insert the installation disk and follow the on-screen prompts to complete the setup process.
What types of paper can I use with my HP 4100e printer?
The HP 4100e printer is compatible with a variety of paper types, including plain paper, envelopes, labels, cardstock, and transparencies.
How do I troubleshoot paper jams with my HP 4100e printer?
To troubleshoot paper jams with the HP 4100e printer, first turn off the printer and unplug it from the power source. Then, remove any jammed paper from the input and output trays. Once the paper is removed, turn the printer back on and try printing again.
How do I replace ink cartridges in my HP 4100e printer?
The HP 4100e printer does not use ink cartridges, as it is a laser printer. Instead, it uses toner cartridges that can be easily replaced by opening the front cover, removing the old cartridge, and inserting a new one.