Have you ever encountered issues with your computer’s performance? Are you looking to upgrade your computer’s motherboard for improved functionality? As a vital component, a motherboard plays an essential role in the overall performance of your computer. However, how can you ensure that the new motherboard is functioning correctly and is compatible with the rest of the system hardware? The answer is simple: testing. Testing your motherboard ensures that you have a robust system that runs smoothly and efficiently.
Think of a motherboard as the foundation of your computer; if the foundation is flawed, the entire structure collapses. This blog will give you an insight into testing a motherboard and provide you with the tools to make informed decisions when upgrading your system.
Tools Needed
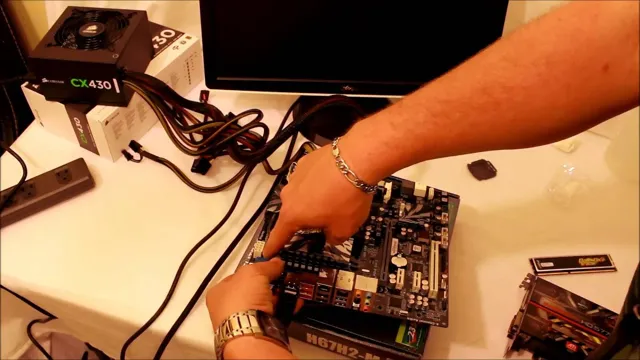
When it comes to testing a motherboard, you don’t need a lot of fancy equipment. The essential tools you’ll need include a working power supply, a compatible CPU, a stick of RAM, and a graphics card. You’ll also want to have a keyboard, mouse, and monitor on hand for the testing process.
Once you have all of these components, the process is fairly straightforward. You’ll need to connect everything to the motherboard, power it up, and look for any error messages or other issues that might arise. It’s also a good idea to run a diagnostic tool to check for any underlying problems that may not be immediately apparent.
With the right tools and a little bit of patience, you should be able to thoroughly test any motherboard and ensure that it’s in good working order.
Multimeter
Multimeter Before diving into the world of electronics, it’s important to have the right tools on hand. One of the most essential tools for any beginner or experienced technician is a multimeter. This device is used to measure electrical current, voltage, and resistance within a circuit.
To use a multimeter properly, it’s recommended to have other tools on hand, including wire strippers, screwdrivers, and alligator clips. Whether you’re a hobbyist or professional, a multimeter can help you diagnose and solve issues with ease. By having this tool in your toolbox, you’ll be able to tackle any project with confidence.
Don’t let your lack of a multimeter hold you back from your next electrical project, invest in this essential tool today.
CPU and RAM
When it comes to understanding the performance of a computer, two of the most critical components are the CPU and RAM. The CPU, or Central Processing Unit, is responsible for executing all of the commands that a computer receives, while RAM, or Random Access Memory, is responsible for temporarily storing data and instructions that the CPU needs to access quickly. To effectively monitor and optimize the performance of these components, there are several essential tools that you’ll need.
Firstly, a reliable system monitoring tool that can display the usage of both CPU and RAM in real-time is crucial. This can help you identify any issues with performance, such as high CPU utilization or excessive RAM usage. Additionally, a diagnostic tool that can run various stress tests on your CPU and RAM is handy for identifying potential bottlenecks or hardware failures.
With these tools, you can ensure that your CPU and RAM are operating optimally and can avoid any performance issues down the line.
Visual Inspection
When it comes to testing a motherboard, one of the most important steps is to perform a visual inspection. This involves carefully examining the motherboard for any physical damage, such as cracks or breaks in the circuitry, or signs of overheating, such as discolored components or burn marks. It’s also important to check for any loose connections or components, as these can cause instability and other issues.
To perform a visual inspection, you’ll need to remove the motherboard from the computer case and place it on a flat, non-conductive surface. Next, use a magnifying glass or other tool to inspect both the front and back of the motherboard, looking for any signs of damage or wear. In addition to a visual inspection, it’s also important to test the functionality of the motherboard using software tools and diagnostic tests.
But by starting with a thorough visual inspection, you can catch any obvious issues early on and potentially avoid more serious problems down the line. So, if you’re planning on testing a motherboard, be sure to take the time to perform a detailed visual inspection first.
Check for Damaged Components
When it comes to maintaining your equipment, it’s essential to perform visual checks regularly. A visual inspection involves checking your equipment for any signs of damage thoroughly. It’s a basic maintenance task that helps you to detect any potential issues before they become bigger problems.
The first step to conduct a visual inspection is to check for any damaged components. This could include anything from a cracked hose to a damaged motor. A damaged component can lead to decreased efficiency, increased energy use, safety risks, and even equipment failure.
By spotting damage early on, you can take the necessary steps to repair or replace the component, preventing any further damage from occurring. So, take the time to conduct a visual inspection and look for any damaged components to ensure that your equipment is operating optimally and avoid any costly repairs down the line.
Check for Leaking Capacitors
When it comes to maintaining electronic devices such as computers, laptops, or even gaming consoles, one of the essential things to look out for is capacitor leakage. Capacitors are crucial components responsible for storing electrical charge and providing power to various parts of the device. Unfortunately, capacitors are prone to leakage, which can cause significant damage to the device.
Thus, it is crucial to perform a visual inspection to check for any leaking capacitors regularly. This visual check only requires a keen eye to detect any bulging or leaking capacitors on the motherboard or the device’s power supply. If any are found, it is important to replace them immediately to prevent any significant damage to the device.
In conclusion, it is essential to frequently check for any leaking capacitors, as they can cause significant issues that may ultimately lead to costly repairs.
Test Power Supply
If you suspect that your motherboard is faulty, a good place to start is by testing your power supply. A failing power supply can cause all sorts of issues, including intermittent reboots, random shutdowns, and other erratic and quirky behavior. Fortunately, it’s relatively simple to test your power supply using a basic multimeter.
First, unplug your computer and remove the side panel to access the power supply. Next, disconnect the power supply cables from all components to isolate the unit. Then, use a multimeter to test the voltage outputs from each of the power supply cables.
If all the readings are within acceptable ranges, your power supply is likely functioning correctly. If not, it may be time to replace it. Remember, testing your power supply is just one step in troubleshooting a motherboard issue, and if problems persist, you should consider seeking professional assistance.
Check Voltage Output
When it comes to ensuring that your electronics are functioning correctly, it is important to test the power supply. One crucial step in this process is to check the voltage output. The voltage output refers to the amount of electricity that is being supplied to the device.
If the voltage is too low, the device may not function correctly. If the voltage is too high, the device may become damaged. To check the voltage output, you will need a multimeter.
This tool can measure the voltage output and provide you with an accurate reading. Simply place the multimeter on the power supply’s output terminals and read the display. If the voltage is within the manufacturer’s recommended range, then the power supply is functioning correctly.
If it is outside the recommended range, then there may be an issue with the power supply that needs to be addressed. By regularly testing the voltage output of your power supplies, you can ensure that your electronics are functioning correctly and avoid any potential damage.
Check for Short Circuits
When it comes to testing your power supply, it’s essential to check for short circuits. Short circuits can cause damage to your power supply and even lead to fire hazards, so it’s vital to ensure that everything is safe before using your power supply. To check for short circuits, you will need a multimeter, which can measure electrical continuity.
First, unplug all cables from your power supply and turn off the power switch. Then, use the multimeter to measure resistance between each of the power supply’s pins. If the multimeter shows that there is no resistance between any two pins, it means that there is a short circuit present.
In this case, you should not use the power supply and must seek assistance from a professional. Checking for short circuits can be time-consuming, but it’s worth it to avoid potential damage and hazards. So, whenever you are testing your power supply, don’t forget to check for any short circuits!
Testing with Diagnostic Software
If you’re trying to figure out how to test a motherboard, one of the best options is to use diagnostic software. This type of software is designed specifically to test various aspects of a computer, including the motherboard. One of the most popular options is PC-Doctor, which is used by many professional computer repair technicians.
This software can test everything from the motherboard’s memory and processor to its input/output ports and storage devices. By using diagnostic software, you can quickly and accurately determine if there are any issues with your motherboard, which can save you a lot of time and money in the long run. So, if you’re experiencing problems with your computer and suspect that the motherboard may be to blame, consider using diagnostic software to help pinpoint the issue.
Using POST Card
If you’re having trouble diagnosing problems with your computer, using a POST card can help pinpoint the issue. POST stands for Power On Self Test, and the card will tell you if any errors occurred during this initial testing phase. Using diagnostic software with the POST card can provide even more specific information about what may be causing the issue.
By following step-by-step instructions provided by the software, you can better understand the root of the problem and take steps to fix it. Investing in a POST card and diagnostic software can save you time and money in the long run by helping you avoid costly repairs or replacement parts. So why not give it a try the next time you’re troubleshooting your computer?
Using Motherboard Diagnostic Tool
Motherboard Diagnostic Tool When it comes to troubleshooting your computer, motherboard diagnostic tools can be a lifesaver. These software programs allow you to test your motherboard for any issues or faults, such as hardware failures or compatibility problems. Some diagnostic tools are even designed to diagnose problems with specific brands or models of motherboards.
Using a motherboard diagnostic tool may sound intimidating, but it’s actually quite simple. Once you’ve downloaded and installed the software, you can run a diagnostic test on your motherboard. The tool will then scan your motherboard for any issues and provide you with a report on its findings.
One popular motherboard diagnostic tool is CPU-Z. This free software program can provide you with detailed information about your processor, motherboard, and memory. It can also tell you whether your system is running at its optimal settings.
Another common tool is PC Doctor, which offers a range of diagnostic tests for your motherboard, CPU, memory, and other hardware components. It can also provide you with recommendations on how to fix any problems it detects. Overall, using a motherboard diagnostic tool is a great way to identify and troubleshoot issues with your computer’s motherboard.
With the right software at your disposal, you can easily diagnose and fix any problems that may be affecting your system’s performance. So the next time your computer is acting up, consider using a motherboard diagnostic tool to help you quickly pinpoint the source of the problem.
Testing with Spare Parts
If you’re wondering how to test a motherboard, one effective method is to use spare parts. This approach can help you isolate the problem, whether it’s a faulty motherboard or another component such as the CPU, RAM, or power supply. Start by removing all but the essential components from your system, including the processor, graphics card, and memory modules.
Then, try to boot up the system with a spare power supply or another compatible motherboard. This will help you determine whether the issue lies with the motherboard or elsewhere. If the system boots up successfully, you can further troubleshoot by adding back components one at a time until you identify the faulty part.
By using spare parts, you can save time and money by diagnosing and fixing the problem yourself instead of relying on a professional repair service.
RAM
RAM Are you experiencing slow performance from your computer? The culprit may be your RAM. RAM stands for Random Access Memory and is responsible for temporarily storing data that the computer is currently using. If your RAM is running low or malfunctioning, it can cause your computer to operate at a slower pace.
That’s why it’s important to regularly test your RAM with spare parts. By doing this, you can ensure that your computer’s RAM is functioning properly and up to par. Think of RAM like a classroom desk.
The larger the desk, the more books and papers you can temporarily store while you work on them. If your desk is too small, you’ll have to move things around more often and it will take longer to complete your task. It’s the same with RAM; the more available space you have, the faster your computer can process data.
Testing your RAM with spare parts is a straightforward process. First, identify the type of RAM your computer uses, then purchase a spare part that is compatible with your system. Once you have the spare part, remove your computer’s original RAM and replace it with the spare.
Turn on your computer and test it for any performance issues. If there are no issues, then your original RAM may be faulty and in need of replacement. If you encounter issues, then the spare part may be the problem.
In conclusion, testing your RAM with spare parts is a simple yet important process that can save you from experiencing slow computer performance. Take the time to regularly test your RAM to ensure that your computer is running at its best.
Power Supply
Power Supply When it comes to troubleshooting computer hardware issues, a faulty power supply can often be the culprit. The best way to test for power supply failure is by using spare parts. This can include another power supply or spare cables.
It is important to ensure that the spare part you are using is compatible with your computer’s specifications. Once you have a compatible spare, carefully connect it to your computer and turn it on. If the computer boots up successfully, the issue was likely with the original power supply.
However, if the issue persists, it could be a sign of a different problem altogether. Always remember to double-check the connections and compatibility before testing with spare parts as incorrect connections can result in further damage to your computer hardware components.
CPU
If you’re putting together or upgrading a computer, you may find yourself in need of a new CPU. But with so many different options available, how can you know which one is right for your needs? One way to figure it out is by testing with spare parts. Whether you borrow a friend’s CPU, buy a second-hand one, or simply play around with different models in-store, testing out different CPUs can help you determine which one performs best for your specific needs.
During your testing process, be sure to pay attention to factors like clock speed, number of cores and threads, cache size, and power usage. You’ll also want to consider how well each CPU performs when multitasking, gaming, rendering video, and completing other tasks that are important to you. By testing with spare parts and taking the time to really compare different CPUs, you’ll be able to make an informed decision and build a computer that meets your exact specifications.
So why not start testing today?
Conclusion
In conclusion, testing a motherboard is like solving a puzzle. You need to carefully examine every component, piece them together correctly and power them up to see if they work. The key is to be patient, meticulous and always have a backup plan.
If all else fails, remember the wise words of a computer technician: “when in doubt, unplug it and plug it back in”. With these tips, you’ll be ready to tackle any motherboard challenge that comes your way like a techno-savvy Sherlock Holmes!”
FAQs
What are the common symptoms of a faulty motherboard?
A faulty motherboard can cause various issues like intermittent or complete failure of the computer, blue screens, overheating, and random shut-downs.
How do I test my motherboard for issues?
You can use different diagnostic tools such as the POST (Power On Self Test) or software like HWiNFO, PC Doctor, or AIDA64 to check your motherboard’s performance and identify any underlying issues.
What is a stress test, and how can it help identify the problems in my motherboard?
A stress test is a process of pushing the components of your system to their limits to identify their maximum performance capabilities. In case of a faulty motherboard, a stress test may reveal issues like overheating, random restarts, and more.
Can a faulty power supply damage my Motherboard?
Yes, a failing or damaged power supply can cause severe damage to your motherboard. It can result in a complete failure of components ranging from the hard drive to the motherboard. Thus, it is essential to maintain and replace your power supply to prevent any damage to your motherboard.