So, you’ve got a brand new MSI motherboard, and you’re ready to connect to the internet, only to realize that it doesn’t come with built-in Wi-Fi connectivity. Don’t worry though; setting up Wi-Fi on your MSI motherboard is simple and easy. With just a few steps, you can have your computer connected to the internet, and you’ll be browsing the web in no time.
In this blog, we’ll explore the different ways you can set up Wi-Fi on your MSI motherboard, so whether you prefer a wired or wireless connection, we’ve got you covered. So, put on your tech hat, and let’s dive in!
Check for Wifi Module
If you’re wondering how to set up Wifi on MSI motherboard, the first step is to ensure that your motherboard has a Wifi module. Some MSI motherboards come with a built-in Wifi module, but others require an additional adapter or card. You can check for a Wifi module by looking at the specifications of your motherboard or by physically inspecting it for an antenna connector.
If you don’t see one, you may need to purchase an adapter or card that is compatible with your motherboard. Once you have a Wifi module installed, you can proceed to set up Wifi on your MSI motherboard by following the instructions provided in the user manual or on the manufacturer’s website. With Wifi capability, you can access the internet wirelessly and enjoy faster data transfer speeds, making it a worthwhile investment for many users.
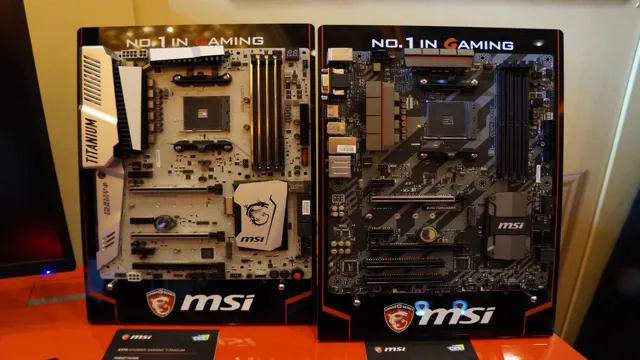
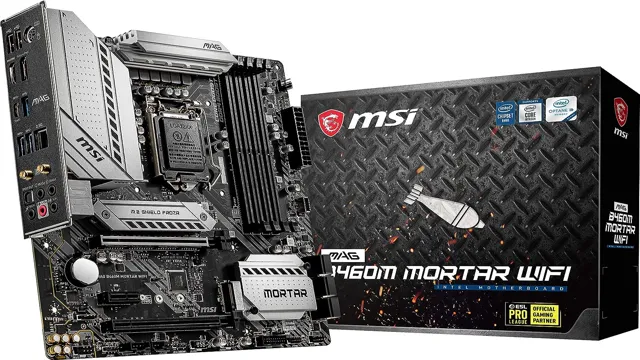
Verify your motherboard has a built-in Wifi module to enable wifi connectivity.
If you’re building a new PC or upgrading an existing one, one of the key features you might want to consider is Wi-Fi connectivity. With more and more devices relying on wireless connectivity, it makes sense to have the convenience of Wi-Fi built right into your motherboard. But before you start shopping for a new board, it’s important to verify that it comes with a built-in Wi-Fi module.
Not all motherboards have this feature, so it’s essential to check the specifications carefully. If your motherboard doesn’t have a built-in Wi-Fi module, you’ll need to purchase a separate wireless adapter to get online wirelessly. However, having a built-in Wi-Fi module eliminates the need for an extra component and saves you money.
So, ensure you check the specifications before purchasing a new motherboard to avoid any inconvenience.
Update BIOS
If you’re struggling to find the steps necessary for setting up WiFi on an MSI motherboard, you may want to consider updating the BIOS first. The reason for this is that many MSI motherboards have outdated BIOS versions that can cause problems when trying to connect to WiFi. Updating the BIOS, however, can help to resolve these issues and ultimately make it easier for you to connect to the internet.
To update the BIOS on your MSI motherboard, you’ll first need to download the latest update from the MSI website. Once this is done, you’ll need to use a tool like MSI’s Command Center to access the update and install it onto your motherboard. It’s important to follow the instructions carefully during the installation process, as any mistakes could cause irreversible damage to your system.
Once the BIOS has been updated, you should be able to connect your MSI motherboard to WiFi with ease. Simply go into your system settings and select the network you want to join. From there, you should be prompted to enter your password and other necessary information.
With the updated BIOS, you should be able to connect to the internet in no time!
Update your motherboard BIOS to the latest version for optimized wifi compatibility.
Updating your motherboard BIOS to the latest version is essential for optimized wifi compatibility. Your motherboard BIOS controls all the main functions of your motherboard, including wifi connectivity. An outdated BIOS can cause issues such as slow internet speeds, disconnection, and weak signal strength.
Updating your BIOS is a simple process that can make a significant difference in your wifi performance. However, before proceeding with a BIOS update, you should ensure that you have downloaded the correct version from the manufacturer’s website. Once you have downloaded the correct version, follow the instructions provided, and your BIOS will be updated promptly.
Updating your BIOS will not only improve your wifi performance but also enhance the overall performance of your computer. By keeping your BIOS updated, you can ensure that your computer is running efficiently, securely, and reliably. So don’t wait any longer, update your BIOS today and enjoy a faster, more reliable wifi connection.
Install Wifi Antenna
If you’re looking to set up wifi on your MSI motherboard, the first step is to install a wifi antenna. The antenna is essential for wireless connectivity and can greatly improve your internet speed and connectivity. To begin the installation process, first, ensure that your MSI motherboard has a compatible wifi slot, and then locate the wifi antenna port on your motherboard.
Next, carefully insert the wifi antenna into the port, ensuring that it is securely in place and properly aligned. Once the antenna is installed, you can proceed to configure your wifi settings. The process may vary depending on the operating system you’re using, but typically, you can locate the wifi settings in the control panel or settings menu.
From there, you can select your network and enter the necessary login information. With a properly installed wifi antenna and configured settings, you should now be able to enjoy fast and reliable wireless internet on your MSI motherboard.
Install necessary Wifi antennas to your motherboard if not already built in.
If you’re building a new computer or upgrading an existing one, and you want to connect to the internet wirelessly, you’re going to need to install a Wifi antenna. Most modern motherboards come with built-in Wifi capability, but if yours doesn’t, don’t worry – adding wireless connectivity is easy. The first step in installing a Wifi antenna is to determine what type of antenna you need.
There are many different types of antennas available, but the most common ones are the dipole antenna, which is a simple wire antenna, and the patch antenna, which is a flat, square antenna that is mounted on the back of your computer case. Once you have your antenna, the next step is to find the antenna connectors on your motherboard. These connectors will be labeled “WLAN” or “Wifi,” and they are usually located near the back of the motherboard.
Simply attach your antenna to these connectors, and you’re ready to go! Before you know it, you’ll be surfing the web wirelessly, without the need for any unsightly cables or cords. So don’t let a lack of built-in Wifi capability hold you back – add a Wifi antenna to your computer today and enjoy all the benefits of wireless connectivity.
Enable Wifi in BIOS
If you’re looking to setup wifi on your MSI motherboard, one potential solution is to enable Wifi in BIOS. This can be done in a few simple steps. First, enter your computer’s BIOS setup by restarting your computer and pressing the key indicated on your screen during the boot process (often F2, F10, or Delete).
From there, navigate to the “Advanced” or “Integrated Peripherals” section. Look for an option related to Wifi or WLAN, often called “Onboard Wireless LAN” or “Network Stack.” Make sure that this setting is enabled.
Then, save your changes and exit BIOS. Your computer should now recognize and be able to connect to wifi networks. Keep in mind that not all MSI motherboards have built-in wifi capabilities, so you may need to purchase a separate wifi adapter if this is the case for your motherboard.
Navigate to BIOS settings, enable wireless LAN, and save changes before exiting.
Enabling the Wifi on your computer can be a tricky process that can require you to dig into your system’s BIOS settings. Luckily, the process is pretty straightforward once you know what steps to take. To start, you’ll need to restart your computer and enter the BIOS settings by pressing a specific key during the startup process.
The key that you need to press can vary depending on your system, but it’s usually a key like F2, F10, or Delete. Once you’re in the BIOS settings, you’ll need to navigate to the wireless LAN option and enable it. Some systems may have this option under a different name, but it should be easy to find with a bit of exploration.
Once the option is enabled, make sure to save your changes before exiting the BIOS settings. Once you do this, your computer should be able to connect to Wifi networks without issue. By taking these steps, you can quickly enable Wifi on your computer and enjoy all the benefits of wireless connectivity.
Install Wifi Drivers
If you’ve just installed a new MSI motherboard and are having trouble connecting to your wifi, don’t worry, it’s an easy fix. The first thing you need to do is make sure you have the latest wifi drivers installed. You can typically find these drivers on the MSI website by searching for your motherboard model.
Once you’ve downloaded the driver package, extract it to a folder on your computer. Then, go to Device Manager and find the network adapter that’s causing the issue. Right click on it and select “Update Driver Software”.
Choose the option to browse your computer for driver software and choose the folder where you extracted the driver package. Windows will then automatically install the updated driver and you should be able to connect to your wifi network without any problems. With these simple steps, you’ll be able to easily set up wifi on your MSI motherboard and get online in no time.
Download and Install drivers from MSI’s official website to get the most up-to-date driver software.
If you’ve recently purchased an MSI laptop or desktop computer, it’s important to download and install the latest driver updates from the official MSI website. Doing so will ensure that your device is equipped with the most up-to-date software, including WiFi drivers. These drivers are essential for enabling wireless connectivity and ensuring smooth internet access.
Installing WiFi drivers is quite simple, and can typically be done in a few easy steps. To get started, visit the MSI website and locate the drivers page for your specific device. From there, you can download the latest WiFi driver software and follow the on-screen prompts to complete the installation process.
Once complete, you should notice a significant improvement in your computer’s wireless connectivity. Don’t let outdated drivers hold you back – take the time to download and install the latest software from MSI today.
Connect to your Network
If you’re wondering how to setup Wifi on your MSI motherboard, don’t fret! It’s a relatively simple process. First, you’ll need to make sure you have a compatible Wifi card installed in your motherboard. Then, navigate to the BIOS settings and confirm that your Wifi module is enabled.
Once you’ve done that, install the necessary drivers for your Wifi card from the manufacturer’s website. After that, it’s just a matter of connecting to your network like you would on any other device. Simply search for available networks, select your network, enter the password if necessary, and voila! You’re now connected to Wifi on your MSI motherboard.
It’s important to note that not all MSI motherboards come with built-in Wifi capability, so you may need to purchase a Wifi card separately. But with a little bit of effort, you’ll be enjoying wireless internet on your MSI setup in no time.
Navigate to Windows Network settings and connect to your preferred Wifi network.
Connecting to a wifi network in Windows is a simple process that can get you online in no time. To start, navigate to your computer’s Network settings, which can usually be found in the system tray or by searching for “network settings” in the Start menu. Once you’re there, select your preferred wifi network from the list of available options and click Connect.
If the network is secured, you may be prompted to enter a password or other security credentials to verify your connection. Once you’ve successfully connected, you should see a notification confirming your wifi status. It’s important to note that some networks may require additional setup or configuration before you can connect, so be sure to check with your network administrator or service provider if you encounter any issues.
Overall, connecting to wifi in Windows is a straightforward process that can be completed in just a few clicks, allowing you to get online quickly and easily.
Conclusion
Congratulations! You have successfully navigated the treacherous waters of setting up WiFi on your MSI motherboard. You can now connect to the internet without pesky cables getting in your way, and roam free with the freedom of wireless connectivity. So go ahead, stream your favorite shows, browse the web, and conquer the online world with confidence.
And remember, if all else fails, just try turning it off and on again.”
FAQs
What are the compatible wifi adapters for MSI motherboards?
MSI motherboards support all major wireless adapters available in the market. Some of the popular options include IEEE 802.11n, IEEE 802.11ac and Bluetooth.
Is it necessary to install drivers for wifi on MSI motherboards?
Yes, in order to setup wifi on an MSI motherboard, you need to install the necessary drivers. You can download and install the drivers from the MSI website.
How do I enable wifi on my MSI motherboard?
First, you need to install the wifi drivers. Then, you can enable wifi using the BIOS settings. Go to the Advanced Settings, find the Onboard Devices Configuration, and enable the Wireless LAN Controller.
What do I do if my MSI motherboard’s wifi is not working?
If your MSI motherboard’s wifi is not working, first check if the drivers are installed correctly. If the drivers are installed but the issue still persists, you can try resetting the BIOS settings. If that doesn’t work, try connecting a different device to the wifi network to isolate the issue.