Have you ever been in a situation where your phone motherboard suddenly dies? It’s a frustrating experience, and one that can leave you feeling helpless. However, all hope is not lost. With some simple steps, you can revive a dead phone motherboard and get your phone back up and running.
In this blog post, we’ll explore some of the reasons why a phone motherboard can die, what you can do to revive it, and some tips for preventing it from happening in the future. So, grab a cup of coffee, settle in, and let’s dive in!
Diagnosing the Issue
Are you looking for ways to revive a dead phone motherboard? The first step is to diagnose the issue. Before you start troubleshooting, make sure your phone is really dead and not just experiencing a temporary glitch. Check if the battery is fully charged or if it needs replacing.
You can also try a hard reset by holding the power and home buttons simultaneously. If the phone still does not turn on, it could be a software or hardware issue. Check if there are any software updates available and try reinstalling them.
If it is a hardware issue, it may require professional help. Don’t attempt to open up the phone on your own as it could cause more damage. Remember, prevention is better than cure, so always invest in quality phone accessories and avoid exposing your phone to extreme temperatures.
By taking care of your phone, you can avoid a dead motherboard altogether.
Testing the Battery
Before determining the best course of action for a dead or malfunctioning battery, it’s essential first to diagnose the issue correctly. There are several potential causes of battery failure, ranging from a dead cell or low electrolyte levels to a faulty alternator or starter. The first step in testing the battery should be a visual inspection, checking for any signs of corrosion or damage to the terminals.
If nothing is apparent, the battery’s voltage should be tested using a multimeter. A fully charged battery should have voltage levels ranging from 14 to 1
6 volts. However, if the battery is reading significantly lower, it may not have enough charge to start the vehicle. In such cases, recharging the battery may solve the problem temporarily.
If that fails to resolve the issue, the battery may need to be replaced altogether. It’s always best to have a professional mechanic conduct a full diagnostic of the battery to ensure accuracy and prevent any further damage to the vehicle.
Checking the Charging Port
When it comes to charging your device, the charging port is a crucial element. However, if you’re experiencing issues with your charging port, don’t despair as there are several ways to diagnose the problem. Firstly, take a look at the charging port and check if there is any debris or foreign objects lodged inside.
Often, lint or other materials can accumulate inside the port, making it difficult to charge. Use a non-metallic object to gently remove any debris, being careful not to damage the port. If that doesn’t solve the problem, try another charging cable or adapter.
Sometimes, the issue is with the cable, not the port itself. If the problem persists, it may be due to a damaged charging port, which should be diagnosed by a professional. By taking the time to check and diagnose the charging port, you can enjoy a fully charged device once again.
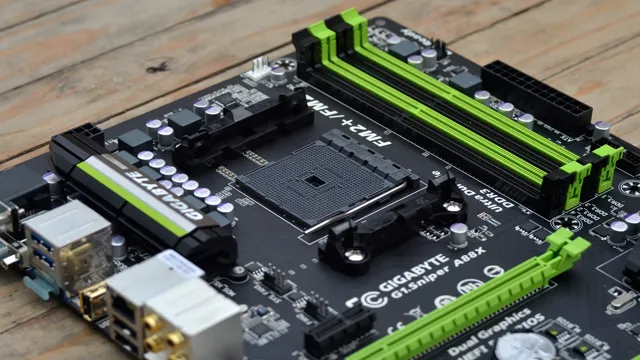
Cleaning the Motherboard
One possible way to revive a dead phone motherboard is by cleaning it thoroughly. Over time, dust, dirt, and other debris may accumulate on the motherboard’s surface, causing it to malfunction or stop working altogether. To clean the motherboard, you will need a few basic tools, such as isopropyl alcohol, cotton swabs, and a brush.
Start by removing the battery and any other components attached to the motherboard. Next, use the brush to gently remove any visible dust or debris. Then, dip a cotton swab in isopropyl alcohol and gently swipe it across the motherboard’s surface, paying special attention to any areas that appear dirty or corroded.
Repeat this process until the motherboard is clean and dry. Once you’ve completed the cleaning process, reattach the battery and any other components, and try turning on your phone again. If the motherboard was the issue, your phone should now be working again!
Removing Dust and Debris
When it comes to maintaining and cleaning a motherboard, one of the most important things to consider is removing dust and debris. Over time, dust and debris can accumulate on the motherboard, blocking airflow and potentially leading to overheating or other issues. The most effective way to remove dust and debris from a motherboard is by using compressed air or a soft-bristled brush.
When using compressed air, be sure to hold the can upright and use short bursts instead of continuous spraying to prevent moisture from building up. For tougher debris, a soft-bristled brush can be used to gently brush away the dirt. It is important to be gentle when cleaning the motherboard to avoid causing any damage to the delicate components.
By regularly cleaning the motherboard and removing dust and debris, you can help ensure that your computer runs smoothly and efficiently, with a longer lifespan.
Using Isopropyl Alcohol
If you’re looking for an effective way to clean your motherboard, isopropyl alcohol is a great choice. Not only is it affordable and easy to find, but it also evaporates quickly, leaving no residue behind. However, it’s important to use it correctly to avoid damage to your motherboard.
Before using isopropyl alcohol, make sure to turn off your computer and disconnect all cables. Next, remove the motherboard from the case and carefully wipe down the surface with a lint-free cloth. Then, dip a cotton swab in the isopropyl alcohol and gently clean any areas that have buildup or residue.
Avoid using too much alcohol, as this can damage sensitive components. Finally, let the motherboard dry completely before reassembling your computer. By following these steps, you can safely and effectively clean your motherboard with isopropyl alcohol.
Repairing the Motherboard
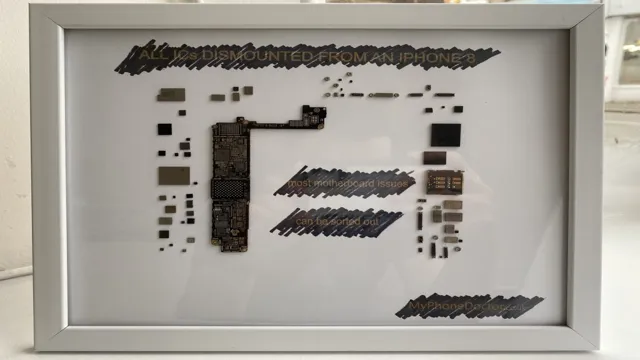
Have you ever found yourself with a phone that just won’t turn on? You might have tried plugging it in, pressing every button, and even saying a small prayer, but nothing seems to work. Before you give up and buy a new phone, you may want to try reviving the dead motherboard. While it may sound intimidating, it’s not as complicated as you may think.
First, make sure that your phone is completely turned off and unplugged. Then, you will need to remove the back cover and locate the motherboard. Look for any signs of damage, such as visible burns or corrosion.
If the issue is just a loose connection, try unplugging and re-plugging the cables. If there is more serious damage, you may need to heat up the affected area with a hairdryer or use a soldering iron to fix any broken pins. Remember to proceed with caution and have a steady hand.
With a little patience and effort, you may be able to revive your phone’s motherboard and save yourself from buying a new one.
Replacing Damaged Components
If you’re experiencing issues with your computer’s motherboard, it’s important to diagnose the problem and determine whether it can be repaired. Small issues like a faulty RAM slot or damaged connector pins may be able to be fixed, but larger problems like cracks in the motherboard may require a complete replacement. If you opt to repair the motherboard, the first step is to locate the damaged component.
This can be done visually using a magnifying glass or microscope. Once the damaged component is identified, it needs to be carefully removed and replaced with a new component. It’s essential to use caution when repairing a motherboard, as ESD (electrostatic discharge) can cause even more damage.
It’s also important to use only high-quality replacement components to ensure the longevity and function of the motherboard. Overall, repairing a motherboard can be a complex process and may require professional expertise. If you’re unsure, it’s best to seek the advice of a computer technician to avoid causing further damage to your motherboard.
Soldering Techniques
Soldering Techniques When it comes to repairing a motherboard, soldering is often necessary in order to fix broken connections or replace damaged components. However, soldering can be a tricky process that requires patience, precision and the right tools. It’s important to start by selecting the correct soldering iron and solder for the job.
A higher wattage iron isn’t always better, as it can cause damage to delicate components. Additionally, it’s important to prep the area beforehand by cleaning it thoroughly and using a flux pen to ensure a better bond. When soldering, a steady hand and good technique are essential.
Practice makes perfect, so it’s important to start with smaller, less complex jobs before moving on to larger repairs. Finally, always double-check your work and use a magnifying glass to ensure that all of the connections are secure. By following these tips and taking your time, you can successfully repair your motherboard without causing any additional damage.
Preventing Future Damage
Reviving a dead phone motherboard may seem like a daunting task, but it is possible with a few simple steps. First, ensure that the battery connection is secure and there are no visible signs of damage. Next, try a hard reset by holding down the power and home buttons simultaneously for at least 10 seconds.
If this does not work, try connecting the phone to a computer and performing a software update. If none of these methods work, it may be necessary to take the phone to a professional repair shop. It’s important to note that attempting to repair the motherboard yourself can cause further damage and may void any existing warranties.
By following these steps and seeking professional help if necessary, you can prevent future damage to your phone’s motherboard and keep it running smoothly.
Conclusion
In conclusion, reviving a dead phone motherboard is like performing CPR on a patient – it requires a delicate balance of knowledge, skill, and patience. While there may be no guaranteed fix, trying out some of the methods suggested such as resetting the phone, checking for water or physical damage, or even replacing the battery can bring new life to a seemingly hopeless situation. So don’t give up on your beloved phone just yet – with a little persistence and some creative troubleshooting, you may just be able to bring it back from the brink of death!”
FAQs
What are the common causes of a dead phone motherboard?
The common causes of a dead phone motherboard include water damage, overheating, drop or physical damage, and electrical surge.
Can a dead phone motherboard be repaired?
It depends on the extent of the damage. Some minor issues can be repaired, while major damage may require a replacement of the motherboard.
How can I revive a dead phone motherboard?
You can try reviving a dead phone motherboard by removing the battery and leaving the phone to rest for a few hours, trying a new battery, or performing a hard reset. However, if these methods do not work, it may be time to seek professional help.
Is it possible to prevent a dead phone motherboard from happening?
Yes, you can prevent a dead phone motherboard by avoiding water damage, avoiding overheating, being careful while handling your phone, using voltage stabilizers, and avoiding cheap or counterfeit chargers.