So, you’re looking to upgrade your computer’s storage by removing your SSD from the motherboard. Perhaps you want to switch to a larger or faster SSD, or maybe you’re selling your current one and need to remove it. Whatever your reason, you’re in the right place.
In this blog post, we’ll go over the steps you need to take to safely and easily remove your SSD from your motherboard. We’ll also discuss some important tips to keep in mind during the process to avoid damage to your hardware and data loss. So, grab your screwdriver and let’s get started!
Tools Required
If you’re looking to upgrade or replace your SSD, you’ll need to remove it from your motherboard. However, before you get started, you’ll need a few tools. The most important tool you’ll need is a screwdriver; most SSDs are held in place with screws, and you’ll need to remove the screws in order to remove the SSD.
In addition to a screwdriver, you may also need a grounding strap. This will help protect your SSD and other components from electrostatic discharge, which can damage your hardware. Finally, some SSDs may be secured with clips or brackets, so you may also need a pair of pliers or a small pry bar to remove them.
With the right tools and a little bit of patience, you can easily remove your SSD from your motherboard and replace it with a new one.
Screwdriver, anti-static wrist strap, flat surface
When it comes to fixing or building electronic devices, having the right tools is essential. Three tools you will need for any project are a screwdriver, anti-static wrist strap, and a flat surface. A screwdriver is a universal tool that you will need to take apart and put back together electronic devices.
It is important to have a set of different screwdriver heads so you can reach the different screw types used in electronics. An anti-static wrist strap is necessary to prevent damage to electronic components caused by static electricity. Wearing an anti-static wrist strap will ground you and dissipate any static electricity that may have built up on your body.
Lastly, a flat surface is necessary for working on electronic devices. A flat surface will ensure that your work area is stable and that your devices won’t roll or fall while you work on them. Additionally, a flat surface will help you keep track of all of the small parts you will need to handle during your repair or build.
With these three tools, you will be able to tackle any electronic project that comes your way.
Preparing for Removal
If you’re wondering how to remove SSD from motherboard, don’t fret! It’s a relatively simple process as long as you take some precautions. The first step is to shut down your computer and disconnect all cables and power sources – this will prevent any accidental damage to your hardware or data. Once your computer is unplugged, locate the SSD on your motherboard and identify the screws or clips holding it in place.
Use a screwdriver or similar tool to carefully remove the screws or unclip the SSD. Before you remove the SSD from your motherboard, it’s crucial to ground yourself to prevent electrostatic damage. You can use an anti-static wristband or touch any grounded metal surface to discharge any static electricity from your body.
Once you’re grounded, carefully remove the SSD from its slot – it should come out easily, but make sure not to bend or twist it. With these simple steps, you can safely remove your SSD and upgrade or replace it as needed!
Shut down computer, unplug from power source, remove battery
One important step you need to take before removing your computer’s battery is to properly shut down your device. This ensures that all the necessary files are saved, and your system is not damaged. Once your computer is shut down, you should unplug it from the power source.
This eliminates the risk of electric shock or any other potential hazards. After you’ve unplugged your computer, you can finally remove the battery. This step ensures that your battery’s life is protected, especially if you plan on storing it or reselling it.
Remember that before you remove your computer’s battery, it’s essential that you take the proper precautions to ensure your safety and the safety of your device. Take your time and follow these steps carefully so that you can efficiently remove your battery.
Opening the Case
If you need to remove an SSD from your motherboard, the first step is to open your computer case. Depending on the type of case you have, this may require unscrewing panels or removing clasps. Once the case is open, locate the SSD.
It should be connected to the motherboard by a connector and mounted somewhere on the case. Before removing the SSD, make sure your computer is turned off and unplugged. This is important to prevent accidental damage to your computer or to the SSD itself.
Next, gently disconnect the connector from the SSD. This may require a bit of force, but be careful not to bend or break any pins. Once the connector is detached, the SSD can be safely removed from the case.
With a little care and attention, removing an SSD from your motherboard can be a quick and easy process!
Refer to manufacturer instructions, locate screws holding case together
When it comes to opening a computer case, the first thing you need to do is refer to the manufacturer’s instructions. These instructions will tell you where the screws holding the case together are located, and how to remove them without damaging the case or any of the components inside. Once you have found the screws, you will need the appropriate screwdriver to remove them.
It’s essential to make sure that you have the right size and type of screwdriver, as using the wrong one could result in damage to the screws or the case itself. When you have removed all the screws, you can then carefully open the case and access the internal components. It’s important to take your time and be gentle when opening the case to avoid any damage, and to make sure that you know what you’re looking for before you start tinkering around.
By following these steps, you can safely and effectively open your computer case, and begin exploring the inner workings of your machine.
Locating the SSD
If you’re looking to remove your SSD from your motherboard, the first step is to locate it. Usually, the SSD is attached to the motherboard in a slot near the SATA ports or the M.2 slot.
Although the SSD may be located in different positions depending on the motherboard, it’s generally pretty easy to locate it. You can also check your motherboard manual to find out exactly where your SSD is located. Once you’ve found the SSD, you can safely remove it by unplugging its cable and releasing any screws or connectors that are holding it in place.
Make sure to handle the SSD with care to avoid damage and use an antistatic strap to protect it from static electricity. With a little patience and know-how, removing your SSD from your motherboard can be done easily and with minimal fuss.
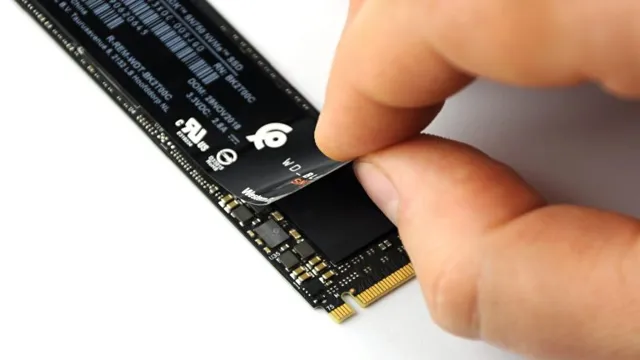
Identify the SSD by its label and size
When it comes to locating the SSD in your system, the first step is to identify it through its label and size. Usually, SSDs have a clear label on them that shows their brand and model number. You can also check the size of the SSD to confirm it’s the correct one.
You can find this information on the box it came in or by checking the specifications of your system. Once you have identified the SSD, you can then proceed to install it in your computer. It’s important to be careful when handling the SSD to avoid any damage.
When installing it, make sure that you follow the instructions carefully. By doing this, you’ll avoid any potential issues that may arise from incorrect installation. With these steps, it should be easy for you to locate and install your SSD, ensuring improved performance and faster boot times.
Removing the SSD
If you’re looking to remove an SSD from your motherboard, the first thing to do is ensure that the computer is powered off and unplugged from the electrical outlet. Once you’ve done this, you’ll need to locate the SSD. Depending on your specific motherboard, this could be in several different places.
Most motherboards will place the SSD near the SATA ports, so you may need to remove any cables that are obstructing your view. Once you’ve located the SSD, look for the screws that are holding it in place. Some motherboards will use screws to secure the SSD in place, while others may use a different mechanism.
If it’s screws, use a screwdriver to unscrew them so that you can remove the SSD. Once you’ve done this, gently lift the SSD out of its slot. Be sure to hold onto it carefully to prevent any damage.
And that’s it! You’ve successfully removed the SSD from your motherboard.
Unscrew and disconnect power and data cables from SSD, slide it out gently
If you’re looking to remove your SSD, follow these simple steps. Firstly, make sure your computer is completely powered off to avoid any accidents. Locate the SSD on your computer and unscrew any screws on the bracket or casing holding it down.
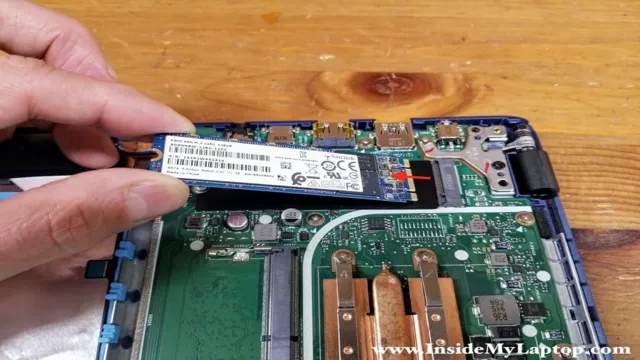
Be careful not to dismantle or damage any other components in the process. Once you’ve removed any screws, gently slide the SSD out of its slot. Make sure to disconnect any power and data cables connected to the SSD before removing it completely.
You don’t want to damage any cables or pull them out too forcefully. Removing the SSD from your computer can be intimidating, but if you follow these steps carefully, you should be able to do it with ease. Remember, always prioritize safety, and don’t be afraid to ask for help if you’re unsure about anything.
Handling the SSD
Removing an SSD from your motherboard may seem like a daunting task, but it’s actually fairly simple. First, make sure your computer is turned off and unplugged from the wall. Then, locate the SSD on your motherboard – it’s typically a small rectangular object with metal contacts on the bottom.
Using a screwdriver, remove any screws holding the SSD in place. Gently pull the SSD out of its socket and disconnect any cables or connectors attached to it. Be careful not to bend any of the pins or damage the connector in the process.
Once the SSD is removed, you can replace it with a new one or store it safely for later use. With a little bit of patience and care, removing an SSD from your motherboard is a quick and easy process.
Place in anti-static bag, avoid touching connectors
When it comes to handling an SSD, it’s important to take certain precautions to avoid damaging it. First, it’s best to place the SSD in an anti-static bag to protect it from static electricity which can be harmful to electronic components. Additionally, it’s important to avoid touching the connectors on the SSD as they can be very delicate and easily damaged.
Handle the SSD with care, just like you would handle other delicate equipment. If you’re unsure about how to handle an SSD safely, consider seeking professional assistance. By taking the time to properly handle your SSD, you can ensure that it functions optimally and lasts for as long as possible.
Taking these simple steps can save you from losing important data and experiencing costly repairs or replacements. Remember to always prioritize caution when handling electronics!
Conclusion
Removing an SSD from your motherboard is a bit like playing Operation. You need to be steady-handed, precise, and avoid making any unnecessary incisions. Remember to turn off your computer and unplug it to avoid any shock therapy before beginning the process.
Then, locate your SSD, unscrew it, and gently remove it from its slot. Finally, bask in the satisfaction of successfully completing the operation and upgrading or replacing your SSD. Now, you can confidently strut your stuff and impress all your tech-savvy friends with your newfound knowledge.
“
Removing an SSD from motherboard is easy with proper tools and precautions
When it comes to removing an SSD from a motherboard, it’s important to handle the SSD with care. First, make sure to power down the computer and unplug it from any power source. You’ll want to ground yourself by touching a grounded object or using an anti-static wrist strap to prevent any static electricity that could potentially damage the SSD.
It’s also best to have a proper set of tools, such as a screwdriver that fits the screws holding the SSD in place, and a small container to store the screws. Once you’ve removed the screws, gently disconnect the cables from the SSD, being careful not to apply too much force. The key is to handle the SSD delicately to avoid damaging it.
With the proper tools and precautions, removing an SSD from a motherboard can be a simple and straightforward process. Remember to always take your time and handle the SSD with care.
FAQs
What tools do I need to remove an SSD from a motherboard?
To remove an SSD from a motherboard, you may need a screwdriver, an anti-static wrist strap, and possibly a metal spudger tool.
Can I remove an SSD from a motherboard while the computer is turned on?
No, it is not safe to remove an SSD from a motherboard while the computer is turned on. Always shut down the computer and unplug it before attempting to remove the SSD.
How do I safely remove an SSD from a motherboard?
To safely remove an SSD from a motherboard, shut down the computer and unplug it. Touch the metal case of the computer to discharge any static electricity and then undo any screws holding the SSD in place. Gently remove the SSD from the slot and disconnect any cables attached to it.
Do I need to uninstall any drivers or software before removing an SSD from a motherboard?
Before removing an SSD from a motherboard, it is recommended to uninstall any drivers or software associated with the SSD. This will help to prevent any issues or errors when installing a new SSD or another type of storage device.