Upgrading your PC’s graphics card can give it a new lease of life, bringing faster and better visuals to your favorite games and applications. However, before you can install your shiny new GPU, you need to remove the old one from your motherboard. In this blog, we will guide you through the process of removing a GTX 1060 from your motherboard.
Even if you have never done it before, don’t worry, we will break it down step by step so you can do it with confidence. So grab your screwdriver and let’s get started!
Prepare for Removal
If you need to remove a GTX 1060 from your motherboard, the first thing to do is to prepare for the removal process. Make sure you have all the necessary tools, such as a screwdriver and antistatic wrist strap, to avoid damage to your components. Turn off your PC and unplug it from the socket, then open your computer’s side panel by removing the screws holding it in place.
Locate the graphics card on the motherboard, unscrew it from the chassis, and gently remove all necessary power cables and connections. Once you have removed all of the screws and wires, carefully lift the graphics card from the PCIe slot and set it aside. Be sure to handle the card with care, as it contains delicate components.
With a little bit of patience and attention to detail, you can safely and easily remove your GTX 1060 from your motherboard.
Turn off Computer
Turning off your computer is important not only when you’re done working but also when you’re planning to move it. To prepare for removal, you need to turn off the computer properly to avoid any data loss or damage to the hardware. One way to ensure that everything is safe is to close all running programs and save your work before shutting down your computer.
This will prevent any unexpected shutdowns or errors that can lead to data loss. Once you’ve saved everything, you need to shut down the computer correctly. Click on the start menu, select ‘Shut Down’ and wait for the computer to turn off completely.
This might take a few minutes depending on the computer’s speed. Once it has shut down, you need to unplug all wires and cables from the back of the computer. This will ensure that there’s no power going to the computer and it’s safe to move.
Remember, turning off your computer properly is essential to keep your data safe and your hardware intact.
Unplug Computer
When it comes to moving or replacing your computer, there are a few important steps you should take to ensure everything goes smoothly. One of the most important steps is to unplug your computer. Not only can leaving your computer plugged in during a move or replacement damage the device, but it can also be a safety hazard.
Before unplugging your computer, make sure to properly shut it down to prevent any data loss or corrupted files. Once your computer is shut down, unplug any cords connecting it to the power source and any other devices, such as a monitor or printer. Taking the time to properly prepare your computer for removal will help ensure that it stays safe and intact during the process.
Remember, it’s better to take a few extra minutes to prepare your computer properly than to risk damaging it by rushing through the process.
Ground Yourself
Grounding yourself is an important step to take before any type of removal. It’s about connecting yourself to the present moment and getting in touch with your body. One simple way to ground yourself is by taking a few deep breaths and focusing on the sensation of the air moving in and out of your lungs.
You can also try visualizing roots growing from the bottom of your feet and connecting you to the earth. This practice can help calm your nerves and reduce anxiety, allowing you to approach the removal with a clear and level head. Remember, preparing for removal isn’t just about physical preparation – it’s about mental and emotional preparation as well.
By grounding yourself, you can ensure that you are ready for whatever lies ahead.
Remove the Graphics Card
Removing a graphics card like the GTX 1060 from a motherboard can feel daunting, but it’s a necessary step when replacing or upgrading your system’s hardware. First things first, you need to power down your computer and unplug it from the power source to avoid any electrical hazards. Once you’ve opened up your computer case, find the graphics card located in a PCIe slot on the motherboard.
Most GPUs are secured with a latch on the PCIe slot, so gently press down on it to release the lock. Then, you can carefully pull the graphics card out of the slot. Be mindful of any other components or cables attached to the card and remove them before fully lifting the GPU out.
And with that, you’ve successfully removed your GTX 1060 graphics card from the motherboard.
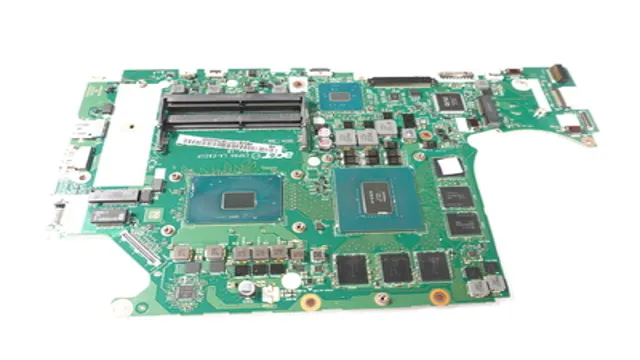
Locate the Graphics Card
To upgrade or replace your graphics card, the first step is to locate it inside your computer. Graphics cards are usually found in the expansion slots on the motherboard. Most modern motherboards have a PCI Express slot for the graphics card.
Once you have located the graphics card, it is time to remove it. First, make sure your computer is unplugged and that you are grounded to prevent any static electricity damage. Next, gently press down on the release lever or tab on the end of the PCI Express slot and give it a little tug to release the graphics card.
Carefully lift the card out of the slot and place it on an anti-static bag or a non-conductive surface. Congratulations, you have now removed your graphics card and are ready to install the new one!
Unscrew the Retaining Screw
If you want to remove the graphics card from your computer, the first step is to unscrew the retaining screw. This screw secures the graphics card in place and prevents it from slipping out of the slot. So, before you can remove the card, you need to locate the screw and use a screwdriver to turn it counterclockwise.
Once the screw is loose, you can gently pull the card out of the slot. However, make sure to apply even pressure and avoid yanking the card out forcefully. Otherwise, you might damage the connectors or the motherboard.
Also, be cautious if there are any cables or wires connected to the graphics card, as you need to disconnect those before removing the card completely. Overall, removing a graphics card requires some basic technical skills, but with patience and care, you can do it efficiently.
Unplug PCIe Power Cable
If you’re looking to remove your graphics card, the first thing you need to do is unplug the PCIe power cable. This cable provides power to your graphics card, so it’s important to disconnect it before attempting to remove the card itself. To do this, locate the power cable on the graphics card and gently unplug it from the power supply.
Depending on your setup, this may require some maneuvering to get to the cable. Once you’ve successfully unplugged the PCIe power cable, you can safely remove the graphics card from your computer. Make sure you’re carefully handling the card and avoiding any unnecessary pressure or twisting.
By properly removing your graphics card, you’ll be able to upgrade or replace it with ease.
Gently Remove the Card
When it’s time to upgrade your computer’s graphics card, there are a few important things to keep in mind. One of the most crucial steps is properly removing the old graphics card from its slot. This may seem like a simple task, but it’s important to take your time and do it carefully to avoid damaging any components.
To begin, shut down your computer and unplug it from the wall. Then, open up your computer case and locate the graphics card. You may need to unscrew any brackets or unplug any cables before you can remove it.
Once you have access to the card, gently grasp it by the edges and pull it out of the slot. Be sure to exert equal pressure on both ends of the card to avoid bending or breaking it. With the old graphics card removed, you can now install your new one and get back to enjoying your favorite games and applications.
Remember to always handle computer components with care to avoid damage and ensure longevity.
Clean the PCIe Slot
If you’re looking to remove your GTX 1060 graphics card from your motherboard, it’s essential to take proper precautions and handle it with care. One crucial step is to clean the PCIe slot. This slot is where your graphics card connects to your motherboard, and over time, it can accumulate dust and debris, which can affect the card’s performance.
Before removing the card, use compressed air or a soft brush to gently remove any dust or debris from the slot. This will ensure a smooth removal and prevent any damage to the card or motherboard. Once the slot is clean, carefully release the locking mechanism that holds the card in place and gently lift the card out of the slot.
Be sure to store the card safely, and properly dispose of any components that may be damaged or no longer needed. With a little care and attention, you can safely remove your GTX 1060, allowing you to upgrade or make any necessary repairs to your computer.
Remove Any Dust or Debris
To properly clean the PCIe slot, the first step is to remove any dust or debris that may have accumulated over time. This is especially important if the computer’s ventilation system is not effective or the room is particularly dirty. It is not uncommon for dust to accumulate in the PCIe slot, as it is an open area that can easily collect particles.
To remove the dust, you can use a can of compressed air or a soft-bristled brush. Gently blow the compressed air or brush over the slot, making sure to dislodge any debris. It is important not to use excessive force as this can damage the slot.
Once you have removed any large debris, you can use a cotton swab or cloth to wipe away any remaining dust. Keeping your PCIe slot clean will help prevent any performance issues or damage to your computer’s components.
Inspect for Damage
When it comes to inspecting your PCIe slot, it’s essential to check for any damage or debris that may be blocking the insertion of your graphics card. A simple visual inspection can often reveal any potential issues, such as bent pins or dirt buildup. It’s crucial to use caution when cleaning the PCIe slot, as any rough handling can further damage the slot and render it unusable.
The best way to clean the slot is by using a can of compressed air to blow out any dust or debris. By doing so, you can ensure that your graphics card can be smoothly inserted and operate optimally without any interruptions. Keeping your PCIe slot clean and free from damage can significantly improve the performance of your system and provide you with seamless gaming or work experiences.
Installing a New Graphics Card
Looking to upgrade your graphics card and wondering how to remove your old GTX 1060 from your motherboard? The process is actually quite simple. Begin by shutting off your computer and unplugging all cables. Then, open your computer case and locate the GTX 1060 on your motherboard.
Remove any screws or connectors holding it in place, and gently lift it out of its slot. Be sure to avoid touching any of the metal components on the card itself to prevent static shock. Once removed, you’re ready to install your new graphics card and take your gaming or graphic design to the next level.
Choose the Right Card
When it comes to installing a new graphics card in your computer, it’s crucial to choose the right one. The first step is to consider the compatibility of the graphics card with your system’s motherboard and power supply. Make sure to choose a graphics card that fits these specifications.
Next, consider the intended use of the graphics card. If you’re a gamer, you’ll want a card with a higher clock speed and more VRAM. On the other hand, if you’re using it for video editing or graphic design, a card with more CUDA cores will be more beneficial.
It’s also important to consider your budget and do some research on the brands and models available in your price range. By taking these factors into account, you can choose the right card for your needs and ensure a smooth installation process.
Install the Card Carefully
When installing a new graphics card, it’s crucial to handle it with care. The first step is to ensure that the old card is removed before inserting the new one. Once you’ve taken out the old card, you’ll need to identify the slot where the new card will go.
Make sure to check that both the card and the slot match up, as there are different types of slots available. Align the card with the slot, then gently push it in until it clicks into place. It’s important to not use excessive force, as this can cause damage to both the card and the slot.
Once the card is securely in place, connect any necessary power cables and secure the card with screws if needed. With a bit of patience and care, your new graphics card will be installed and ready to use in no time, providing improved performance and visual quality for your computer.
Plug in PCIe Power Cable
Installing a new graphics card can be an exciting experience, but it’s important to follow the proper steps to ensure a smooth installation. One of these essential steps is plugging in the PCIe power cable. Without this cable, your graphics card won’t receive the power it needs to function properly.
The PCIe power cable is a small, rectangular cable with multiple pins that connects to your power supply and your graphics card. You’ll want to make sure the cable is securely plugged in on both ends, being careful not to force it in the wrong way as it only fits in one direction. Once everything is connected properly, you should be good to go.
Your new graphics card will be powered up and ready to provide you with stunning visuals and improved gameplay. So, don’t forget the PCIe power cable when installing your new graphics card!
Secure with Retaining Screw
When it comes to installing a new graphics card, it’s important to ensure that it’s securely fastened in place. One way to do this is by using a retaining screw. This small but crucial component can ensure that your graphics card doesn’t come loose or move around while your computer is in use.
To install a graphics card with a retaining screw, you’ll first need to locate the correct slot on your motherboard. Once you’ve found it, carefully align your graphics card with the slot and gently push it in until it clicks into place. Then, use the retaining screw to secure the card in place by screwing it tightly into the bracket.
This one simple step can help to ensure that your graphics card stays securely in place, so you can enjoy smooth and uninterrupted performance for all of your games and other applications. So, don’t forget to use a retaining screw when installing your new graphics card.
Conclusion
Removing a GTX 1060 from a motherboard can be intimidating for even the most seasoned tech enthusiasts, but fear not! With a bit of patience, a steady hand, and a touch of bravery, this task can be accomplished. It’s like unhooking a bra, but for computer parts. So go forth, dear IT warriors, and unhook that GTX 1060 from its PCIe socket with pride and confidence!”
FAQs
How do I remove the GTX 1060 graphic card from my motherboard?
First, turn off your computer and unplug it. Locate the GTX 1060 graphics card and gently release the latch that holds it in place on the motherboard. Carefully pull the card out of the slot.
Do I need any special tools to remove the GTX 1060 from my motherboard?
No, you do not need any special tools. However, it is recommended to use an anti-static wristband while removing or replacing any component in your computer to avoid any static discharge that can damage delicate parts.
Can I remove the GTX 1060 without uninstalling the drivers first?
It is recommended that you uninstall the graphics card drivers before removing the GTX 1060 from your motherboard. This helps to avoid any conflicts with the new hardware you may install.
How do I know if my motherboard is compatible with the GTX 1060?
The GTX 1060 graphics card is compatible with most motherboards that have a PCI-Express x16 slot and support the minimum power requirements of the card. Check the specifications of your motherboard before purchasing the card to ensure compatibility.