
Are you struggling to open the top cover of your HP printer but can’t seem to find the answer? Well, you’re not alone. Many people find themselves in this situation, and it can be frustrating when you’re not sure what to do. Luckily, we’ve got you covered.
In this blog post, we’ll be showing you how to open the top cover of your HP printer step-by-step, so you can get back to printing in no time. So, grab your printer and let’s get started!
Check Your HP Printer Model
If you are wondering how to open the top cover of your HP printer, the first step is to check your printer model. Not all HP printers have the same design and therefore do not have the same method of opening the top cover. Once you have identified your printer model, you can consult the user manual or online resources for specific instructions on how to open the top cover.
In general, most HP printers have a lever or button located on the front, back, or sides of the printer that releases the cover latch. If you encounter any difficulties or uncertainties, it’s always best to seek assistance from HP support or a qualified technician for proper guidance. By carefully following the manufacturer’s instructions, you can safely and easily access the interior of your printer, clean it, or replace the ink cartridges without damaging the printer.
So, before attempting any action to open the top cover of your HP printer, check your printer model to avoid any mishap.
Find the Top Cover Latch
If you’re looking for the top cover latch on your HP printer, the first thing you need to do is identify your printer model. Each printer has a slightly different design, so the location of the cover latch may vary. Once you’ve figured out your model, you can search for the user manual online to find detailed instructions.
Alternatively, you can look for visual guides or videos that show you exactly where to look. It’s important to find the top cover latch if you need to replace ink cartridges or clear paper jams, as it provides easy access to the inner workings of the printer. By taking the time to locate this latch, you’ll be able to maintain your printer properly and ensure it lasts for years to come.
Push or Pull the Latch
When it comes to fixing printer issues, one of the most common problems people encounter is the inability to open the printer latches. If you own an HP printer, it’s essential to check the model number before attempting to open the latch. Different HP printer models have various latch designs that require different methods of opening.
Some printer models require you to push the latch down, while others need you to pull it up. To avoid confusion or damaging the printer, it’s crucial to check the user manual or HP website for instructions on how to open the latch correctly. Additionally, if you’re unsure about the model number, check for identification labels or branding on the printer’s exterior.
Taking the time to ensure you have the correct method for opening the printer latch prevents costly repairs and lengthens the lifespan of your HP printer.
Removing the Cover
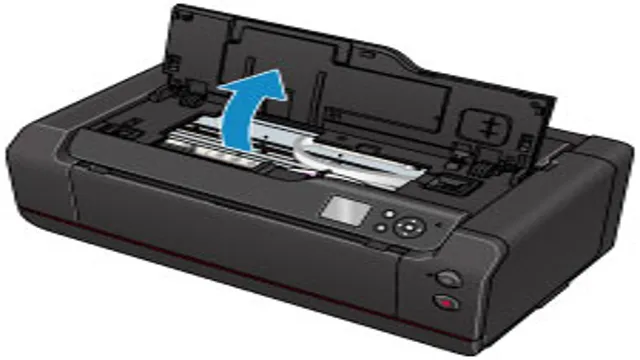
Opening the top cover of an HP printer can be a simple and easy task. First, make sure that the printer is turned off and unplugged from the power source to avoid any mishaps. Then look for the cover latches which are usually located at the sides of the printer’s top cover.
Press the latch or button and lift up the cover to fully open it. In some cases, some printer models may require you to push a release button located at the back of the printer. Once you have successfully removed the cover, you can now access the internal parts of the printer, including the ink cartridges, printhead, and paper jams.
It’s important to handle the cover with care, and ensure it’s properly aligned and secured in place when closing it. By following these simple instructions, you can easily remove the top cover of your HP printer and perform routine maintenance and cleaning to ensure the printer continues to provide high-quality and reliable printing.
Gently Lift the Cover
When it comes to removing the cover of any electronic device, it’s important to do so gently. The cover is designed to protect the inner workings of the device, so it’s important not to damage it. One way to do this is to use a small tool or your fingernail to gently pry up the edge of the cover.
Once you have a small opening, you can slowly work your way around the cover, gently lifting it up as you go. It’s important to be patient and take your time, as rushing this process can lead to damage to the device. By being careful and gentle, you can easily remove the cover and gain access to the inner workings of the device.
Remember to take your time and be patient, and you’ll have the cover off in no time.
Handle the Cover Carefully
Removing the cover of your device may seem like a simple task, but it’s important to handle it carefully to avoid any damages. The first step to removing the cover is to make sure your device is turned off and unplugged. Next, locate the tabs or screws that hold the cover in place.
If your device has tabs, use a flat tool to gently pry the cover off. If your device has screws, use the appropriate screwdriver to remove them and then carefully lift off the cover. It’s important to be gentle and avoid using excessive force, which can lead to cracking or breaking the cover.
Once the cover is removed, it’s a good idea to clean it with a soft cloth before replacing it back on your device. Remember, taking care of your device’s cover is crucial to keeping it in good condition and protecting it against any potential damage.
Set the Cover Aside
When it comes to cleaning your car, one of the first steps is removing the cover. But before you do so, make sure to set it aside in a safe and clean area. This will prevent any dust or debris from getting onto the cover and potentially damaging it.
It’s important to handle the cover carefully, as it may be expensive and require delicate care. You may want to fold it neatly or hang it up on a hanger to avoid any creases or wrinkles. By taking the time to set the cover aside properly, you can ensure that it remains in good condition and ready to use again in the future.
So go ahead and carefully remove the cover, but don’t forget to give it the attention and care it deserves.
Closing the Cover
If you’re wondering how to open the top cover of your HP printer, don’t worry, it’s actually quite easy! First, make sure your printer is turned off and unplugged from any power source. Then, locate the release button or lever on the front or side of the printer. It may be labeled with an icon resembling an open lock or a curved arrow pointing upwards.
Press or pull the release button or lever to unlock the top cover. Gently lift the cover upwards and it should pop open. You may need to use a bit of force if it’s stuck, but be careful not to break anything.
Once you’re finished accessing or cleaning the interior of the printer, simply lower the cover until it clicks back into place and locks. Easy peasy! Remember to always be cautious when handling electronics and to consult your printer’s manual if you have any doubts.
Align the Cover with Your Printer
When aligning the cover with your printer, it’s important to make sure everything is lined up correctly. This will help prevent any issues with paper jams or misprinted pages. First, ensure that the printer is turned off before attempting to align the cover.
Then, gently place the cover onto the printer and make sure that the edges of the cover are flush with the printer’s edges. You should also make sure that any openings on the cover are correctly aligned with any important areas on the printer, such as the paper feeder. Once you are confident that the cover is properly aligned, gently press down on all edges of the cover to ensure a secure fit.
It’s important to note that closing the cover on your printer is just one small step in the printing process. It may seem simple, but taking the time to ensure that everything is properly aligned can make a big difference in the quality of your printed materials. So, take a few extra moments to ensure that your cover is correctly aligned, and you’ll be rewarded with flawless prints every time.
Press the Cover Down
When it comes to closing the cover of your device, it can sometimes be a little tricky. That’s why it’s important to know how to do it properly, to avoid any damage or wear and tear on your device. One of the most important things to remember when closing the cover is to press it down firmly.
This ensures that the cover is securely in place, protecting your device from any outside elements. By pressing the cover down, you’re also ensuring that it doesn’t accidentally open up, exposing your device to potential damage. So, next time you’re closing the cover of your device, be sure to give it a good press down to keep it perfectly secure.
In Conclusion
In conclusion, opening the top cover of an HP printer may seem like a daunting task, but with the right technique, you can unlock this printing treasure chest in no time. Remember to use gentle pressure, avoid excessive force, and always read the manual before attempting any printer surgery. With a little patience and persistence, you’ll be printing like a pro in minutes.
So go forth, brave printer explorers, and discover the wonders that await inside your HP printer’s top cover!”
FAQs
How do I open the top cover of my HP printer?
To open the top cover of your HP printer, first make sure it is turned off and unplugged. Then simply locate the latch or button on the top of the printer and press or slide it to release the cover.
Why won’t the top cover of my HP printer open?
If the top cover of your HP printer won’t open, there may be a problem with the latch or button that you use to release it. Try gently pushing or pulling on the cover to see if it will release. If not, consult your user manual or contact HP customer support for assistance.
Can I clean the inside of my HP printer by opening the top cover?
Yes, you can often clean the inside of your HP printer by opening the top cover. This will give you access to the ink cartridges and other internal components. However, be sure to consult your user manual or HP customer support for instructions on safe cleaning methods to avoid damaging your printer.
Is it safe to open the top cover of my HP printer while it is still on?
No, it is not safe to open the top cover of your HP printer while it is still on. This can result in electrical shock or other injuries. Always make sure to turn off and unplug your printer before attempting to open the top cover.