
Have you ever wondered what goes into creating your computer’s motherboard? It’s no secret that motherboards are the backbone of any computer system, but the process of creating one is far from simple. Building your own motherboard, on the other hand, can be a fascinating and rewarding experience. From designing the layout to assembling the circuits, every step you take in making your own motherboard will deepen your understanding of how computers function.
It’s a bit like building your own car from scratch – it requires time, patience, and a willingness to learn. But with the right tools, knowledge, and guidance, you can create a one-of-a-kind motherboard that’s unique to your needs and preferences. In this blog post, we’ll explore what goes into creating your own motherboard, including the tools you’ll need, the steps involved, and the benefits of DIY motherboard building.
So grab your soldering iron and let’s get started!
Understanding the Basics
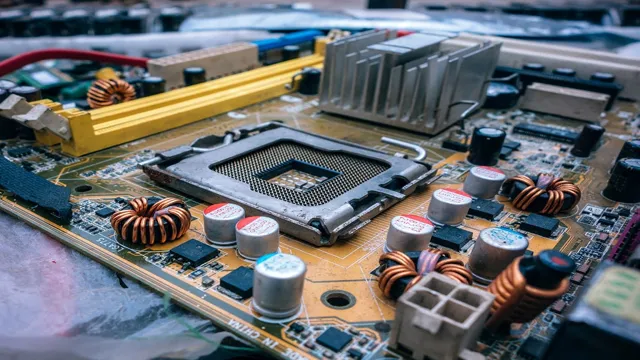
If you’re interested in building your own motherboard, it’s important to understand the basics of how they work. A motherboard is essentially a printed circuit board that connects all of the components in your computer together. The board houses a number of connectors, including memory slots, expansion slots, and input/output ports, that are used to connect the various components of your computer.
To build your own motherboard, you’ll need to start by choosing a suitable board design and then assembling the components onto the board. This can be a complicated process that requires a good understanding of electronics and circuit board design, so it’s important to do your research and ensure that you have all the necessary skills and knowledge before you start the project. However, with the right tools and resources, it is possible to create a custom motherboard that is tailored to your exact needs.
Researching the Components
When it comes to researching the components of a product, it’s important to first understand the basics. This means familiarizing yourself with the different materials that make up the product, their properties, and how they function together. For example, if researching the components of a laptop, understanding the differences between a CPU, GPU, RAM, and hard drive is essential.
You’ll need to know how they work together to ensure the laptop runs smoothly and efficiently. It’s also important to consider the quality of the components. Cheaper components may affect the overall performance and lifespan of the product.
By understanding the basics of a product’s components, you’ll be better equipped to make informed decisions when it comes to purchasing or repairing it.
Gathering Necessary Tools
When gathering the necessary tools for any task, it’s crucial to understand the basics of what you need. Whether you’re cooking a meal or starting a DIY project, having the right tools can make all the difference. The same goes for digital marketing.
As a marketer, you’ll need access to various tools to help you execute your campaigns effectively. These tools can range from social media management software to email marketing platforms and data analytics programs. But before diving into any of these tools, it’s important to understand what they do and how they can help you achieve your goals.
Take the time to research and evaluate different options to find the best fit for your needs. By doing so, you’ll be equipped with the necessary tools to succeed in your digital marketing efforts.
Designing the Layout
When it comes to designing the layout for your custom motherboard, there are several key factors to consider. The first step is to determine the size and shape of the board. This will depend on the specific components you will be using and the desired form factor for your final product.
Next, you will need to decide on the placement of key components such as the power supply, processor, RAM, and any expansion slots you require. It is important to ensure that each component is in its optimal location for efficient operation and easy maintenance. Another key consideration is the routing of traces, which are the connections between components on the board.
This can significantly impact the performance and reliability of your motherboard, so it is crucial to plan carefully. Finally, you will need to consider the placement and routing of your power and signal lines, as well as any additional features such as heatsinks or cooling fans. With careful planning and attention to detail, you can create a custom motherboard that meets your specific requirements and delivers optimal performance.
So why not give it a try and design your own powerful and customized motherboard?
Using Schematics and Blueprints
Designing the layout is a crucial step when using schematics and blueprints for any project. The layout design determines the overall look and functionality of the space or structure being built. It is important to consider factors such as accessibility, safety, and practicality when designing the layout.
For instance, the layout of a commercial building needs to accommodate high traffic flow, while the layout of a residential home might prioritize privacy. The use of schematics and blueprints allows for precise measurements and planning, ensuring that the final product meets all necessary requirements and achieves the desired outcome. The key to a successful layout design is to balance aesthetics with functionality, keeping in mind the specific needs of the project and its intended purpose.
Determining the Placement of Components
When designing a layout for components, there are a few things to consider. Firstly, think about how the components interact with each other and how they will be used by the user. It is important to make sure they are placed in a logical and intuitive order, so the user can quickly navigate the interface.
Another important factor is the visual hierarchy of the components. Consider which elements are the most important and which are secondary. A good rule of thumb is to use size, color, and contrast to highlight the most important components and make them stand out from the others.
It is also important to leave plenty of space between them to prevent overcrowding and confusion. By following these guidelines, you can create a clear and effective layout that enhances the user experience.
Creating the Printed Circuit Board (PCB)
When it comes to creating a Printed Circuit Board (PCB), one of the most important steps is designing the layout. This process involves deciding where each component will be located on the board, as well as the routing of the circuit traces. It’s critical to make sure that the layout is well-organized and efficient, as a poorly designed layout can result in a range of problems.
To get started, it’s essential to have a clear understanding of the circuit’s requirements and constraints. This will help in determining the board’s size, shape, and layer stackup. After that, the actual layout design can begin, with most engineers starting by placing the larger components first, followed by the smaller ones.
During this process, it’s important to consider factors like signal integrity, power distribution, and thermal management to ensure optimal performance. Ultimately, creating a well-designed PCB layout is a crucial part of the process that can make all the difference in the final product’s functionality and success.
Soldering and Assembly
If you’re looking to create your own motherboard, one of the key steps is learning how to solder and assemble the components. Soldering involves melting a metal alloy to join two pieces of metal together, such as connecting a resistor to a circuit board. It is important to have a steady hand and knowledge of the components to ensure a proper connection.
Assembling the motherboard involves carefully placing the components and connecting them through soldering or other specialized techniques such as pinning. It’s essential to follow the schematics and instructions carefully during assembly to ensure that the final product functions as intended. By learning these skills, you can create a unique motherboard tailored to your specific needs.
Preparing the Components
When it comes to building electronic projects, preparing the components is a crucial step in ensuring a successful outcome. Soldering and assembling the components can be a challenging yet rewarding process. Before beginning, it’s important to gather all the required components, including resistors, capacitors, and ICs.
Carefully bend the leads of the components to fit the intended layout and begin to solder them onto a prototype board. It’s important to apply just the right amount of heat for the solder to flow correctly without damaging the components. Assembling the components also requires attention to detail.
Follow the circuit diagram and use proper tools to cut and strip wires, crimp connectors, and fit the components into the enclosure. With patience and practice, the soldering and assembly process can become a fun and satisfying part of building electronic projects.
Soldering the PCB
Soldering, PCB, assembly Once you’ve got your PCB board printed, the next step is to solder the components onto it to create a functioning circuit. The art of soldering takes a steady hand and some practice, but it’s a relatively simple process once you get the hang of it. To start, you’ll need a soldering iron, solder wire, and a fume extractor to protect your lungs from the fumes.
Set your temperature to the recommended level for the specific components you’re soldering, and then begin by placing a small amount of solder onto the tip of the iron. Pick up one of the components with a pair of tweezers, and position it on the board. Once in place, use the soldering iron to heat the pad and the pin of the component at the same time, then add solder to the joint.
Hold the component in place until the solder cools and hardens, and then repeat for the remaining pins. Once all the components are attached, you can then add any necessary jumper wires and test the circuit to ensure it’s working properly. With some practice, you’ll be a pro at soldering in no time!
Testing and Troubleshooting
Making your own motherboard may seem like an overwhelming task, but it is not impossible. The first step is to do ample research on the different components and how they fit together. Next, you will need to obtain the necessary equipment and materials, which includes a PCB board, microcontrollers, resistors, capacitors, and more.
Once you have assembled the components, you can begin soldering them onto the PCB board. After the soldering process is complete, it is crucial to test the motherboard thoroughly to ensure that everything is functioning correctly. Troubleshooting any issues that arise is also a part of the process, and it can take some time.
However, once you have successfully completed the process, you will have a sense of satisfaction that you have created something unique and functional. Remember to keep the keyword “how to make your own motherboard” in mind throughout the process, and don’t hesitate to seek assistance if needed.
Connecting Power and Testing
Testing and troubleshooting are fundamental to ensuring the functionality of power connections. Before any electrical power application, thorough testing is required to ensure that the necessary power outputs are achieved. If there are any issues, it’s crucial to identify their root cause as fast as possible to minimize downtime, losses, and prevent hazardous conditions.
Troubleshooting becomes a way of life in the power connectivity industry, and without it, the efficiency and lifespan of your power connections could be at stake. Widespread adjustments and tests to every component of your system can help identify and resolve problems before they escalate into major issues. Smaller system components, such as fuses and circuit breakers, may require replacement rather than extensive troubleshooting.
Using the appropriate power connectivity hardware and reliable testing equipment helps mitigate these potential issues. By focusing intently on testing and troubleshooting, you can avoid costly errors and ensure that your power connections work as intended.
Identifying and Resolving Issues
Testing can be a challenging task, but it is an important part of identifying and resolving issues. Whether it’s testing a new software update or troubleshooting a hardware problem, a systematic approach is crucial to ensure that everything is working as expected. It’s often necessary to break down the components of the system and test them individually to determine the source of the problem.
In some cases, it may even be necessary to simulate certain conditions to try and replicate an issue. When testing, it’s important to always keep the end-user in mind and try to replicate their experience as closely as possible. This can help to identify any issues that may arise during normal use.
Troubleshooting, on the other hand, involves finding and fixing issues that have already been identified. It is often a process of elimination where potential causes are systematically ruled out until the exact issue is identified and fixed. By using a systematic approach to testing and troubleshooting, issues can be quickly and effectively identified and resolved, leading to a better end-user experience.
Conclusion
In conclusion, making your own motherboard may seem like an intimidating task, but with the right tools and knowledge it can be a satisfying and rewarding experience. Sure, it may not be as easy as ordering one online, but the pride of building your own PC from scratch is unparalleled. So roll up your sleeves, grab your soldering iron, and get ready to unleash your inner tech wizard because there’s nothing like crafting your own custom motherboard that’s tailored to suit your every need.
“
FAQs
What are the basic components required to make your own motherboard?
The basic components required to make your own motherboard are a printed circuit board (PCB), connectors, a microcontroller, capacitors, resistors, and power regulators.
Is it difficult to make your own motherboard?
Yes, making your own motherboard is a challenging task as it requires expertise in electronics and a thorough understanding of circuit design. It also involves complex procedures such as designing the PCB, soldering components, and testing for functionality.
What are the benefits of making your own motherboard?
The benefits of making your own motherboard include full customization of the design and features, the ability to choose which components are used, and the satisfaction of creating something from scratch.
How much does it cost to make your own motherboard?
The cost of making your own motherboard depends on the quality of components you use, as well as the complexity of the design. It can range anywhere from a few hundred dollars to thousands of dollars.