Setting up a new printer can be an exciting time, but it can also be a little overwhelming. With so many wires and components to deal with, it’s no wonder that many people feel daunted by the prospect of installing a new printer. Fortunately, setting up the HP Envy 6400 printer is a breeze with a few simple steps.
In this guide, we will walk you through how to set up your HP Envy 6400 printer and get you printing in no time. Whether you’re a seasoned tech pro or a newbie to printers, this guide will help you get your printer up and running quickly and easily. So, let’s get started!
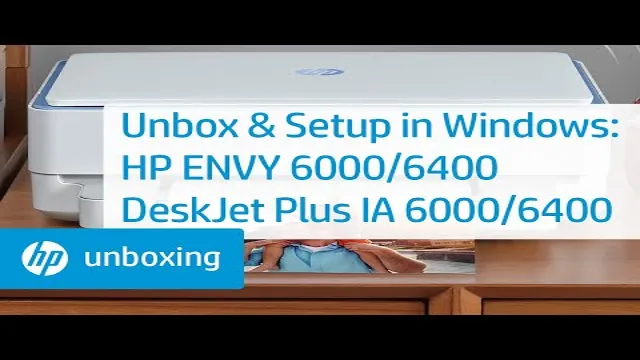
Unboxing and Setup Process
Installing the HP Envy 6400 printer can seem a bit overwhelming at first, but it’s actually super simple. When you unbox the printer, you’ll find the setup guide, power cord, ink cartridges, and some other materials inside. First things first, connect the power cord and turn on the printer.
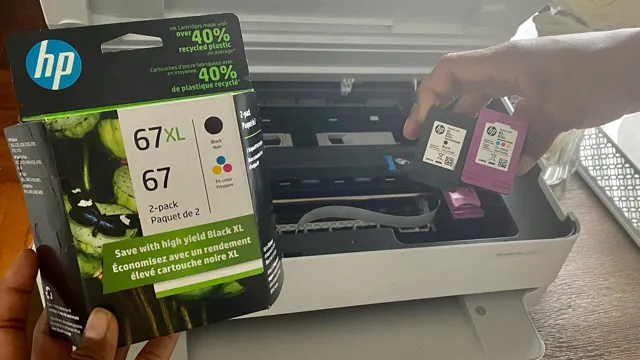
Next, open the ink cartridge access door and install the cartridges according to the color-coded labels. After that, load paper into the input tray and adjust the guides to fit the paper size. Finally, download the HP Smart app on your device, connect to the same network as the printer, and follow the on-screen instructions to complete the installation process.
Voila! You’re now ready to start printing with your HP Envy 6400 printer.
Assemble Printer Parts
If you just got a new printer, congratulations! Now comes the part where we need to put it all together. Unboxing a new printer can be intimidating, especially if you’ve never put one together before. Don’t worry though, as it’s actually a lot simpler than it looks.
Start by opening the box and removing all of the parts and accessories. Some printers will have a manual or setup disk included, so make sure to check for those. Then, start looking for the instructions on how to assemble the printer.
Typically, you will find a diagram that will help you identify the different parts and how to attach them together. The keyword for this section is “assemble printer parts”. One of the first things you’ll need to do is attach the base or stand to the printer.
This usually involves using screws or other hardware to secure the base to the main body of the printer. Next, attach the paper tray or cassette to the bottom of the printer, making sure to align it properly. You’ll also need to connect any cables or cords that came with the printer, such as power cords, USB cables or Ethernet cables.
Make sure to follow the instructions on where to plug in each cable. As you assemble the printer parts, take care to read the instructions carefully and be patient. Don’t rush through the setup process or you may end up with parts that are not aligned properly or connected correctly.
Once you have everything put together, turn on the printer and run the software setup program that came with it. This will take you through the process of setting up your printer on your computer or mobile device. Overall, the process of setting up a new printer can seem daunting at first, but it’s actually fairly simple once you get started.
Connect to Power Outlet and Wi-Fi
If you’re excited about your new device, the first step is to unbox it and begin the setup process. This process is usually straightforward and won’t take much time. You’ll begin by connecting your device to the power outlet using the provided power cable.
Once it’s powered up, you’ll need to connect it to your Wi-Fi network. This step is essential, as it enables you to access online content, update your device, and stream music or movies. Connecting to Wi-Fi is quite easy and straightforward, and your device’s manual will guide you through the setup process if you encounter any challenges.
Once you’ve connected to Wi-Fi, you can proceed to complete your device’s setup. Remember to choose a strong password to secure your network and protect your device from hackers or unauthorized access. With everything set up and connected, you’re now ready to enjoy your device’s features and explore new possibilities.
Download and Install HP Printer Software
If you’re wondering how to install your HP Envy 6400 printer, don’t worry – it’s a straightforward process. First, open a web browser and go to the HP website. Find the “Support” section and locate your specific printer model.
From there, you can download the necessary software for your printer. Once the software is downloaded, run the installer and follow the on-screen instructions. Depending on your computer’s operating system, you may need to connect your printer through a USB cable during the installation process.
After the software is installed, you should be able to set up and use your printer. Don’t forget to register your product with HP for customer support and warranty purposes. With these simple steps, you’ll be printing in no time!
Go to HP Printer Website
If you’re looking to download and install the software for your HP printer, the best place to start is the HP Printer website. Here, you can find all the necessary drivers and software that you need to get your printer up and running. To begin, simply navigate to the HP Printer website and search for your specific printer model.
From there, you can select the software and drivers that are compatible with your computer’s operating system. It’s important to choose the correct version for your system, as this will ensure that the printer works correctly and efficiently. Once you’ve downloaded and installed the software, you can start using your HP printer to print whatever you need.
Whether you need to print documents for work or photos for personal use, your HP printer is a reliable and efficient choice. So why not head on over to the HP Printer website today and get started? It’s the easiest and most straightforward way to get your printer up and running in no time!
Select HP Envy 6400 model
To enjoy the full features and functionalities of HP Envy 6400, it’s crucial to download and install the printer’s software. The software helps to manage printing tasks, scan documents, and also perform maintenance. To make the process easier, you can download the HP Smart app from the Windows store, which automatically searches and installs the right software for your printer.
Alternatively, you can navigate to the HP support website, select your printer model, and download the software manually. Remember to choose the correct operating system version to avoid any compatibility issues. Installing the software is a simple process that requires following the on-screen instructions and connecting your printer to the network.
You can also activate the web services feature to print and scan remotely from anywhere. With HP Printer Software, you can maximize the printer’s functionality and enjoy seamless printing experiences.
Follow Step-by-Step Instructions
If you’ve just purchased an HP printer, congratulations! Now, it’s time to download and install the software so you can start printing with ease. The first step is to locate the correct software for your printer model on HP’s website. Once you’ve found it, download the software onto your computer.
Then, double-click on the downloaded file to begin the installation process. Follow the prompts on the screen, which may include setting up wireless connectivity, configuring print settings, and registering your printer. Remember to have your printer model and network information handy, as you’ll need them during the installation.
Once the software is installed, restart your computer and try printing a test page to ensure that everything is working correctly. With the installation complete, you can now enjoy using your new HP printer to print documents, photos, and more. So, what are you waiting for? Get started with your new printer today! The main keyword used in this passage is “install HP printer software.
“
Test Print and Troubleshoot
Installing an HP Envy 6400 printer is a breeze and once done, you’ll be able to print all your documents and pictures. Firstly, open the printer box and remove all the contents. These include the printer, power cord, ink cartridges, and a user manual.
Next, connect your printer to an electrical outlet using the power cord. Turn on your printer and then follow the prompts to set up the language, date, and time. Install the ink cartridges, ensuring that they snap into place.
You will then need to connect your printer to your computer using a USB cable or Wi-Fi. Once connected, it’s important to test-print to ensure everything is working properly. Troubleshoot any issues by checking your printer’s display or use the troubleshooting section of the user manual.
Now that your printer is up and running, you can start printing beautiful documents and pictures in no time.
Print a Test Page
Printing a test page is an essential step when setting up a new printer or troubleshooting printing issues. It helps to ensure that the printer is correctly installed and communicating with your computer or device. To print a test page, first, go to the printer settings on your computer and select the option to print a test page.
This will send a simple test image or text to your printer, which should print out immediately. If the test page does not print or prints incorrectly, it may indicate a problem with the printer settings or configuration. It’s best to check the printer manual or manufacturer website for troubleshooting tips or contact customer support for further assistance.
It’s important to note that printing a test page regularly can help you to catch any printing issues before they become significant problems. So, don’t hesitate to print a test page every once in a while to ensure everything is running smoothly.
Check for Software Updates
Checking for software updates is a vital task that can help you maintain your printer’s performance and avoid potential issues. You need to regularly check for driver updates and other software updates to ensure that your printer is running on the latest version available. This can help you fix any bugs or glitches that may be causing issues, as well as improve the overall functionality of your printer.
It is also essential to test print and troubleshoot any problems that arise. This allows you to identify the root cause of the problem and make necessary adjustments to improve the overall performance of your printer. Remember, if you ever need help or have any concerns, don’t hesitate to contact the printer manufacturer’s support team.
By taking these simple steps, you can keep your printer running smoothly and ensure that it consistently delivers high-quality prints.
Conclusion
Congratulations, you have successfully navigated the labyrinth of printer installation and emerged victorious with your brand new HP Envy 6400 Printer. With a little patience and a lot of tech-savviness, you can now experience the joy of high-quality printing, scanning, and copying from the comfort of your own home. So sit back, relax, and let your stylish and sleek new printer do all the work while you bask in the glory of a job well done.
You are the envy of all your friends now!”
FAQs
What are the system requirements to install HP Envy 6400 printer on a computer?
To install HP Envy 6400 printer on a computer, you need to make sure that your computer meets the following system requirements:
– Operating System: Windows 10, 8.1, 8, 7, macOS X v10.11 or later
– Processor: 1 GHz 32-bit or 64-bit processor
– RAM: 2 GB (32-bit) or 4 GB (64-bit)
– Hard disk space: 1.5 GB available space
– Internet access
How can I download the drivers for HP Envy 6400 printer?
You can download the latest drivers and software for HP Envy 6400 printer from the official website of HP. Follow these steps:
1. Go to hp.com on your computer.
2. Click on ‘Support’ at the top of the page.
3. Select ‘Software & Drivers’ from the drop-down menu.
4. Enter ‘HP Envy 6400 printer’ in the search box and click on ‘Submit’.
5. Select your operating system and click on ‘Download’ next to the recommended driver.
6. Follow the on-screen instructions to complete the driver installation process.
How can I connect my HP Envy 6400 printer to a Wi-Fi network?
To connect your HP Envy 6400 printer to a Wi-Fi network, follow these steps:
1. Turn on your printer and make sure it is connected to the power source.
2. Press the ‘Wireless’ icon on your printer control panel.
3. Press the ‘Settings’ icon and select ‘Wireless Setup Wizard’.
4. Follow the on-screen instructions to select the Wi-Fi network you want to connect your printer with and enter the Wi-Fi password.
5. Once connected, your printer will display a confirmation message.
How can I troubleshoot connectivity issues with my HP Envy 6400 printer?
If you are facing connectivity issues with your HP Envy 6400 printer, follow these steps for troubleshooting:
1. Make sure your printer is turned on and connected to the Wi-Fi network.
2. Check if your printer and computer are connected to the same Wi-Fi network.
3. Restart your printer, computer, and Wi-Fi router.
4. Make sure the printer firmware and driver software are up to date.
5. Disable the firewall and any antivirus software temporarily and check if the connectivity issue is resolved.
6. If the issue still persists, contact HP Support for further assistance.