Heat generation is one of the most common issues faced by computer enthusiasts and hardcore gamers. As the system gets overloaded, the processor heats up, and excess heat can damage the motherboard. To prevent this from happening, you can use a heatsink.
It helps in dissipating the heat away from the processor, keeping the system temperature under control. In this blog, we will guide you through the installation process of a heatsink on your motherboard, and it’s easier than you think. So, are you ready to learn how to install a heatsink on your motherboard? Let’s dive right in!
Gather Tools and Materials
When it comes to installing a heatsink on your motherboard, gathering the right tools and materials is crucial. Firstly, make sure you have a compatible heatsink with your CPU and that it comes with thermal paste. You’ll also need a flat surface to work on, a screwdriver, and rubbing alcohol to clean the CPU and heatsink before installation.
It’s important to handle the CPU with care, avoiding touching the delicate pins on the underside. Once you’ve gathered everything you need, you’re ready to get started on the installation process. Keep in mind that each motherboard may have slightly different instructions for installing a heatsink, so it’s worth reviewing your motherboard manual before proceeding.
With the right tools in hand and knowledge on how to properly handle the materials, you’ll be on your way to a successful installation in no time.
Tools: Heatsink, Thermal Paste, Screwdriver, and Cleaning Alcohol.
Gathering the necessary tools and materials is crucial when it comes to replacing or upgrading components in your computer. In particular, if you’re working with a processor, a heatsink and thermal paste are essential items to have on hand. The heatsink is responsible for dissipating the heat generated by the processor, while the thermal paste ensures optimal transfer of heat from the processor to the heatsink.
Additionally, a screwdriver will be needed to open up your computer case and make any necessary adjustments. Don’t forget to have some cleaning alcohol on hand as well, as you may need to clean surfaces before applying thermal paste or dealing with any dust or debris inside the case. Taking the time to gather these tools and materials beforehand can make the process of upgrading or replacing parts much smoother and more efficient.
Prepare the Motherboard
Installing a heatsink on a motherboard can seem like a daunting task, but with the right preparation, it can be a smooth process. First, ensure that the motherboard is unplugged and removed from the computer case. Next, locate the CPU socket on the motherboard and clean it thoroughly with a lint-free cloth.
Then, apply a small amount of thermal paste onto the top of the CPU and spread it evenly with a plastic applicator. Now, it’s time to attach the heatsink. Align the heatsink with the CPU and firmly press down to secure it in place.
Make sure that the heatsink is properly seated and that the mounting screws are tightened evenly. Finally, connect the fan cable to the appropriate header on the motherboard and reassemble the computer. With these steps, you’ll have successfully installed a heatsink on your motherboard, ensuring optimal cooling for your CPU.
Disconnect the power supply and remove the processor.
To prepare a motherboard for maintenance or upgrading, the first step is to disconnect the power supply and remove the processor. This ensures that the board is no longer under power and cannot accidentally get damaged while working on it. To disconnect the power supply, the power cord must be removed from the wall outlet or power strip.
After allowing a few minutes for any residual power to dissipate, the processor can be carefully removed from its socket. It’s important to refer to the motherboard manual to ensure that the processor is removed correctly without causing any damage to the socket or the processor itself. Once the processor is removed, the motherboard is ready for further maintenance or upgrading.
Whether replacing a faulty component or upgrading the motherboard itself, it’s crucial to take these steps before starting any work. By taking the time to disconnect the power supply and remove the processor, you can ensure that your motherboard is protected while you work on it. So, whenever you need to do any maintenance work on your motherboard, first, remember to disconnect the power supply, and then you can confidently start your work.
Attach Heatsink to Motherboard
Installing a heatsink on a motherboard may seem like a daunting task, but it’s actually quite simple with the right tools and instructions. First, make sure you have all the necessary hardware, including the heatsink, thermal paste, and appropriate screws. Remove any existing thermal paste from your CPU and clean it thoroughly before applying a small amount of new paste.
Next, place the heatsink on top of the CPU and align the screw holes with those on the motherboard. Tighten the screws carefully and evenly, taking care not to overdo it and damage the motherboard. Double-check that the heatsink is secure, and you’re good to go.
Keep in mind that proper installation of a heatsink is crucial for the optimal performance and longevity of your computer, so take your time and follow the instructions carefully. With a little effort, you can easily attach a heatsink to your motherboard and enjoy reliable, efficient cooling for your system.
Apply thermal paste to the processor and clip the heatsink onto the motherboard.
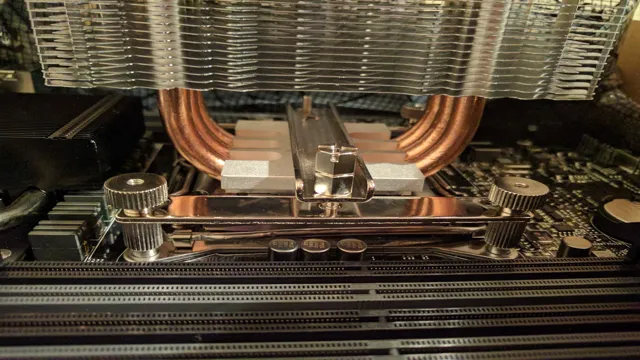
Heatsink When building a PC or upgrading certain components, it’s important to know how to properly attach the heatsink to the motherboard. The heatsink is responsible for dissipating the heat generated by the processor to prevent it from overheating, which can cause damage to your system. To attach the heatsink, you must first apply thermal paste to the processor.
This paste ensures that there is proper contact between the processor and heatsink, maximizing heat transfer. After applying the paste, align the clip on the heatsink with the retention bracket on the motherboard. Firmly press down on the heatsink to secure it in place, making sure that all of the retention clips are fully latched.
A properly attached heatsink will keep your processor cool and running smoothly, allowing you to enjoy all of your favorite games and applications without any worries. So the next time you’re installing a new CPU, don’t forget to attach the heatsink properly for optimal performance.
Tighten screws in a star pattern.
If you’re building a PC, attaching the heatsink to the motherboard is an important step to ensure your PC doesn’t overheat. However, it’s not just a matter of slapping it on and calling it a day. You need to tighten the screws in a star pattern to ensure that the heatsink is securely mounted.
This means starting with a screw, then moving diagonally to the opposite screw, then to another diagonal screw, and so on until all screws are tight. This even distribution of force helps to prevent any damage or warping that can occur if you tighten one screw too much before tightening the others. Don’t forget to apply thermal paste to the CPU before attaching the heatsink, as this helps to transfer heat away from the CPU and onto the heatsink.
With these steps done correctly, you can be confident that your PC will stay cool and won’t suffer any damage from overheating.
Reassemble the Computer
Installing a heatsink on your motherboard can seem intimidating, but with the right tools and a little know-how, it’s a straightforward process. To begin, you’ll need to remove any old thermal paste from the CPU and the heatsink base. Then, attach the brackets to the heatsink and align the screws with the mounting holes on your motherboard.
Tighten the screws with a screwdriver, being careful not to overtighten. Next, apply a small amount of thermal paste in the center of the CPU and place the heatsink on top. Gently press down and evenly tighten the screws in a cross pattern to ensure even pressure distribution.
Finally, reconnect any other components you removed, such as the fan, and power on your computer to ensure proper cooling. By following these simple steps, you’ll have a properly installed heatsink and a smoothly running computer.
Reinstall the processor and connect the power supply cables.
Now that we have gone over the steps to disassemble your computer, it’s time to put everything back together. The first step in reassembling your computer is to reinstall the processor. This is one of the most important components of your computer and needs to be handled with care.
Take the time to properly align the processor and gently lower it into place. Once the processor is in place, you can connect the power supply cables. Make sure that the cables are securely connected and that they are connected to the correct ports.
It’s essential to connect the power supply cables correctly, as any mistakes could cause significant damage to your computer’s components. Take your time to verify each connection, and then move on to the next step. By following each step carefully, you can successfully reassemble your computer and enjoy its full functionality once again.
Turn on your computer and ensure that the processor is running at a safe temperature.
Assembling a computer can seem like a daunting task, but it can be a rewarding experience for any DIY enthusiast. Once you’ve installed your processor and graphics card, it’s important to turn on your computer and ensure that the processor is running at a safe temperature. This can be done by checking the BIOS settings or using a program to monitor the temperature.
If you notice that the temperature is too high, you may need to adjust the CPU fan or add extra cooling to your system. Once you’ve confirmed that everything is running smoothly, you can proceed to reassemble your computer. This involves carefully placing all of the components back into their respective slots, securing them with screws, and connecting all of the cables.
It’s important to be patient and take your time during this process, as any mistakes can cause damage to your system or compromise its performance. By following these steps and taking the necessary precautions, you can enjoy a fully functioning computer that meets your needs and exceeds your expectations.
Conclusion
Congratulations, you’ve successfully installed a heatsink on your motherboard! With a cool head and steady hands, you’ve shown that even the most daunting task can be accomplished with ease. Now your CPU can stay cooler than the other side of the pillow, ensuring that your system stays running at its best. So sit back, relax, and enjoy a job well done – and maybe even treat yourself to a cool beverage while you’re at it.
Just make sure to keep that heatsink firmly in place – we wouldn’t want your computer to get too hot under the collar.”
FAQs
What is a heatsink and why is it important for a motherboard?
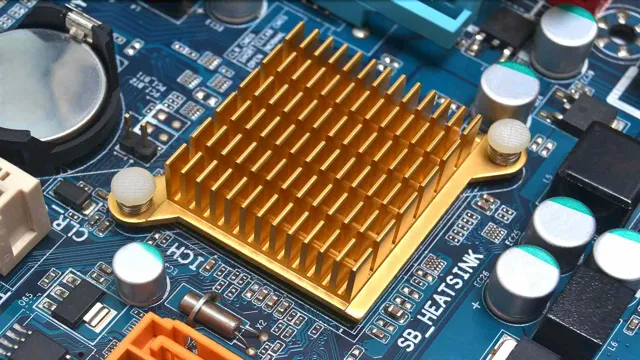
A heatsink is a device that dissipates heat from the motherboard, preventing damage to the electronic components due to high temperatures.
Can I install a heatsink on any motherboard?
No, you need to consider the compatibility of the heatsink with the motherboard’s socket type and size.
What tools are required to install a heatsink on a motherboard?
You will need a screwdriver, thermal paste, and a cleaning solution for the CPU and heatsink surface.
What is the proper technique for applying thermal paste before installing the heatsink?
A small pea-sized amount of thermal paste should be applied to the center of the CPU, and then spread evenly using a spreading tool or plastic card.