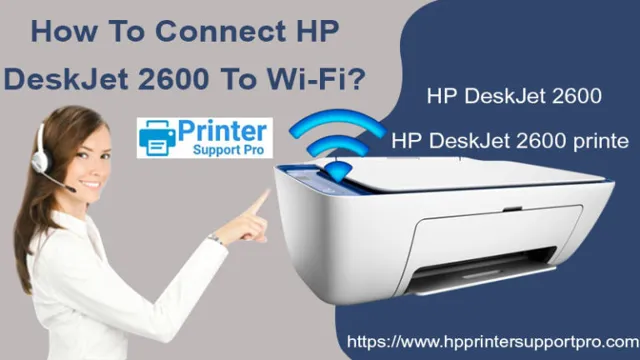
Connecting your HP 2600 printer to WiFi might seem like a daunting task, but with these simple steps, you’ll be printing wirelessly in no time! The HP 2600 is a popular model of printer among both personal and professional users, and connecting it to WiFi can save time and hassle when printing multiple documents or for printing from multiple devices. In this blog, we’ll guide you through the steps to connect your HP 2600 printer to WiFi, so you can print from anywhere in your home or office. So, let’s get started!
Step 1: Prepare Your Printer
Connecting your HP 2600 printer to Wi-Fi is a simple process that requires a bit of preparation to ensure a seamless connection. First, ensure your printer is compatible with Wi-Fi and that your wireless network is turned on and has a strong signal. Make sure your printer is in range and that there are no obstructions that may interfere with the connection.
Next, connect your printer to Wi-Fi by accessing the settings menu on the printer and selecting the network and wireless options. Enter your Wi-Fi network name and password, and your printer will connect to your network. It may take a few minutes for the printer to connect, but once it has successfully connected, you’re ready to start printing wirelessly.
By following these simple steps, you can easily connect your HP 2600 printer to Wi-Fi and enjoy wireless printing from your mobile device or computer.
Ensure Your Printer is on
When it comes to using your printer, one of the first things you need to check is if it’s turned on. This might seem like an obvious step, but you would be surprised at how many people skip it and then wonder why their printer isn’t working. Make sure to check the power cable is properly connected and the printer is switched on, and any power indicators on the printer light up.
If your printer is wireless, ensure that it’s connected to your network and is turned on. By following this essential step, you can save yourself a lot of time and frustration trying to troubleshoot a printer that’s not even switched on. Always ensure that your printer is powered up before you start printing anything, or you may end up with incomplete or corrupted print jobs.

Make Sure You Know Your WiFi Network Name (SSID) and Password
Before you dive into connecting your printer to your WiFi network, it’s important to make sure you know your network’s name (SSID) and password. This information is critical to ensure that your printer can successfully connect to your WiFi network. To prepare your printer for connection, you’ll first need to find the printer’s control panel and select the WiFi setup option.
From there, you’ll be prompted to enter in your network’s name and password. If you’re unsure of what your WiFi network name or password is, you can typically find this information on your router or by contacting your internet service provider. It’s always a good idea to double-check this information before beginning the setup process to avoid any potential connection issues.
Once you’ve entered in your WiFi network information, your printer should be ready to go!
Step 2: Connect Your Printer to WiFi
Connecting your HP 2600 printer to WiFi is a straightforward process that can be done quickly and easily. First, ensure that your printer is turned on, and press the Wireless button or the Network button on the control panel of the printer. Then, navigate to the WiFi network settings option and select your WiFi network name from the list of available networks.
Enter the password for your network, and your printer will automatically connect to the WiFi network. You can confirm that your printer is connected to your WiFi network by printing a configuration page or a network summary page, which will show your printer’s network status. With your printer now connected to WiFi, you can easily print from any device connected to the same network, making your printing experience more efficient and convenient.
Press the Wireless Button on Your Printer
Connecting your printer to WiFi may seem like a complicated process, but it’s actually quite simple. The second step in this process is to press the wireless button on your printer. This button is usually located on the front or top of your printer and may have a wireless symbol next to it.
Once you press this button, your printer will start searching for available WiFi networks in the vicinity. Make sure that your WiFi is turned on and your printer is within range of the network. Once your printer detects the network, it will display the name of the network on its screen.
Select the network name and enter the password to connect your printer to the WiFi network. You can print a test page to make sure that your printer is connected to the network properly. By following these simple steps, you’ll be able to connect your printer to WiFi and enjoy the convenience of wireless printing.
Select the WiFi Network You Want to Connect To
When it comes to connecting your printer to WiFi, selecting the network you want to connect to is a crucial step. Before you start, make sure you have the name and password of the WiFi network you want to use. Once you have that information, turn on your printer and select the WiFi icon from the home screen.
You should see a list of available networks, so choose the one you want to connect to and enter the password when prompted. Once you’ve successfully entered the password, your printer should be connected to the WiFi network. It’s important to note that if you’re having trouble connecting, make sure your printer and router are both turned on and within range of each other.
With a little patience and persistence, you’ll be able to connect your printer to WiFi in no time.
Enter Your WiFi Network Password
Connecting your printer to your home network is an essential step in making sure your printing experience is as seamless as possible. To connect your printer to WiFi, you will need to enter your WiFi network password correctly. This is an important step because it ensures that your printer can access your WiFi network and, in turn, allows you to print from any device connected to the same network.
Keep in mind that passwords are case-sensitive, so make sure to double-check that you enter it correctly. If you’re unsure what your password is, you can check your router’s settings or contact your internet service provider. Always take note that security is paramount when sharing your internet network so be sure that you have a strong password to prevent unauthorized access.
With these steps, you can now move on to the next step of the process, which involves connecting your printer to your home WiFi network and start printing your documents seamlessly.
Step 3: Verify Your Connection
Now that you have successfully connected your HP 2600 printer to Wi-Fi, it’s time to verify your connection. You can do this by printing a test page or checking the printer’s connectivity status in the printing settings. If the test page comes out with no errors and the printer is showing as connected in the settings, then congratulations, you have successfully connected your HP 2600 printer to Wi-Fi! If, however, you encounter any issues, try restarting your printer and router and making sure that the correct Wi-Fi network and password are being used.
Remember, with a little bit of patience, troubleshooting, and attention to detail, anyone can connect their HP 2600 printer to Wi-Fi hassle-free.
Print a Test Page to Ensure Your Printer is Connected
After successfully installing your printer drivers and connecting your printer to your computer, it’s time to verify your connection. The best way to do this is by printing a test page. A test page is a simple document that you can use to verify that your printer is working correctly and that it is connected to your computer.
To print a test page, you need to go to your printer settings and select the ‘Print Test Page’ button. This will initiate a print job, and once your printer finishes printing the test page, you can examine it to make sure everything looks good. If you encounter any issues during the printing process, make sure to check your connections and try again.
Printing a test page is a quick and easy way to ensure that your printer is connected and working correctly, and it’s essential to do this before attempting to print anything more substantial. If there are any problems with your connection, it’s better to address them sooner rather than later to avoid any delays or frustration when you need to print something important.
Conclusion
Congratulations, you have successfully connected your HP 2600 printer to Wi-Fi! You can now print wirelessly from any device in your Wi-Fi network without having to fuss with distracting cords and cables. With this newfound convenience, you can take comfort in the fact that your printing process is not only efficient, but also eco-friendly. Say goodbye to printouts cluttering your desk and hello to a more streamlined, tech-savvy printing experience!”
Enjoy Wireless Printing with Your HP 2600 Printer
After completing the first two steps, it’s time to verify your connection and ensure your HP 2600 printer is ready for wireless printing. First, make sure that your printer and computer are connected to the same Wi-Fi network. Next, go to the Settings on your computer and select Printers & Scanners.
Click on the Add a Printer or Scanner button and wait for your computer to detect your HP 2600 printer. Once it appears on the list, select it and follow the prompts to complete the setup process. If your printer doesn’t show up, try restarting both your printer and computer and repeating the steps.
Once your connection is established, you can start printing wirelessly from your computer or mobile device, making printing tasks more efficient and convenient. With wireless printing, you’ll have the freedom to move around while printing documents, eliminating the need for unsightly cables. So, take advantage of this innovative technology and enjoy the convenience of wireless printing with your HP 2600 printer.
FAQs
What are the steps to connect HP 2600 printer to wifi network?
To connect your HP 2600 printer to wifi network, first make sure that your printer and router are turned on. Then, press the wireless button on your printer and wait for the wireless light to start blinking. Next, press and hold the WPS button on your router for 3 to 5 seconds. Once the wireless light on your printer turns solid, it means your printer is connected to your wifi network.
How do I know if my HP 2600 printer is connected to wifi network?
To check if your HP 2600 printer is connected to wifi network, you can print a wireless network test report by pressing and holding the resume button on your printer for 3 seconds. The report will show the status of your wireless connection, including the SSID, signal strength, and IP address.
Can I use my HP 2600 printer without wifi network?
Yes, you can use your HP 2600 printer without wifi network by connecting it to your computer using a USB cable. Once connected, you can install the printer software and start printing.
How do I troubleshoot wifi connection issues on my HP 2600 printer?
If you’re having trouble connecting your HP 2600 printer to wifi network, you can try the following troubleshooting steps:
– Make sure your printer and router are turned on.
– Check if your printer and router are within range of each other.
– Restart your printer and router.
– Check if the wireless light on your printer is blinking, if not, press the wireless button to enable it.
– Reset your printer network settings to default.
– Update your printer firmware and router firmware.