
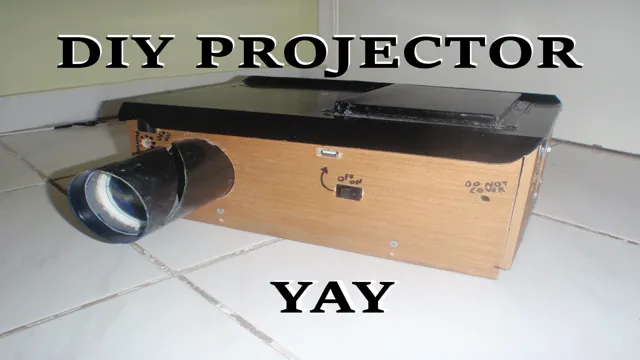
Have you ever wanted a projector but couldn’t justify spending hundreds of dollars on one? What if we told you that you could make your own projector at home? That’s right! DIY homemade projectors are becoming more and more popular as people are looking for cost-effective alternatives to buying expensive electronics. With just a few materials and a little bit of patience, you can create a projector that will provide you with hours of entertainment in the comfort of your own home. In this blog post, we’ll walk you through the steps to create your own DIY homemade projector and provide some tips and tricks on how to get the most out of it.
So, grab your tools and let’s get started!
Introduction
If you’re looking for a budget-friendly way to enjoy a movie night at home, a homemade projector might be just what you need. With a little bit of creativity and some basic supplies, you can create a DIY projector that rivals the ones you could pick up at a store. All you’ll need is a cardboard box, a smartphone, a magnifying glass, and some duct tape.
Simply place the magnifying glass over the opening of the box, secure it with tape, and place your smartphone inside the box facing the magnifying glass. Adjust the focus and distance until you get a clear, bright image on your wall or projector screen. This method is perfect for mini-movie nights or for projecting photos or presentations.
Give it a try and see what creative uses you can come up with for your homemade projector!
Why make your own projector?
If you’re a DIY enthusiast, making your own projector could be a fun and engaging project that allows you to learn more about the technology behind it. While buying a new projector may seem like a convenient option, it could be a lot more expensive, not to mention the lack of customization. By making your own projector, you’ll have the ability to choose the quality of components that will be used, which can greatly influence the quality of the final product.
Additionally, you can make a projector that meets your unique needs, something that may not be possible with store-bought projectors. By taking on such a project, you can also experience the satisfaction of creating something yourself from scratch, something that a store-bought projector could never give you.
Materials Needed
If you’re planning to make your own homemade projector, there are a few materials that you will need to have on hand first. Firstly, you will need a suitable light source, which can be an LED or a traditional halogen lamp. You’ll also need a good-quality lens to project the image.
You can purchase a pre-made lens or get creative and use a simple magnifying glass or old camera lens. Other materials that you may need include a cardboard box or frame to house the projector, a white sheet or screen to project onto, and a few small accessories like screws and tape to hold everything together. Creating a homemade projector is a fun and rewarding project that provides a unique viewing experience.
With a little ingenuity and effort, you can create a powerful and efficient projector that will enable you to enjoy movies and videos in the comfort of your own home. So gather your materials and get ready to make a homemade projector today!
Projector lens & bulb
When it comes to setting up a projector system, two essential components are the lens and bulb. The lens is responsible for projecting the image onto the screen, while the bulb provides the necessary light to create the image. To ensure you have a high-quality projector system with clear and bright images, you’ll need to invest in quality projector lenses and bulbs.
It’s essential to choose the right size and type of lens that is compatible with your projector model to ensure optimal image quality. Similarly, bulbs come in various types, including incandescent, halogen, and LED. It’s crucial to choose a bulb that is compatible with your projector and fits both your budget and project requirements.
Investing in high-quality projector lenses and bulbs can significantly impact the quality of your projected image, so it’s essential to take the time to make the right decision.
Cardboard or wood
When it comes to building structures like furniture, people usually have to choose between two materials: cardboard or wood. Both materials have their advantages, but there are also drawbacks that must be considered. For starters, cardboard is an affordable and lightweight option that is easy to transport and cut into any shape or size.
It’s also an environmentally-friendly choice as it can be recycled after use. However, it’s not as durable as wood, and it’s prone to get damaged by water or moisture. On the other hand, wood is sturdy, long-lasting, and aesthetically pleasing.
It also gives a natural look and is a renewable resource. But, it’s usually more expensive than cardboard, and it’s heavier and requires more maintenance. So, it ultimately depends on factors like the intended use, budget, and personal preferences.
Cardboard might be a good option for temporary structures, while wood is a better choice for long-term use, aesthetic appeal, and durability.
Magnifying glass or fresnel lens
If you’re looking to magnify small objects, there are two popular tools to choose from: a magnifying glass or a fresnel lens. A magnifying glass is a convex lens that can be held up to an object to make it appear larger than it actually is. A fresnel lens, on the other hand, is made up of a series of concentric circles that act as tiny prisms, allowing light to bend and magnify whatever is held behind it.
To make your own magnifying glass, all you need is a convex lens, some cardboard, and glue. For a fresnel lens, you’ll need to order a pre-made one or make your own using clear plastic and a laser cutter. Both tools can be incredibly useful for hobbies like coin collecting, stamp collecting, or even just reading small print.
So why not try making one yourself and see the world from a whole new perspective?
Building the Projector
Building a homemade projector can be a fun and rewarding project, especially if you’re on a budget. One of the easiest ways to build a projector is by using a magnifying glass and a smartphone. First, find a cardboard box that fits your smartphone and cut off one side.
Then, place the magnifying glass over the hole and secure it in place with tape. Make sure that the distance between the magnifying glass and the smartphone is just right so you get a clear image. Next, turn on the image you want to project on your smartphone and place it in the box facing the magnifying glass.
Finally, project the image onto a large white wall or a projector screen and enjoy your homemade creation. With a little bit of imagination and creativity, you can enjoy a movie night under the stars or turn your living room into a cinema without breaking the bank. So go ahead and try it out, you might surprise yourself with what you can create using just a few simple tools.
Step-by-step instructions
Building a projector from scratch can be a fun and rewarding experience. Here are some step-by-step instructions to get you started. The first step is to gather all the necessary materials, including a lens, mirror, cardboard or plywood, glue, screws, an LED light source, and a power source.
Next, cut the cardboard or plywood into the desired size and shape for the projector. Attach the lens and mirror to the cardboard or plywood using glue and screws. Then, attach the LED light source to the cardboard or plywood, ensuring it is aligned with the lens and mirror.
Finally, connect the power source to the LED light source and turn it on to test the projector. With some creativity and patience, you can build a projector that meets your specific needs and gives you a unique viewing experience. So, what are you waiting for? Get started today and enjoy the excitement of building your own projector!
Tips for optimal image quality
When it comes to building a projector, there are a few tips for optimal image quality that you should keep in mind. Firstly, you’ll want to make sure that the lens is clean before use, as any smudges or dirt will affect the clarity of the final image. Additionally, ensure that the projector is level and properly aligned with the screen for the best possible picture.
Another important factor is the source of the image – make sure that it has a high resolution and is compatible with the projector. Finally, consider the lighting in the room where the projector will be used – a dark space with minimal light will make for the best viewing experience. By keeping these tips in mind, you can build a high-quality projector that produces stunning images.
Using the Projector
Have you ever thought about making your own homemade projector for movie nights or presentations? Creating a DIY projector can be a fun and rewarding experience. To start, you’ll need a few materials such as a magnifying glass, a shoebox, and a smartphone. First, cut a rectangular hole in one end of the shoebox.
Then, place the magnifying glass over the hole on the inside of the box and secure it in place with tape. Next, turn on your smartphone and find a video or image you want to project. Place your phone face down in the box so the image is reflected onto the magnifying glass.
Lastly, turn off the lights and adjust the focus by moving the phone closer or further away from the magnifying glass. Using a homemade projector can be a fun and inexpensive way to enjoy movies or share presentations with friends and family.
Connecting video source
When it comes to connecting your video source to your projector, there are a few simple steps you can follow to ensure a seamless experience. First, make sure that your video source, such as a laptop or DVD player, is compatible with your projector. Then, connect your video source to your projector using the appropriate cable – for example, an HDMI cable.
Once your devices are connected, turn on your video source and your projector, and select the correct input on your projector. If everything is working properly, you should see your video source displayed on your projector’s screen. Remember to adjust the resolution and other settings as needed to achieve the best possible picture quality.
By following these simple steps, you’ll be able to connect your video source to your projector with ease and enjoy stunning visuals in no time!
Adjusting focus and brightness
Adjusting focus and brightness on your projector can make a significant difference in the quality of your viewing experience. Most projectors have manual focus, which means you have to adjust it manually to get the best possible image. The best way to do this is to project an image on a wall and then adjust the focus knob until the image is sharp.
You should adjust the focus slowly to ensure you get the best possible clarity. Brightness is another important feature that can affect your viewing experience. To adjust brightness, you can use the menu options on your projector or remote control.
You should make sure you adjust the brightness to match the lighting conditions in the room. For example, if your room is darker, you should lower the brightness to get the best possible contrast. Conversely, if the room is brighter, you should increase the brightness to ensure a clear and visible image.
Adjusting the focus and brightness on your projector is a quick and easy way to ensure an optimal viewing experience.
Conclusion
In conclusion, creating a homemade projector is the perfect blend of science, creativity, and resourcefulness. It’s an opportunity to turn ordinary materials into an extraordinary viewing experience. While it may not have the same high-tech capabilities as its commercial counterparts, it still provides an impressive and fun way to enjoy movies, TV shows, and videos.
So whether you’re a film buff, tech enthusiast, or just looking for a unique DIY project, building your own homemade projector is a sure-fire way to impress your friends and family while flexing your DIY chops. Plus, you’ll never have to pay ridiculous prices for popcorn again!”
FAQs
What materials do I need to make a homemade projector?
To make a homemade projector, you will need: a cardboard box, a magnifying glass, a smartphone, black construction paper, and a glue gun.
How do I assemble a homemade projector?
To assemble a homemade projector, start by cutting a hole in one side of a cardboard box and gluing a magnifying glass over the hole. Then, place your smartphone in the box, facing down, and adjust the focus by moving the phone back and forth. Finally, cover the box with black construction paper to improve the image quality.
Can I use any size of magnifying glass for my homemade projector?
No, you should use a magnifying glass that is at least 3 inches in diameter to ensure a decent image quality.
What kind of image quality can I expect from a homemade projector?
The image quality of a homemade projector will depend on the quality of your smartphone’s screen and the size of the magnifying glass you use. However, you can expect to see a decent quality image up to around 50 inches diagonally.