Connecting your Brother printer to WiFi is a simple process that can be done in a few easy steps. No more dealing with tangled cords and confusing printer setups – with WiFi capability, you can print wirelessly from anywhere in the room. This is especially beneficial if you need to frequently print from multiple devices.
Keep reading to find out how to connect your Brother printer to WiFi and enjoy a hassle-free printing experience.
Check Printer and WiFi
If you’re having trouble connecting your Brother printer to your WiFi network, you’re not alone. Many users experience this issue and it can be frustrating. One of the first things to check is whether your printer and WiFi are compatible.
You may need to update either the printer or the router firmware to ensure compatibility. Another thing to check is whether your printer is in range of your WiFi network. If it’s too far away, it may not be able to connect.
Make sure there are no obstructions blocking the signal as well. You also want to ensure that your printer and WiFi are both on the same network. If you have multiple networks in your home, it’s easy to accidentally connect your printer to the wrong one.
Lastly, make sure that your wireless network security settings are properly configured. A firewall or other security measure may be blocking the printer’s connection. With these tips, you should be able to troubleshoot and resolve any issues you may be having in connecting your Brother printer to your WiFi network.
Ensure Printer is ON and Connected to Laptop/Computer
When it comes to printing documents, the first and most crucial step is to ensure that your printer is on and connected to your laptop or computer. This may sound obvious, but sometimes it’s easy to overlook the little things. Double checking that your printer is switched on and connected to WiFi can save you a lot of frustration further down the line.
In fact, it’s a good idea to make sure your printer is within range of your WiFi signal and that it’s connected to the right network. This may seem like common sense, but it’s important to realize that printers can sometimes automatically connect to other networks without you realizing it. By ensuring that your printer is connected to your local network, not only will it make printing easier, it will speed up the process as well.
So, before you hit print, take a moment to make sure your printer is switched on and properly connected to your laptop or computer.
Check WiFi Password and Connection
Are you having trouble getting your printer to connect to your WiFi network? Fear not – the solution might be as simple as double-checking your WiFi password and connection. First, make sure you’re entering the correct password for your WiFi network. It’s easy to mix up numbers and letters, especially if your password is long and complex.
If you’ve confirmed that the password is correct, check your WiFi connection. Is your printer and computer both connected to the same network? Is your WiFi signal strong enough? A weak connection can cause disruptions in the printing process. A good way to test the strength of your connection is to try connecting another device to the same WiFi network and see if it works reliably.
By ensuring that both your device and printer are connected to the same WiFi network with a strong signal, you can get back to printing in no time!
Connect Printer to WiFi
If you’re having trouble connecting your Brother printer to WiFi, don’t worry, you’re not alone! Many people struggle with this task, but there are a few simple steps you can take to get your printer up and running. First, make sure your printer is compatible with your WiFi network. If it’s not, you’ll need to upgrade your network or purchase a different printer.
Once you’ve confirmed compatibility, check your WiFi signal strength and ensure that it’s strong enough to support your printer. Then, verify that your printer is in range of your WiFi network and that it’s powered on and ready to go. Finally, follow the manufacturer’s instructions for connecting your Brother printer to your WiFi network, and you should be all set.
Remember, if you get stuck or need additional assistance, don’t hesitate to reach out to Brother’s customer support team for help.
Access Printer Settings
Connecting your printer to WiFi is crucial if you want to access printer settings and optimize its functionality. This process might seem daunting, but it’s easier than you think! First, ensure that your printer supports wireless connectivity. Then, locate the WiFi button on the printer and press it to activate the wireless setup.
Next, head to your computer or mobile device’s network settings and connect to the printer’s network. Once connected, enter the printer’s IP address into your browser to access its settings. This will enable you to set up the printer, change ink settings, adjust the paper types, and much more.
By connecting your printer to WiFi, you can print from multiple devices and take advantage of the printer’s full range of features. So don’t be intimidated; get your printer connected today and start unlocking its potential!
Select Network and Connect
Connecting your printer to WiFi can ensure quicker and more efficient printing. To begin the process, first, select the network you want to connect your printer to and ensure that it has a stable internet connection. Next, turn on your printer and navigate to the network settings in the printer menu.
Select the option to connect to a WiFi network and find your network on the list of available networks. Once you’ve chosen your network, enter the password to connect. If the password is correct, your printer should be able to connect to the network and you should be good to go.
Keep in mind that some printers may have slightly different steps, so make sure to check the instruction manual or website for specific instructions. By following these steps, you can easily connect your printer to WiFi and start printing wirelessly. Remember, a connected printer is a happy printer!
Enter WiFi Name and Password
In order to connect your printer to your WiFi network, you’ll need to enter your WiFi name and password into your printer’s settings. This is a simple process that can typically be done through your printer’s control panel or via a mobile app. Once you’ve entered in your WiFi credentials, your printer should automatically connect to your network and be ready for use.
One important thing to note is that your printer may only be compatible with certain types of WiFi networks – for example, it may only work with 4GHz networks rather than 5GHz networks. If you’re having trouble connecting your printer to your WiFi network, double-check that it’s on the right type of network and that you’ve entered in your WiFi name and password correctly.
With a little patience and troubleshooting, you should be able to get your printer connected to your WiFi network in no time.
Troubleshooting
If you’re having trouble connecting your Brother printer to Wi-Fi, don’t worry, you’re not alone. This can be a common issue, but luckily, it can usually be resolved with a few simple troubleshooting steps. First, make sure that your printer and Wi-Fi network are both turned on and working properly.
Next, check that your printer is in range of the Wi-Fi signal and that any necessary passwords or security settings are input correctly. If you’re still having trouble, try resetting your printer’s network settings or reconnecting it to your Wi-Fi network. It may also be helpful to consult your printer’s manual or the manufacturer’s website for specific instructions.
By following these steps and being persistent yet patient, you should be able to successfully connect your Brother printer to Wi-Fi in no time.
Reset Printer and WiFi
When you encounter issues with your printer and WiFi connection, resetting both devices can often resolve the problem. This can be achieved by turning off the printer and unplugging it from the power source for a few minutes. Afterward, turn the printer back on and check if it connects to WiFi without any hiccups.
If the problem persists, try resetting your WiFi router by unplugging it and restarting it after a few minutes. Sometimes, your printer might require a firmware update to fix connectivity issues. In such cases, visit the manufacturer’s website and download and install the latest firmware update for your printer.
By troubleshooting the issue and resetting both the printer and WiFi, you can ensure optimal performance between the two devices in the future.
Contact Technical Support, If Not Successful
If you’ve tried troubleshooting on your own and still haven’t been successful in resolving your technical issue, it’s a good idea to contact technical support for further assistance. The customer service representatives at technical support can often provide more detailed advice and solutions to help you resolve the issue. They may be able to walk you through some additional steps to troubleshoot your problem, or even remotely access your device to help identify and fix the issue.
It’s important to note that technical support representatives are trained professionals who can effectively diagnose and resolve technical issues, so don’t hesitate to reach out for help. Remember, sometimes it takes an expert to solve a problem, and technical support is there to ensure that you get the help you need. So, if you’re stuck on a technical issue and can’t seem to make progress on your own, reach out to technical support and let them help you find a solution.
Final Thoughts
If you’re experiencing difficulties connecting your Brother printer to Wi-Fi, you’re not alone. Many users find themselves struggling with this problem. But don’t worry, there are a few things you can try to resolve the issue.
Firstly, ensure that your printer is within the Wi-Fi range by moving it closer to the router. Check if your Brother printer is connected to the same network as your computer. If not, make sure to connect it.
You can also try resetting your printer’s network settings and restarting both your printer and router. Additionally, it’s essential to check if your Wi-Fi password is correct. If everything else fails, contacting technical support at Brother may be your best bet.
With these few tips, you should be able to connect your Brother printer to Wi-Fi without any further hassle.
Conclusion
Looks like your Brother printer has decided to play hard to get with your wifi network. Maybe it’s afraid of commitment or maybe it’s just too cool for wireless school. Either way, don’t worry, with a little bit of troubleshooting and some patience, you’ll soon be able to win over your printer’s heart and connect it to wifi like a charm.
Just remember to be kind and gentle, printers have feelings too.”
FAQs
What should I do if my Brother printer is not connecting to Wi-Fi?
If your Brother printer is not connecting to Wi-Fi, try restarting your router and printer, ensuring your printer is within range of your network, and checking your Wi-Fi password and network name.
Why is my Brother printer not detecting my Wi-Fi network?
This issue could be caused by outdated printer drivers or incorrect network settings. Try updating your drivers and reconfiguring your network settings, or contacting your network administrator for assistance.
How do I reset the network settings on my Brother printer?
To reset the network settings on your Brother printer, go to the printer’s settings menu, select “Network,” and then choose “Reset Network.” Follow the on-screen prompts to complete the reset process.
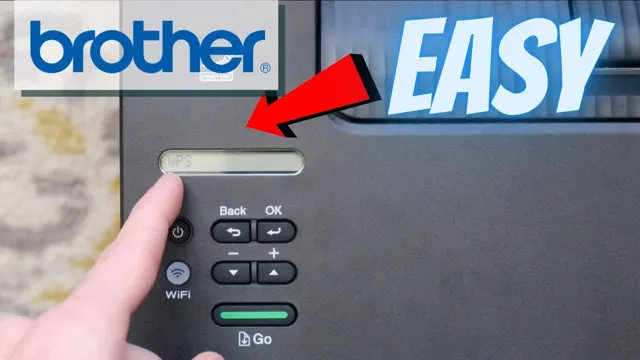
Can I connect my Brother printer to Wi-Fi using WPS?
Yes, if your router supports WPS (Wi-Fi Protected Setup), you can press the WPS button on your printer and router simultaneously to connect your printer to the Wi-Fi network.
How do I check if my Brother printer is connected to Wi-Fi?
To check if your Brother printer is connected to Wi-Fi, go to the printer’s settings menu and select “Network.” From there, you can view the printer’s network status and connection details.