
If you own a Brother printer, you know the importance of understanding how to navigate the printer menu. Unfortunately, it’s not always an easy task, and many of us struggle to take full advantage of our printer’s features. Don’t worry though! Understanding the Brother printer menu doesn’t have to be a frustrating experience.
In fact, with the right guidance, you can master it in no time. In this ultimate guide, we’ll take you step-by-step through the Brother printer menu, so you can take control of your printer and get back to what you do best- printing! So sit back, relax, and let’s get started.
Overview of Brother Printer Menu
When it comes to using a Brother printer, it’s important to understand the menu features. The Brother printer menu is where you can access a variety of settings and functions, including printing options, maintenance tasks, and network settings. You can access the menu by pressing the menu button on the printer’s control panel.
From there, you can navigate the different options using the arrow keys. Some of the most commonly used menu options include the ability to adjust print quality, change paper size and type, and manage ink or toner levels. You can also access settings to connect your printer to a network or troubleshoot any problems that may arise.
By familiarizing yourself with the Brother printer menu, you can take full advantage of the printer’s capabilities and get the most out of your printing experience.
Navigating the Brother Printer Menu
Brother Printer Menu Navigating through the Brother Printer’s menu can be a tricky task for a new user. The menu contains numerous options and settings that can be overwhelming for someone who’s not familiar with the printer. However, once you get the hang of it, the menu can become your best friend.
The Brother Printer menu provides options to customize the printer’s settings based on your needs. For instance, you can change the paper size, print quality, and check ink levels, among other functions. Knowing how to access the menu can also help you troubleshoot any issues that may arise with the printer.
The “menu” button on the printer’s control panel usually accesses the menu. The printer menu is an essential tool for personalizing your printer’s settings and enhancing your printing experience.
Understanding the Brother Printer Menu Options
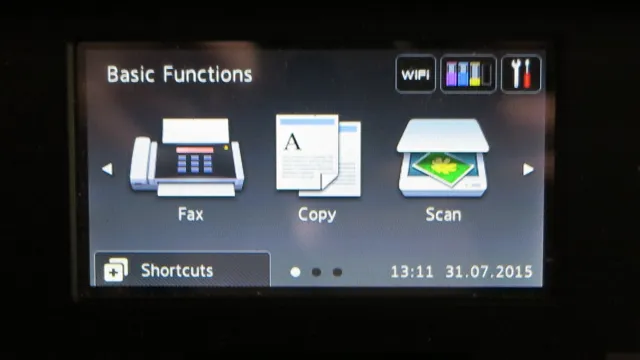
When it comes to navigating the menu options on your Brother Printer, it can be easy to feel overwhelmed and unsure of what each option means. However, taking the time to understand and explore the options on the menu can help improve your printing experience and ensure that you are using your printer to its full potential. The menu options on your Brother Printer can include things like language settings, paper size adjustments, and printer maintenance options, all of which can be accessed via the printer’s control panel.
Additionally, some Brother Printers may come equipped with touchscreen menus, which offer an even more intuitive and user-friendly interface for accessing these options. By taking the time to familiarize yourself with the Brother Printer menu, you can ensure that you are making the most of your printer’s capabilities.
How to Access Brother Printer Menu
Accessing the Brother Printer menu can seem like a daunting task, but it’s actually quite easy once you know where to look. To access the menu, start by turning on your Brother printer and selecting the “Menu” button on its control panel. From there, you will be presented with a list of options, including “Settings,” “Maintenance,” and “Reports.
” The “Settings” option allows you to customize various settings, such as paper type, print quality, and network settings. The “Maintenance” option lets you clean your printer’s printhead, replace ink cartridges, and perform other routine maintenance tasks. And finally, the “Reports” option allows you to print out various reports, such as a network configuration page or a usage report.
By familiarizing yourself with the Brother Printer menu, you can easily adjust settings and perform maintenance tasks to keep your printer running smoothly.
Using the Control Panel
Accessing the Brother printer menu through the control panel is a relatively simple process. If you’re new to the printer, locate the control panel on the front of the printer and turn it on. On the control panel, you’ll find a Home key, which will take you to the main menu.
From there, you can navigate to the Printer Settings section, which is where you’ll find options for things like paper quality and size, connectivity, and ink levels. If you’re unsure about what a specific option does, try hovering over it with your cursor to get an explanation. Overall, accessing the Brother printer menu through the control panel is a straightforward process, and with a little exploration, you can find all the tools you need to customize your printing experience.
Accessing Brother Printer Menu from Computer or Mobile Device
Accessing Brother Printer Menu from Computer or Mobile Device If you own a Brother printer and want to access its menu from your computer or mobile device, it’s actually very easy to do so. Depending on the model of your Brother printer, there are different ways to access the menu. For some models, you can simply navigate to the printer’s IP address using your web browser.
This will bring up the printer’s web interface, where you can access the menu and make changes to various settings. Other models may require you to download a specific app or software to access the menu. To find out how to access your specific Brother printer’s menu, it’s best to refer to the user manual or visit the Brother website for support.
Once you have access to the menu, you’ll be able to do things like change the printer’s default settings, update firmware, or troubleshoot any issues you may be experiencing. With a little bit of research, you’ll be able to easily access and utilize your printer’s menu features.
Connecting to Brother Printer Menu via Wi-Fi
Access Brother Printer Menu If you have a Brother Printer and want to connect it directly to your computer or smartphone, the first step is to access its menu. Fortunately, if you have a Wi-Fi enabled Brother Printer, accessing the menu is easy. Simply turn on your printer, and make sure it is connected to the same Wi-Fi network as your device.
Then, go to your device’s Wi-Fi settings and find the name of your printer. Once connected, open a web browser and type in the IP address of your printer. This will bring up the Brother Printer menu, where you can adjust settings and perform maintenance tasks.
From here, you can also access features like cloud printing and scan to email. Overall, accessing the Brother Printer menu via Wi-Fi is a simple process that makes using your printer much easier and more convenient.
Common Brother Printer Menu Settings
Brother Printer Menu Brother printers menu settings play a crucial role in maintaining and optimizing the performance of the printer. The menu settings include all the features that are embedded in the printer to provide the desired output. Some of the common Brother printer menu settings include paper tray selection, print quality selection, the number of copies, and print mode.
The paper tray selection setting allows you to choose the paper size and paper type for your printing job. Print quality options such as draft, normal, fine, and photo let you choose the level of quality for your prints. The number of copies setting allows you to select the number of copies that you need for your prints.
Finally, the print mode setting lets you choose how you want to print your documents, whether it be duplex, booklet, or poster. Understanding the Brother printer menu settings is essential to ensure that you get the desired printing output every time you use your printer.
Printing and Copying Options
When it comes to printing and copying options on your Brother printer, there are a variety of menu settings you can choose from to control the quality and quantity of your prints. One common setting is “duplex printing,” which allows you to print on both sides of a page and saves you paper and money in the long run. Another useful setting is “resolution adjustment,” which determines the sharpness and clarity of your prints.
You can also adjust the brightness and contrast of your prints, as well as the color balance and saturation. These options give you the flexibility and control you need to produce high-quality prints every time. So whether you’re printing important documents for work or personal photos, your Brother printer has everything you need to get the job done right.
Scanning and Faxing Options
Brother printer menu settings When it comes to scanning and faxing options on a Brother printer, it’s essential to know your way around the menu settings. Once you’ve accessed the menu settings, you’ll find various options for customizing your scanning and faxing experience. For example, you can choose the resolution and quality of your scans, the automatic document feeder settings, and whether you want to scan in color or black and white.
You can also set up faxing options, such as the fax header and fax receive settings. By taking the time to familiarize yourself with your Brother printer’s menu settings, you can streamline the scanning and faxing process to meet your specific needs. It’s always important to explore these features and make the most of them to get the best results from your printer.
Troubleshooting Brother Printer Menu Issues
If you own a Brother printer, you may run into menu issues from time to time. These issues can range from not being able to find certain settings to experiencing glitches when trying to make changes. Fortunately, there are a few things you can try to troubleshoot these problems.
First, make sure your printer is up to date with the latest firmware updates. These updates can fix bugs and improve overall performance. Next, try resetting the printer’s settings back to their default values.
This can often solve issues caused by misconfigured settings. If these solutions don’t work, it may be time to contact Brother support for further assistance. The important thing is not to panic when faced with menu issues.
By trying a few simple steps, you can get your printer working properly again and avoid any unnecessary frustration.
Conclusion
In conclusion, navigating the Brother printer menu is like exploring a culinary buffet – full of options, choices, and the potential for both delight and disaster. So whether you’re whipping up a quick print job or savoring the complexity of a custom setting, take your time, read the labels carefully, and don’t be afraid to try something new. Bon appétit, and happy printing!”
FAQs
How do I access the menu on my Brother printer?
To access the menu on your Brother printer, simply press the Menu button on the printer’s control panel. From there, you can navigate through the various menu options using the arrow keys and select the option you need by pressing the OK button.
How do I reset the menu settings on my Brother printer?
To reset the menu settings on your Brother printer, first, press the Menu button on the printer’s control panel. Next, navigate to the option that says “Initial Setup” or “Factory Reset” and select it. Follow the prompts to confirm your selection and reset the menu settings back to their original state.
Can I add custom options to the menu on my Brother printer?
Yes, you can add custom options to the menu on your Brother printer. To do so, first, access the menu as described in answer 1. Next, navigate to the “Custom Settings” or “User Settings” option and select it. From there, you can add or remove custom options as needed.
How do I troubleshoot menu issues on my Brother printer?
If you are experiencing issues with the menu on your Brother printer, first, try resetting the menu settings as described in answer 2. If the issue persists, consult the printer’s user manual for specific troubleshooting instructions or contact Brother’s customer support for assistance.