Is your Brother printer drum light on, and you’re not sure why? Don’t panic, as this common issue can be easily fixed with a few simple steps. When the drum light is on, it could be an indication that there is a problem with the drum unit, which is responsible for creating the image that is transferred onto the paper during printing. This can lead to poor quality prints, smudging, or even streaks, making it essential to address the issue as soon as possible.
In this blog, we’ll walk you through some troubleshooting tips to fix the Brother printer drum light on and get you back to producing high-quality prints. So, let’s dive in!
Understanding the Drum Light
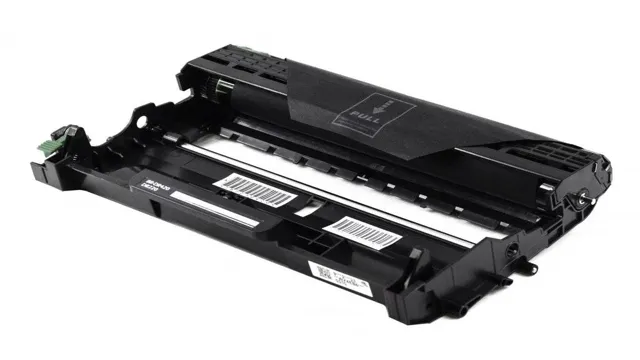
Are you seeing the Brother Printer drum light on and wondering what it means? Well, don’t worry as you’re not alone. The drum light on your Brother printer indicates that the drum unit is nearing the end of its life and requires replacing. The drum unit is a crucial component in the printing process, as it transfers toner onto the paper.
When the drum unit nears the end of its life, it can result in degraded print quality and other printing problems. Replacing a drum unit is a relatively simple process, and you can find replacement drum units for your Brother printer through the manufacturer’s website or other authorized retailers. To replace the drum unit, you’ll typically need to follow a few simple steps, such as opening the printer and removing the old drum unit before replacing it with the new one.
It’s also worth noting that some Brother printers may have a separate drum and toner unit, while others may have a single unit that combines both. Either way, it’s crucial to keep an eye on the drum light on your Brother printer, as it’s an important indicator of the printer’s overall health and performance. By replacing the drum unit when required, you can help maintain your printer’s overall performance and print quality.
What does a drum light mean on a Brother printer?
If you’ve noticed a drum light blinking on your Brother printer, don’t panic! This simply indicates that your printer’s drum unit needs to be replaced. The drum unit is an essential component of your printer that transfers toner powder onto paper during the printing process. Over time, the drum can become worn or damaged, causing a decrease in print quality and prompting the drum light to come on.
To replace the drum unit, first make sure your printer is turned off. Open the printer’s front cover and pull out the drum unit and toner cartridge assembly. Separate the toner cartridge from the drum unit and dispose of the old drum unit responsibly.
Then, install the new drum unit back into the printer and reattach the toner cartridge. Close the front cover and turn the printer back on. Your drum light should now be off and your printer ready to produce high-quality prints again.
Don’t hesitate to reach out to Brother’s customer support if you need any further assistance with your printer.

Why is the drum light on?
If you’re wondering why your drum light is on, you’re not alone. The drum light is an indicator that can be found on many different types of machines, from washing machines to dryers. It’s usually there to signal that the door is open or that the machine is in the middle of a cycle.
If the drum light is on but the machine isn’t running, the most common explanation is that the door isn’t fully closed. Double-check that the door is securely shut and try restarting the cycle. If that doesn’t do the trick, there could be an issue with the door switch, a component that signals when the door is closed.
If the switch is malfunctioning, the machine won’t start because it thinks the door is still open. In this case, it’s best to call a professional to assess and repair the issue. In summary, while the drum light can be a helpful indicator, it’s important to understand why it’s on and how to troubleshoot the problem.
Troubleshooting Steps
If you’re encountering a problem with your Brother printer, specifically a drum light on issue, there are a few simple troubleshooting steps you can follow to try to fix the issue. Firstly, check if the drum unit is properly installed and seated. If it’s not securely in place, it can cause the drum light to come on.
Next, open the printer cover and make sure that there are no jammed paper or debris inside the printer. If there is, remove it carefully. Another step is to check the printer’s toner cartridges.
If the toner is empty or low, this can also cause the drum light to come on. In that case, replace the toner cartridges with new ones and see if it resolves the problem. If you’ve tried all these steps and the drum light is still on, you may want to try cleaning the drum unit or contacting a printer technician for further assistance.
Keeping up with regular maintenance and proper handling of your printer can help prevent this issue and other printer problems from happening.
Step 1: Check for any error messages
When you encounter a problem with your computer system, the first step in troubleshooting is to check for any error messages. Error messages are helpful because they provide you with information about the problem. They can tell you what the problem is, what caused it, and how to fix it.
If you don’t see any error messages, you may need to do some further investigation to determine what the problem is. Check your system logs, search online for solutions to similar problems, and ask others for advice. Remember that most problems can be solved with a little bit of patience and research.
By following these troubleshooting steps, you’ll save time and frustration, and get your system up and running quickly. So, the next time you run into an issue with your computer, start by looking for error messages, and you’ll be well on your way to fixing the problem.
Step 2: Replace the drum unit
If you’ve already tried cleaning the printer and it’s still producing poor quality prints, the next step in troubleshooting is to replace the drum unit. The drum unit is responsible for transferring toner onto paper and, over time, it can wear out or become damaged, causing print quality issues. Before replacing the drum unit, be sure to check your printer’s user manual to make sure you purchase the correct replacement part.
Once you have the new drum unit, carefully remove the old one and insert the new one, following the manufacturer’s instructions. This should help to restore your printer’s print quality and prevent any further issues. Remember to dispose of the old drum unit responsibly by recycling it according to your region’s regulations.
Step 3: Clean the corona wire
If you’re experiencing print quality issues with your LaserJet printer, it could be due to a dirty corona wire. The corona wire is a thin, delicate wire responsible for charging the drum that transfers toner onto the paper. When it becomes dirty due to excess paper dust or toner buildup, it can negatively impact print quality by causing streaks and smudges.
To clean the corona wire, start by turning off your printer and unplugging it from the power source. Then, carefully remove the toner cartridge and look for the corona wire inside the printer. Use a clean, dry cloth or a special corona wire cleaning wand to gently wipe the wire from end to end.
Be sure not to touch the wire with your bare hands, as oils from your skin could cause further damage. Once you’re finished cleaning, reinsert the toner cartridge and plug the printer back in to test the print quality. With a little extra care, you can keep your LaserJet printer running smoothly and producing high-quality prints for years to come.
Preventive Measures
If your Brother printer’s drum light is on, there are a few things you can do to prevent this problem in the future. Firstly, it’s important to handle the drum unit carefully to ensure it lasts as long as possible. Avoid touching the drum surface with your fingers, as this can cause smudging and damage.
Additionally, make sure that you use high-quality compatible toner cartridges and avoid using third-party alternatives. These can cause problems with the drum unit and lead to premature wear and tear. It’s also a good idea to clean your printer regularly to prevent buildup of dust and debris, which can affect the operation of the drum unit.
Finally, it’s important to be aware of the signs that your drum unit may need replacing, such as cartridge leaks or faded prints. By taking these preventive measures, you can minimize the chance of your Brother printer’s drum light coming on again in the future.
Regularly clean your printer
Regularly cleaning your printer can help prevent potential issues and prolong its lifespan. Dust, debris, and ink buildup can accumulate inside the printer, causing smudging, streaking, and paper jams. To avoid these problems, it’s important to clean your printer on a regular basis.
You can start by turning off the printer and unplugging it from the power source. Then, use a clean, dry cloth to wipe the exterior of the printer and remove any dust or debris. Next, carefully open your printer and remove any loose or stuck paper.
Finally, use a soft brush or cloth to remove any ink buildup from the rollers and other components. By following these simple steps, you can keep your printer running smoothly and avoid costly repairs in the future.
Use genuine Brother toner cartridges
Using genuine Brother toner cartridges is one of the best preventive measures you can take to ensure optimal printer performance. Brother toner cartridges are designed to work seamlessly with Brother printers, and as such, they provide reliable and consistent results. Opting for counterfeit or third-party toner cartridges may seem like a more affordable option, but using them could result in damaged printers, reduced print quality, and costly repairs.
By using only genuine Brother toner cartridges, you can prevent these issues and extend the lifespan of your printer. In the long run, investing in genuine toner cartridges will be much more economical than using inferior alternatives that could end up costing you much more. So why take the risk? Use genuine Brother toner cartridges and enjoy reliable, high-quality prints every time.
Conclusion
In conclusion, just like a drum banger in a marching band, a Brother printer drum light on is simply signaling that it’s time for a new tune. So, tap to the beat of efficiency and replace that old drum for a crisp and clear print performance.”
Drum light issues can be easily resolved with these simple troubleshooting steps.
When it comes to drum light issues, prevention is key. One simple preventative measure is to clean the drum on a regular basis. Dust, debris, and toner buildup on the drum can cause issues with the light, leading to poor print quality or even paper jams.
Another preventative step is to ensure that the drum unit is properly installed and seated securely in the printer. A loose drum unit can cause misalignment and other issues that may impact the drum light. Regular maintenance of your printer can also help prevent drum light issues.
This includes keeping your printer in a clean, well-ventilated area and replacing toner cartridges before they are completely empty. By taking these preventative measures, you can help ensure that your printer operates smoothly and efficiently, without any troublesome drum light issues.
FAQs
What does it mean if the drum light on my Brother printer is on?
The drum light on your Brother printer indicates that there is an issue with the drum unit, which is responsible for transferring toner onto the paper. You may need to replace the drum unit to resolve the issue.
How do I reset the drum light on my Brother printer?
To reset the drum light on your Brother printer, simply open the front cover of the printer, press and hold the “GO” button for four seconds until all four LEDs light up, and then release the button. The drum light should now be off.
Can I continue using my Brother printer if the drum light is on?
It is not recommended to continue using your Brother printer if the drum light is on, as this indicates that there is a problem with the drum unit. Continuing to use the printer could potentially damage other components and lead to more costly repairs.
How often should I replace the drum unit on my Brother printer?
The frequency of drum unit replacement on your Brother printer will depend on the usage and print volume. However, as a general rule, it is recommended to replace the drum unit every 12,000 pages or when prompted by the printer to do so.