If you own a Brother printer, then you know how important it is to keep it running smoothly. One of the main components that can affect your printer’s performance is the belt unit. This essential component is responsible for transferring the toner from the drum to the paper, which means that it has a crucial role in producing high-quality printouts.
However, like with any printer part, the belt unit can become worn out or damaged over time. When this happens, it’s important to replace it as soon as possible to avoid any further damage to your printer. But what is a belt unit, and how do you know when it needs to be replaced? In this blog, we’ll dive deeper into the world of Brother printer belt units.
We’ll cover everything from how they work to what to look for when it’s time to replace them. So whether you’re a seasoned printer owner or a relative newcomer, you’ll gain some useful insights that will help you get the most out of your Brother printer.
What it is
If you’re looking for high-quality printouts from your Brother printer, you may want to consider investing in a Brother Printer Belt Unit. This device plays a very important role in ensuring that the toner is distributed evenly across the page, resulting in a sharp, clear image. The belt unit is responsible for transferring toner from the drum to the paper, so it’s essential that it’s working properly.
If you start to notice lines or streaks on your printouts, it could be a sign that the belt unit needs to be replaced. Fortunately, replacing the belt unit is a simple process that can be done by anyone, and it will often breathe new life into an older printer. With a new Brother Printer Belt Unit, you can be confident that your prints will look crisp and professional every time.
Overview of the Brother Printer Belt Unit
Brother printer belt unit The Brother Printer Belt Unit plays a vital role in the printing process. It is responsible for transferring the toner from the cartridge to the paper. This component ensures that the toner is evenly distributed, resulting in high-quality prints.
The belt unit is made up of a long belt that rotates as the print job progresses. This part is especially important for color printing jobs, as it helps to blend and create vivid colors. Over time, the belt unit may wear out or become damaged, resulting in poor print quality.
It is essential to replace it promptly to maintain the printer’s performance and prolong its lifespan. For Brother printers, using a genuine Brother Printer Belt Unit will ensure compatibility and optimal print performance. Don’t overlook this critical component when troubleshooting print quality issues.
How it functions with the printer
When it comes to printers, the term printer driver is a familiar one. So, what exactly is a printer driver and how does it function with the printer? A printer driver is a software application that allows the operating system to communicate with the printer. In other words, it acts as a mediator between the printer and the computer.
Without the driver, the computer wouldn’t know how to send print commands to the printer, and the printer wouldn’t know how to print what’s required. The driver helps ensure that the print job is completed correctly, and all the printer’s features are used correctly. It enables the computer to recognize the printer’s capabilities like output quality, paper size, and any other special features.
Hence, Printer drivers play a critical role in the printing process, and it’s essential to ensure that they’re updated and compatible with the printer. Having the right driver installed in your system will help you produce high-quality prints without sacrificing speed or functionality.
Signs of Wear and Tear
If you own a Brother printer, you may have heard of the term “belt unit.” This component, also known as the transfer belt unit, is responsible for transferring toner from the cartridges onto the paper. Over time, the belt unit can wear down and become damaged, particularly if you use your printer frequently.
There are several signs that your Brother printer belt unit may need to be replaced, such as streaks or smudges on your printouts, uneven toner distribution, or a noisy and grinding sound during printing. If you notice any of these issues, it’s best to check the belt unit for signs of wear and tear, such as cracks, tears, or scratches. In some cases, you may be able to clean the belt unit or replace the rollers to improve its performance.
However, if the belt unit is severely damaged, it’s recommended to replace it entirely to avoid further damage to your printer.
Symptoms that suggest a replacement is needed
As with any home appliance, eventually the time comes when it needs to be replaced. When it comes to air conditioners, there are several signs of wear and tear that suggest it may be time for a replacement. The most obvious sign is reduced performance or efficiency.
If the unit isn’t cooling as effectively as it used to or if your energy bills are increasing even though you’re using the same amount of air conditioning as usual, it’s a good indication that your air conditioner is wearing out. Another sign is strange noises. If the unit is making loud or unusual noises, it could be a sign of a component that is damaged or worn out.
Lastly, if your air conditioner is quite old, say more than 10 years, it may be time to replace it. A new, energy-efficient unit may be a better option in the long run and could save you money on your utility bills.
Tips on extending the life of the belt unit
If you’re using a printer, one of the things you need to check is the belt unit. It’s an essential component that can wear out over time, affecting your printer’s performance. Signs of wear and tear on the belt unit include print quality issues, such as streaks, blurred lines, or uneven color saturation.
You may also notice loud grinding noises coming from the printer or paper jams occurring more frequently. To extend the life of the belt unit, it’s advisable to clean it regularly. Use a damp cloth to wipe away any dust or debris from the belt unit.
Also, avoid overloading the paper tray, as this can strain the belt unit and cause it to wear out quickly. If you notice any signs of wear and tear on your belt unit, it’s best to replace it as soon as possible to prevent further damage to your printer. By taking these steps, you’ll be able to prolong the lifespan of your belt unit and reduce the need for costly repairs or replacements.
How to check the belt unit for damage
When it comes to checking the belt unit for damage, there are several signs of wear and tear to look out for. If you hear a whining or squeaking noise coming from the engine, it could be a result of a worn-out belt unit. Additionally, if you notice any cracks or fraying on the belt, it’s a sign that the belt is deteriorating and is in need of replacement.
You should also check for any looseness in the belt, as this can cause it to slip and affect the performance of your vehicle. Another sign to look out for is a burning smell, which could indicate that the belt is rubbing against another component and needs to be adjusted or replaced. Overall, paying close attention to these signs of wear and tear can help you catch any issues with your belt unit before they worsen and result in costly repairs.
Replacing the Belt Unit
Replacing the belt unit in your Brother printer is a necessary task to ensure that your printer continues to work properly. The belt unit is responsible for transferring the toner from the cartridge to the paper, and over time it can become worn out or damaged, resulting in poor print quality or even paper jams. To replace the belt unit, first, turn off the printer and let it cool down completely.
Next, open the printer cover and find the belt unit, which should be located near the toner cartridges. Carefully remove the old belt unit and replace it with the new one, following any instructions that may be included. Once the new belt unit is in place, make sure that the printer cover is properly secured and turn on the printer to test it out.
Make sure to dispose of the old belt unit properly, as it contains components that should not be thrown in the trash. Overall, replacing the belt unit is a simple but important task that can help keep your Brother printer working at its best.
Step-by-step guide on removing the old belt unit
Replacing the Belt Unit Replacing the old belt unit in your printer can be a daunting task, especially if you’re not familiar with the process. However, the good news is that it’s relatively easy and straightforward to do, and you can save yourself a considerable amount of money by doing it yourself. Here’s a step-by-step guide on how to replace the old belt unit in your printer:
Turn off the printer and unplug it from the wall socket. Open the printer’s front cover and locate the old belt unit.
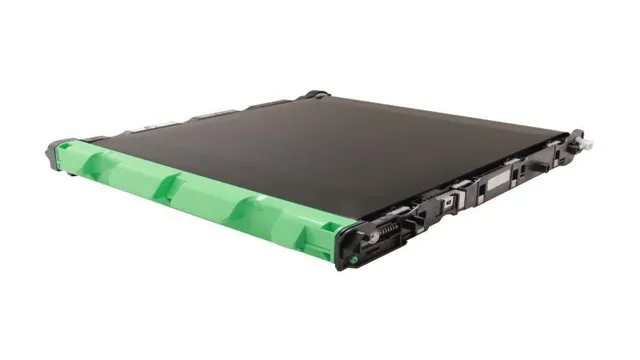
Press down on the green lock lever and slide the old belt unit out of the printer.
Unpack the new belt unit from its packaging and remove any protective tape or packaging material. Insert the new belt unit into the printer, making sure it clicks into place.
Close the printer’s front cover and plug it back into the wall socket.
Turn on the printer and wait for it to initialize and recognize the new belt unit. Make sure to consult your printer’s manual for specific instructions and diagrams on replacing the belt unit. With just a few simple steps, you can easily replace the old belt unit and keep your printer running efficiently without spending a lot of money.
Instructions on installing the new belt unit
If your printer is producing low-quality prints or has started to make unusual noises, it may be time to replace the belt unit. The belt unit is responsible for transferring the toner from the drum to the paper, and over time, it can become worn or damaged. Luckily, replacing the belt unit is a fairly simple process that can be completed in just a few minutes with the correct instructions.
Firstly, turn off your printer and unplug it from the power source. Next, locate the belt unit in your printer and remove it from the machine. Insert the new belt unit into the printer and make sure it clicks into place.
Finally, turn on your printer and run a test print to ensure that everything is working correctly. By following these easy steps, you can have your printer working as good as new in no time! Keyword: belt unit
Conclusion
After researching the ins and outs of the brother printer belt unit, I’ve come to the conclusion that it’s like the fashion belt of the printer world. It may seem like a small accessory, but it plays a crucial role in keeping everything in place and functioning smoothly. So, next time you’re admiring your printer’s sleek design, just remember to give the belt unit the respect it deserves!”
FAQs
What is a brother printer belt unit?
A brother printer belt unit is an essential part of the printer that transfers the toner from the cartridge onto the paper.
How can I know when to replace the brother printer belt unit?
If you notice that your printer is producing low-quality prints, it could be a sign that you need to replace the belt unit. Another indicator is when the printer display prompts you to replace it.
Can I replace the brother printer belt unit myself?
Yes, you can replace the belt unit yourself. Brother provides instructions on how to replace the belt unit in the printer manual, and there are several tutorial videos available online for guidance.
How long does a brother printer belt unit last?
The lifespan of a brother printer belt unit varies depending on usage and the model of the printer. On average, it lasts around 60,000 pages and might need to be replaced after that.