
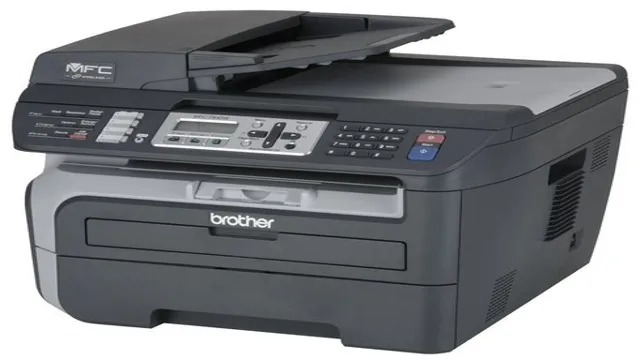
If you’re looking for a reliable, efficient, and high-quality printer for your home or small office, the Brother MFC 7840W could be just what you need. This wireless printer setup has everything you could want in a printer and more. Not only is it fast and reliable, but it also produces high-quality prints and scans.
Plus, with its wireless capabilities, you’ll be able to print from wherever you are without having to be at your desk! In this blog post, we’ll take you through the steps needed to set up your Brother MFC 7840W wireless printer, so you’ll be up and running in no time!
Step 1: Gather Your Materials
To set up your Brother MFC 7840w wireless printer, the first step is to gather all the necessary materials. You will need the printer itself, its power cord, and a USB cable. Ensure that you have an active wireless network and know the network’s name and password as you will need this information during the setup process.
If you do not have an active network, you must create one before proceeding. Keep in mind that you may need to download and install the printer’s drivers and software from the Brother website, so have a computer or mobile device ready for this. Once you have gathered all the necessary materials, you can proceed to the next steps of setting up your Brother MFC 7840w wireless printer.
Check your Wi-Fi Connection
When it comes to checking your Wi-Fi connection, there are a few simple steps you can take. First, gather your materials. You’ll need a device that needs Wi-Fi access, such as a laptop or smartphone, as well as access to your Wi-Fi network.
Once you have these materials, take a moment to clear away any potential obstacles to your Wi-Fi signal. Move closer to your router if possible, and make sure there aren’t any large objects or walls between you and the router. This can help improve your signal strength and connection speed.
Next, open your device’s Wi-Fi settings and make sure you are connected to the right network. Sometimes, devices will pick up nearby Wi-Fi signals that are not actually your own, so double-check to ensure you are connected to your own network. By taking these steps and ensuring you have a clear, strong connection, you can ensure that your Wi-Fi experience is smooth and uninterrupted.
Place printer in desired location
Before you start setting up your printer, make sure you have all the necessary materials in hand. This includes the printer, power cord, USB cable (if required), ink cartridges, and paper. It is also essential to read the instructions manual that comes with the printer to understand the setup process thoroughly.
Once you have all the materials, it’s time to move onto the first step of placing the printer in your desired location. Choose a spot that is flat, stable, and secure, and has a power outlet nearby. It’s vital to keep the printer away from direct sunlight and any potential hazards like water or fire.
Once you have found the perfect place, unbox the printer and place it there carefully. Remember to check the instruction manual for any additional steps specific to your printer model. With the first step completed, let’s move on to the next and get your printer set up and running in no time.
Find power outlet for printer
When setting up a new printer, it’s essential to find a power outlet that’s conveniently located. Fortunately, this step is typically straightforward. The first thing you need to do is gather the materials needed for installation.
These materials include the printer itself, power cord, and any necessary cables to connect the printer to your computer or network. Once you have these items, you can start looking for the power outlet that’s closest and most accessible to your printer. This could be a wall outlet or a surge protector.
Just make sure the outlet is capable of handling the printer’s power needs, which are typically listed in the user manual. By following these steps, you’ll be able to find the perfect power outlet for your printer, which will ensure a smooth start to your printing experience.
Step 2: Connect the Printer to Wi-Fi
Setting up your Brother MFC 7840W wireless printer can be a bit of a challenge, but once you have it up and running, you’ll enjoy the convenience of printing from anywhere in your home or office. To get started, you’ll need to connect your printer to your Wi-Fi network. First, make sure your printer is turned on and then press the Menu button on the control panel.
Press the up or down arrow button until you see “Network” and then press OK. Use the arrow button again to select “WLAN” and then press OK. Finally, select “Setup Wizard” and press OK.
Your printer will scan for available wireless networks. When you see your network listed, select it and enter your Wi-Fi password. Press OK and your printer will connect to your network.
You’re now ready to start printing wirelessly! Remember to keep your printer in range of your Wi-Fi network for the best results.
Access Network Settings on Printer
Now that you’ve accessed the network settings on your printer, it’s time to connect it to your Wi-Fi network. This is a crucial step in ensuring that your printer can communicate with your devices and allow you to print wirelessly. Most printers have a built-in wireless network card or module that allows them to connect to Wi-Fi, so all you need to do is find the network settings menu on your printer and select the Wi-Fi network you want to connect to.
If the network is secured with a password, you’ll need to enter it to complete the connection. Once the printer is connected, you should be able to print wirelessly from your computer, smartphone or tablet, as long as they’re connected to the same Wi-Fi network. Just remember, the exact steps to connect your printer to Wi-Fi may differ slightly depending on your printer model.
So, make sure you refer to your printer manual or online resources for specific instructions.
Choose Your Wi-Fi Network
When it comes to printing wirelessly, connecting your printer to a Wi-Fi network is a must. To do that, on your printer, go to Settings and choose Wi-Fi. Then, select your Wi-Fi network and enter your network password.
Make sure that your printer confirms the connection and displays an active status. Once you’ve connected your printer to the Wi-Fi network, you’re ready to print from any device connected to the same network. The process is straightforward and easy to follow.
Just make sure you type in your password correctly to avoid unnecessary hassle. With your printer now connected to the internet, you can enjoy the benefits of printing without the need for any wires or complicated setups. So, whether you’re at home or in the office, printing wirelessly is now possible and easier than ever before.
Enter Wi-Fi Password
The next step to connect your printer is to enter the Wi-Fi password. This process is necessary to give your printer access to the Wi-Fi network and enable you to print from anywhere within the Wi-Fi coverage range. First, you need to make sure that your printer is turned on and your Wi-Fi network is working correctly.
Then, you can access the printer settings on your computer or mobile device to enter the password. The password is case-sensitive, so it’s essential to enter it correctly, including upper and lower case letters, numbers, and symbols. Once you’ve entered the password, click on the ‘Connect’ button, and your printer will establish a connection to the Wi-Fi network.
It’s essential to enter the correct Wi-Fi network name and password. You can find this information on your router, or you can contact your internet service provider. Without the correct password, your printer won’t be able to connect to the Wi-Fi, and you won’t be able to print wirelessly.
Also, make sure that you keep your Wi-Fi password safe and secure, and don’t share it with anyone who doesn’t need access to your network. With the right password and a stable Wi-Fi connection, you’ll be able to print from anywhere in your home or office and enjoy the convenience of wireless printing.
Step 3: Install Printer Drivers on Your Computer
After successfully connecting your Brother MFC 7840w wireless printer to your home network, the next step is to install the necessary printer drivers on your computer. These drivers are essential software programs that allow your computer to communicate with the printer and execute print jobs. For Windows users, you can download the drivers directly from the Brother website, while macOS users can use the built-in printer drivers.
It is important to install the correct drivers that are compatible with your operating system and printer model to ensure successful installation and operation. Once the drivers have been installed, you can easily print wirelessly from your computer to your Brother MFC 7840w printer with ease. With this step completed, your wireless printer setup is complete and you are now ready to enjoy the convenience and efficiency of wireless printing.
Download Drivers from Brother Website
To install your Brother printer, the next step after connecting it to your computer is to download the drivers from the Brother website. Brother has made it super easy to download and install printer drivers for their range of printers. All you need to do is visit the Brother website, go to the Downloads page, select your printer model, and choose the appropriate driver for your computer’s operating system.
Drivers are available for both Windows and Mac systems, so make sure that you choose the correct one. Once you’ve downloaded the driver, run the installation wizard and follow the on-screen instructions to complete the installation process. The process may vary slightly depending on your computer and printer model, but Brother provides step-by-step instructions and helpful videos to guide you through the process.
With the drivers installed, your Brother printer will be ready to use and print high-quality documents in no time.
Install Drivers on Computer
Installing printer drivers on your computer is an essential step in setting up your new printer. The drivers act as the bridge between your computer and printer, allowing them to communicate effectively. You can install printer drivers using the CD that came with your printer or by downloading them from the manufacturer’s website.
Make sure to choose the correct driver for your printer model and operating system. Once the driver is downloaded, run the installer and follow the on-screen instructions. This process may take a few minutes, so be patient.
After installation, restart your computer to ensure the drivers are properly installed. In case of any issues, you may need to update or reinstall the drivers to ensure they are functioning correctly. By installing the correct printer driver on your computer, you can enjoy seamless printing without any hassle or inconvenience.
Step 4: Test Your Printer
Once you’ve completed the initial setup of your Brother MFC 7840W wireless printer, it’s important to test it out to ensure everything is working properly. One way to do this is by printing a test page. To print a test page, you’ll need to first make sure your printer is turned on and connected to your network.
Then, on your computer, go to the print settings and select your Brother printer. From there, you should see an option to print a test page. If everything is working as it should, you should see a printout that includes various test patterns and colors.
If something isn’t working correctly, you may need to troubleshoot the issue. Don’t worry though, Brother offers plenty of resources and support to help you with any issues you may encounter. With a little patience and persistence, you’ll have your wireless printer up and running in no time!
Print Test Page
Now that you have successfully installed your printer and its driver, it’s time to test it by printing a test page. This is a quick and easy way to ensure that your printer is working correctly and that there are no hardware or software issues. Testing your printer will give you peace of mind, knowing that you’re ready to begin printing when you need to.
To print a test page, open the control panel, select “Devices and Printers,” right-click on your printer, and select “Printer properties.” From there, click on the “Print test page” button. The printer will then produce a sample document, and you can verify that the output looks correct.
If the test page looks good, congratulations! You are now ready to start using your printer. If something doesn’t look right, however, don’t worry. Try troubleshooting the issue by checking your printer cables and settings or contacting your printer’s manufacturer for assistance.
In any case, testing your printer is a critical step to ensure that you get the most out of your new device.
Check for any Issues
Testing your printer is an important step that shouldn’t be overlooked if you want to ensure that it’s functioning properly. One of the ways you can test your printer is by checking for any issues that may arise during the printing process. For instance, you can check if the printer is producing smudges or if the ink is bleeding through the paper.
Another thing to look out for is whether the printer is producing jagged or broken lines in the printed output. These issues can be caused by a variety of factors, such as a clogged print head or low ink levels. By testing your printer and checking for any issues, you can identify and address problems early on, ensuring that your printer works reliably when you need it most.
Conclusion
In conclusion, setting up the Brother MFC 7840w wireless printer may seem like a daunting task at first, but with a few easy steps, you’ll be up and running in no time. Just remember to connect to the correct Wi-Fi network, input the necessary information, and you’ll be able to print from anywhere in the room. So why worry about tangled cables and messy cords when you can enjoy the freedom and convenience of wireless printing? With the Brother MFC 7840w, you can have your cake and eat it too – just without the crumbs on your printer!”
FAQs
What are the system requirements for setting up Brother MFC 7840W wireless printer?
For setting up Brother MFC 7840W wireless printer, you need a Wi-Fi enabled device (laptop, tablet, or smartphone) and an active internet connection. Additionally, the printer should be within the range of your Wi-Fi network.
How do I connect my Brother MFC 7840W wireless printer to a Wi-Fi network?
To connect Brother MFC 7840W wireless printer to a Wi-Fi network, first, make sure the printer is turned on and within the range of your Wi-Fi network. Second, press the Menu button on your printer’s control panel, select the Network option, and then select WLAN. Third, select the Setup Wizard option and follow the on-screen instructions to connect your printer to the Wi-Fi network.
What is the default username and password for Brother MFC 7840W wireless printer?
The default username for Brother MFC 7840W wireless printer is ‘admin,’ and the default password is ‘access.’ It is recommended to change these credentials for security reasons.
How do I install the printer driver for Brother MFC 7840W wireless printer?
To install the printer driver for Brother MFC 7840W wireless printer, first, insert the software CD that came with the printer and follow the on-screen instructions to install the driver. Alternatively, you can download the driver from the Brother website and install it manually on your device.