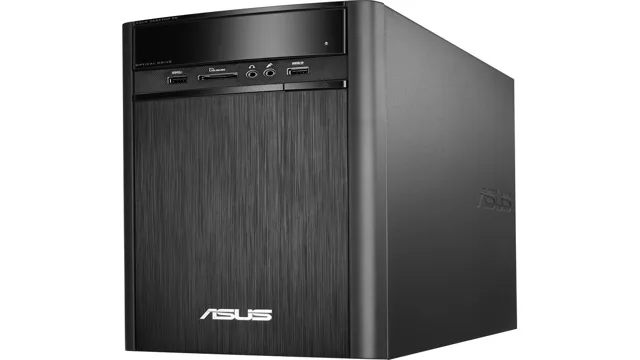
So, you’ve purchased a new Asus desktop PC – congratulations! Now, what’s next? It’s time to delve into the world of computer installation. As with any new technology product, the installation process can seem daunting at first. But don’t worry, we’ve got you covered with this Asus desktop PC installation guide.
We’ll go through every step in detail, including everything you’ll need to know to set up your new device safely and efficiently. Whether you’re a seasoned computer expert or a new user, this guide will provide you with all the information you need to get up and running in no time, so let’s dive in.
System Requirements
Are you thinking about purchasing an ASUS desktop PC? Great choice! But before you jump into the installation process, there are a few things you’ll need to consider in terms of system requirements. First off, make sure your system has enough RAM. ASUS recommends a minimum of 8GB, but consider upgrading to 16GB or more if you plan on using your computer for intensive tasks like gaming or video editing.
Additionally, you’ll want to ensure that your graphics card is up to par. Check the specifications for your specific model, but generally, ASUS recommends a graphics card with at least 1GB of VRAM. Finally, be aware of the amount of storage space you have on your computer.
Factor in things like games, applications, and media files when considering how much space you’ll need. With these system requirements in mind, you’re ready to tackle the installation process and start using your new ASUS desktop PC!
Minimum hardware and software requirements
When selecting a system to run software, you need to make sure that your system meets the minimum hardware and software requirements. Different pieces of software will have different requirements, so be sure to check the software’s documentation for specific requirements. Some common minimum hardware requirements include a certain amount of RAM, processor speed, and available disk space.
Additionally, some software may require a specific operating system, software libraries, or hardware components like a graphics card. With that said, it’s crucial to meet or even exceed the recommended system requirements as using unsupported or underpowered hardware may lead to permanent and unwanted damages. Always make sure that you check the hardware and software requirements first, before making a purchase, or installing any software on your computer.
In case your specs don’t meet the minimum requirements, upgrading the necessary components or opting for a new computer altogether may be the best decision to avoid any potential security threats and system issues.

Preparing for Installation
Installing a new ASUS desktop PC can seem intimidating, but with the right preparation, the process can be smooth and straightforward. The first step is to ensure that all necessary components are present. The packaging should include the desktop tower, power cord, keyboard, and mouse.
Next, review the user manual to familiarize yourself with the process and locate any special instructions. Check the system requirements and verify that your monitor, speakers, and other peripherals are compatible. It’s also a good idea to clear a workspace that is clean and free of clutter.
Finally, before starting the installation process, back up any important data and make sure you have installation discs or product keys for any software you plan to load onto the new PC. With proper preparation, installing an ASUS desktop PC can be a simple and satisfying experience.
Safety precautions to take before installation
Before beginning any installation, it’s important to take the necessary safety precautions. One of the most important steps in preparing for installation is to turn off the power supply. This ensures that you won’t accidentally electrocute yourself or damage any of your equipment.
It’s also important to wear appropriate safety gear, such as gloves and protective eyewear. Make sure to read through the installation instructions thoroughly and gather all the necessary tools and materials before beginning. Taking the time to prepare properly can not only prevent accidents and injuries, but can also ensure that your installation is successful and long-lasting.
By prioritizing safety and being prepared, you can approach your installation with confidence and peace of mind.
Back up important data before proceeding
Before proceeding with the installation process, it is highly recommended that you back up all important data from your device. This step will ensure that if something goes wrong during the installation, you will still have your valuable files and data intact. Many installation processes involve modifying the files on your device, and in rare cases, this can lead to data loss.
To back up your data, you can use an external hard drive or cloud storage services, such as Google Drive or Dropbox. Make sure to back up all important files such as documents, photos, and videos. By taking this step, you can avoid the stress and frustration of potentially losing important data and ensure a smooth installation process.
Installation Process
If you’re about to set up your new ASUS desktop PC, don’t worry, the process is straightforward and simple. First, make sure you have all the necessary components, including the keyboard, mouse, and power cable. You can also choose to connect additional accessories like a monitor or printer at this point.
Once you have all the components ready, locate the power button on the desktop and connect the power cable. Press the power button and wait for the computer to boot up. Follow the on-screen instructions to set up your system, including selecting your time zone, language, and network settings.
You’ll also have the option to create a new local account or sign in with an existing Microsoft account. Make sure to read and accept the license agreement and set up any security features you feel necessary, such as a password or fingerprint scanner. Once everything is set up, you’re ready to start using your new ASUS desktop PC!
Step-by-step guide to installing Asus Desktop PC
Installing an Asus Desktop PC can be a daunting task, but it doesn’t have to be. Here is a step-by-step guide to help make the process easier. First, make sure to unbox all the components and lay them out on a clean, flat surface.
Then, start by connecting the monitor, keyboard, and mouse to the appropriate ports on the back of the desktop tower. Next, plug in the power cord, and press the power button to turn the computer on. Follow the on-screen instructions to set up the operating system and create user accounts.
Once the setup is complete, install any necessary drivers and software. It’s also important to install an antivirus program to protect the computer from potential threats. Lastly, transfer any files or data from the old computer to the new one.
With these steps, you should have a fully functioning Asus Desktop PC ready to use.
Set up user account and configure system settings
When it comes to setting up a new computer system, the first step is always to create a user account and customize system settings. This will ensure that the computer is tailored to your needs and preferences. During the installation process, you will be prompted to create a username and password, which will be used to log in to the system.
This account will also determine what level of access you have to different parts of the system. Once you have created your user account, you can start customizing your system settings. This includes things like setting up your desktop wallpaper, changing the theme and color scheme, and configuring your privacy settings.
By taking the time to set up your user account and customize your system settings, you can ensure that your new computer is set up just the way you like it, and ready to help you work or play in a way that is most comfortable for you. So, set up your user account and start customizing your new system today!
First-time Setup
Are you excited about setting up your new ASUS Desktop PC? Don’t worry; it’s not as complicated as it seems! First-time setup can be a little overwhelming, but this ASUS Desktop PC Installation Guide will make the process much smoother. The first thing to do is to unbox and inspect your computer for any noticeable damages. Once confirmed, plug in the keyboard, mouse, and monitor to the designated ports.
For desktop PCs, they usually come with pre-installed operating systems, and for most ASUS PCs, Windows 10 will be the OS. Follow the on-screen instructions, set up your network, and update the OS. It’s crucial to install antivirus software to protect your computer from malicious attacks and data theft.
Finally, install your desired applications and create a user account with a strong password. Once these steps are completed, your ASUS Desktop PC is ready for use. Congratulations!
Installing drivers and updates
First-time setup for any computer or device involves installing drivers and updates. Drivers are programs that help the operating system communicate with the various hardware components in your system. Updates improve the performance and security of your computer, fixing bugs, adding new features, and enhancing existing ones.
When you buy a new computer or device, the first thing you should do is download and install the latest drivers and updates. This will ensure that your computer or device is running smoothly and efficiently, with no compatibility problems or software errors. Installing drivers and updates is a simple process that can be done either manually or automatically.
Most operating systems have built-in tools that can download and install the necessary updates and drivers automatically, but it’s always a good idea to check for updates and install them manually if necessary. By keeping your computer or device up to date, you can ensure that it runs smoothly and efficiently, providing you with the best user experience possible.
Configuring peripherals and devices
When it comes to setting up your new devices and peripherals, the process might seem a little overwhelming at first. But don’t worry, it’s actually quite simple! The first thing you’ll want to do is carefully read through the user manual that came with your device. This will give you all the information you need to get started, including any specific software or drivers that need to be installed.
Once you’ve done that, you’ll want to connect your device to your computer or other compatible device. This might involve plugging in a USB cable or connecting via Bluetooth. After that, it’s just a matter of configuring your device and setting it up to work the way you want it to.
So, make sure you take your time and follow the instructions carefully. With a little patience and know-how, you’ll be up and running in no time!
Customizing desktop and appearance options
Customizing your desktop and appearance options can be a fun and rewarding task, as it allows you to personalize your computer to match your individual style and preferences. When setting up your computer for the first time, it’s important to consider the different options available to you, such as selecting a wallpaper or screensaver that you enjoy or customizing your desktop icons. Additionally, many operating systems offer themes or skins that can completely change the look and feel of your computer, giving it a unique and personalized touch.
With countless options available, it’s important to take your time and experiment until you find the combination that truly suits you. So go ahead and make your computer your own, it can be a fun and rewarding process!
Troubleshooting
Asus desktop PC installation can sometimes present certain challenges, but don’t worry, we’ve got you covered with this troubleshooting guide. First, ensure that all necessary components are properly connected, including the monitor, keyboard, and mouse. Check all cords and cables for any signs of damage or wear and tear.
If the computer does not power on, the most common culprits could be a faulty power supply or a loose connection to the motherboard. Try reseating the power cable and checking the motherboard connections. If the computer still won’t turn on, you may need to replace the power supply.
Additionally, if you hear any abnormal sounds such as beeping or humming, take note of them as they can point to specific hardware issues. In summary, checking for connection issues, restarting the system, and replacing faulty parts as necessary are the foundation of troubleshooting any Asus desktop PC installation issues. Don’t hesitate to reach out to technical support for further assistance.
Common issues and solutions
When it comes to troubleshooting common issues in technology, there are a few steps you can take before calling in a professional. One of the most common problems is a slow or unresponsive device. This can often be solved by simply restarting the device, freeing up storage space, or clearing the cache.
Another issue is a weak or lost Wi-Fi connection. Try moving closer to the router, resetting the router, or updating the firmware. If you’re having problems with software, check to see if there are any updates available or try reinstalling the program.
It’s also important to stay on top of security updates and use antivirus software to protect against malware and viruses. Furthermore, backup your important files regularly to avoid losing data in the event of a hardware failure. By taking a few simple steps, you can often solve common issues and avoid costly repairs or replacement.
Contacting Asus support for further assistance
Asus support can be an excellent source of assistance for troubleshooting any issues you might be experiencing with your Asus computer or device. Their customer service team is knowledgeable and helpful, and they can guide you through a variety of solutions to get your system back up and running. One of the first steps you can take when contacting Asus support is to provide them with as much information as possible about your issue.
Be specific about what you’re experiencing and provide any error codes or error messages you’ve encountered. This will help the support team hone in on the problem and find a solution more quickly. Additionally, be sure to have your device’s serial number and model number handy, as this can help speed up the support process.
Don’t hesitate to ask questions or ask for clarification if you’re unsure about anything during the troubleshooting process. Overall, contacting Asus support can be a great way to get expert help for any issues you might encounter with your device.
Conclusion
In conclusion, installing your new ASUS desktop PC doesn’t have to be a daunting task. With a little patience and attention to detail, anyone can get their new computer up and running in no time. Remember to follow the instructions carefully, and double-check all connections before powering on.
And always remember, when in doubt, consult with the wise and knowledgeable wizards of tech support. Happy computing!
FAQs
What are the requirements for installing an Asus desktop PC?
To install an Asus desktop PC, you need a power outlet, keyboard, mouse, and monitor. You also need the installation CD and a product key, which come with the PC.
Can I install an Asus desktop PC myself, or do I need professional help?
Installing an Asus desktop PC is designed to be easy, and most people can do it themselves. However, if you have any doubts or concerns, you can always seek professional installation help.
How long does it take to install an Asus desktop PC?
The time it takes to install an Asus desktop PC can vary depending on the complexity of your setup. On average, an installation can take anywhere from 30 minutes to 2 hours.
What should I do if I encounter errors during the Asus desktop PC installation process?
If you encounter any errors during the installation process, first check the troubleshooting section in the installation guide. If you still can’t resolve the issue, contact the Asus customer support team for further assistance.